The Year of Living Audaciously

Former food blog, now travel blog - following my year as a Fulbright ETA in Indonesia

  • Home
  • About Me
    • Travels and Life Updates
    • Privacy Policy
  • Fellow Fulbrighters
  • Never Skip Dessert
    • Recipes By Category
    • Recipe Index
    • The Best of the Best
    • The Social Kitchen Project
  • Recommended

Honey Almond Caramel Crunch Topped Cake with Custard Cream Filling

April 30, 2013 by Mackenzie

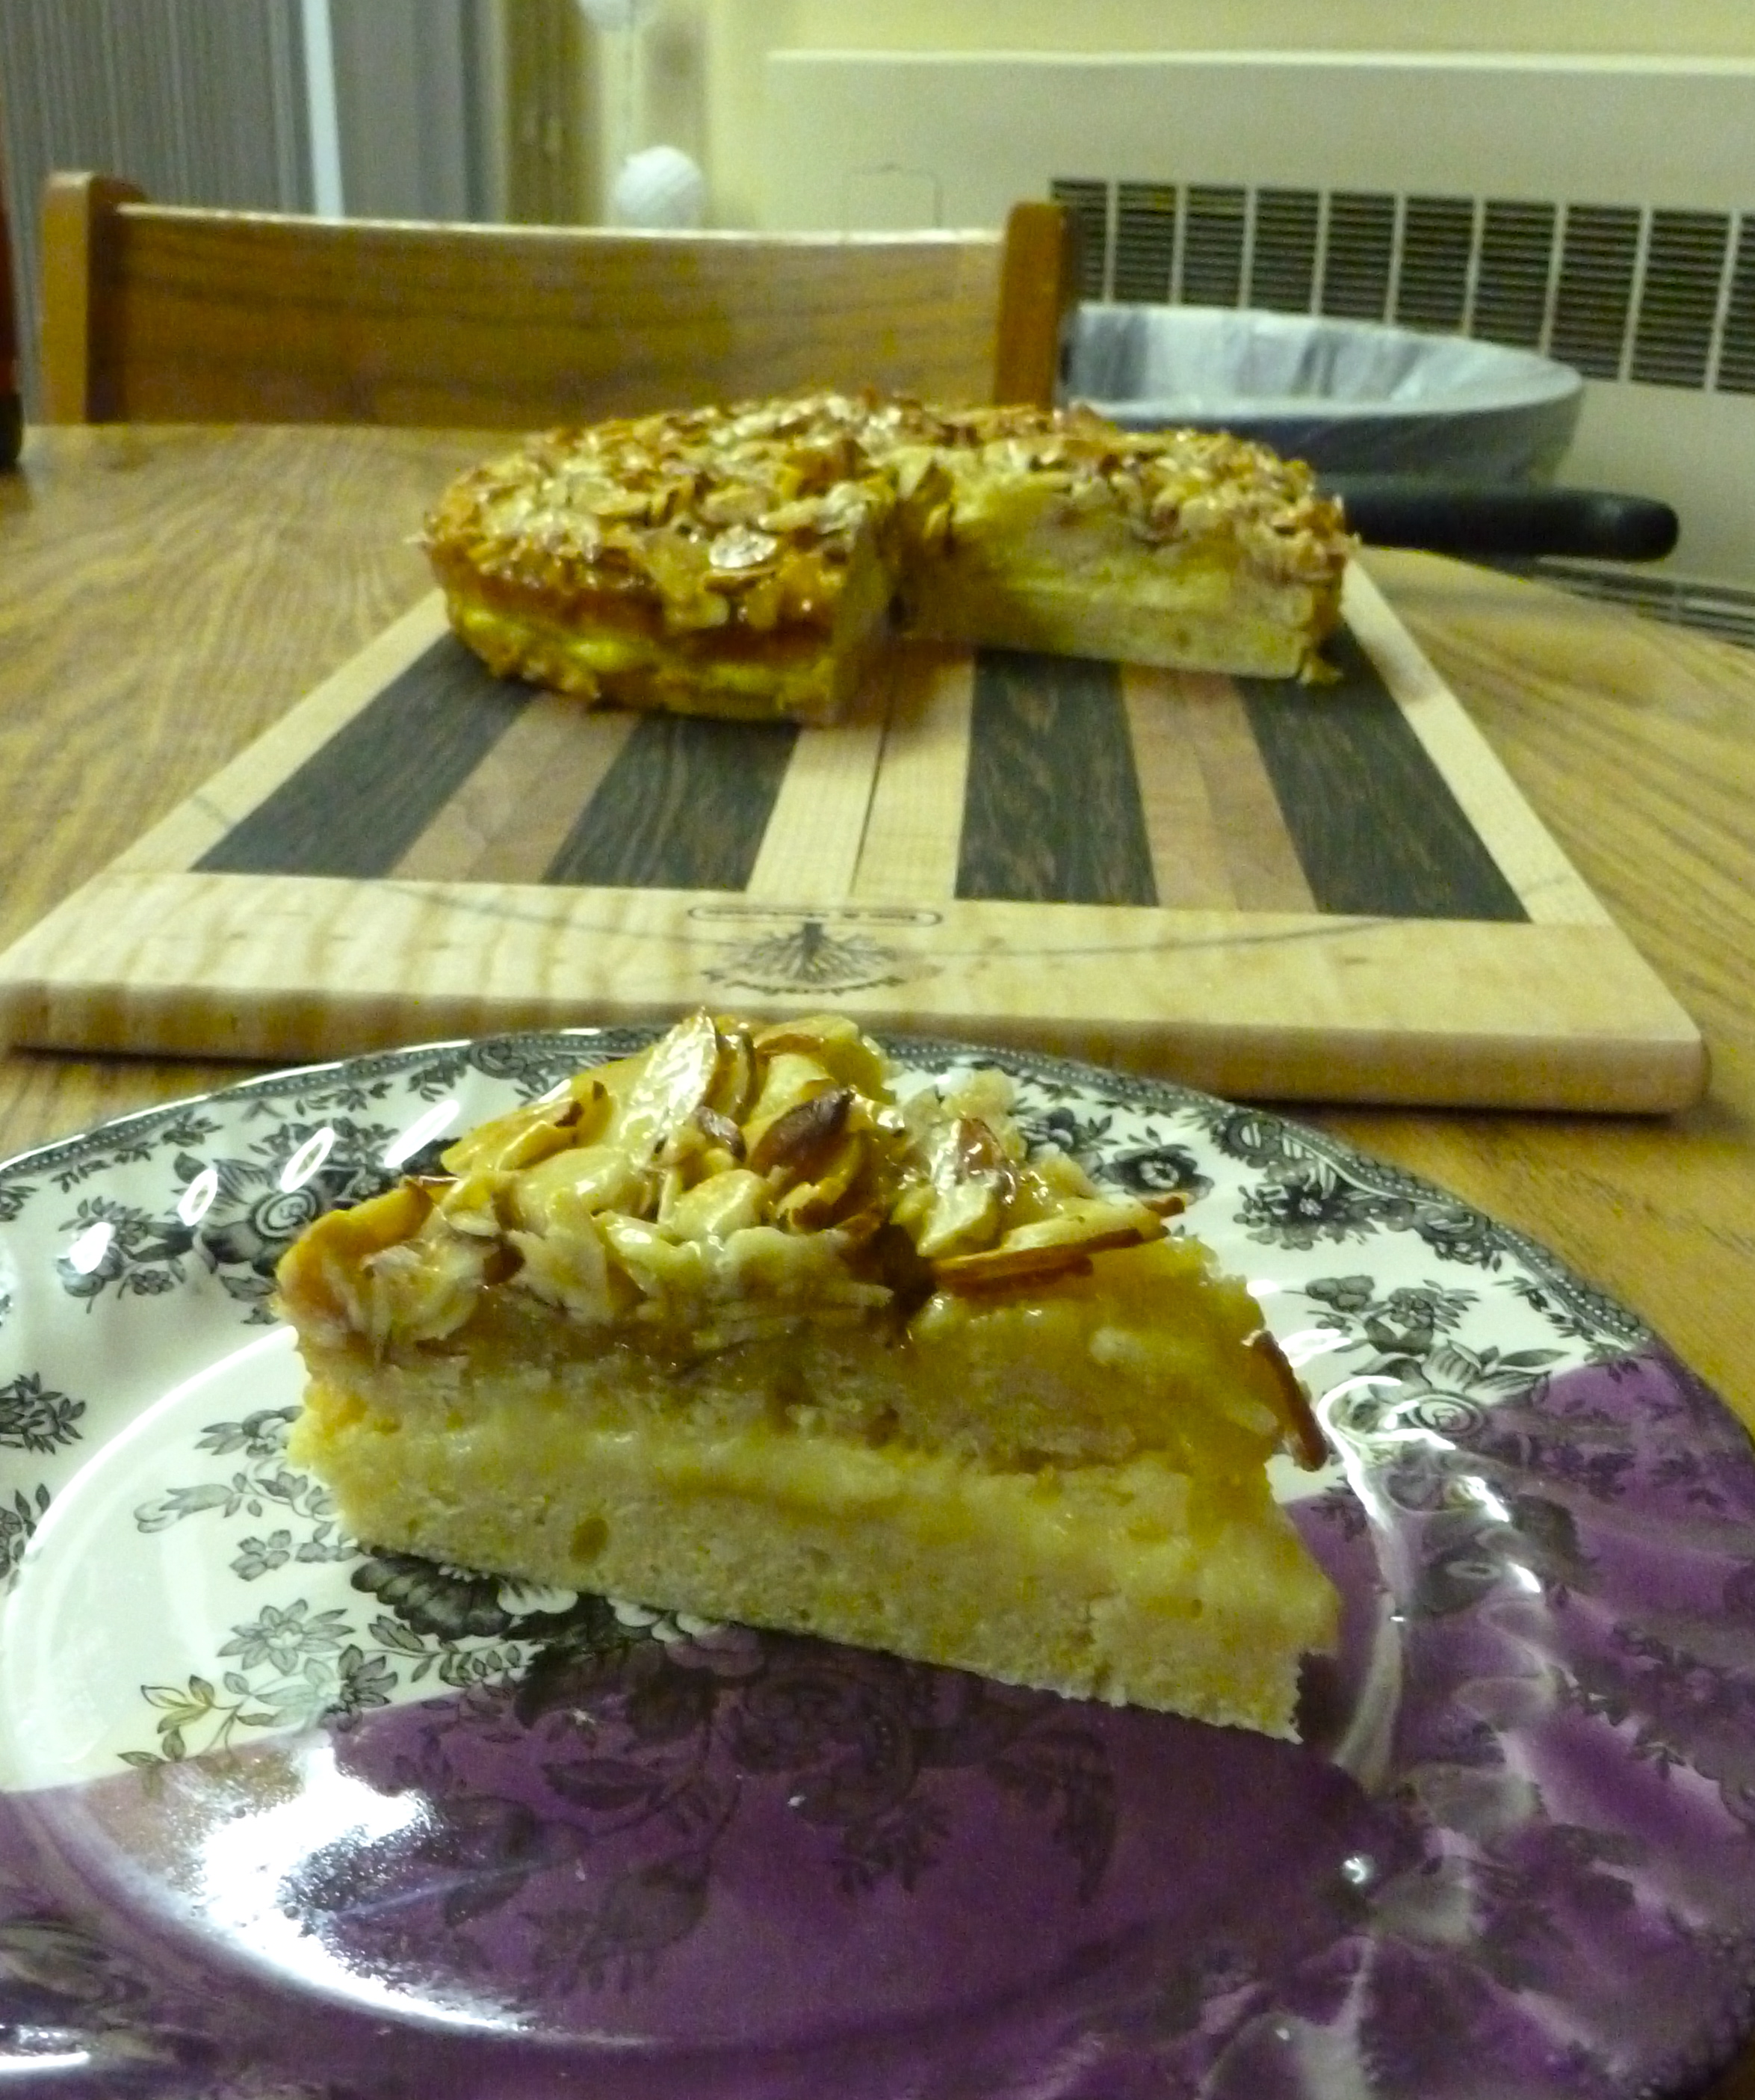
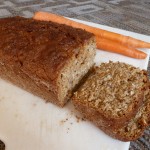
Libby’s birthday was last weekend and we made this cake to celebrate! IT WAS AMAZING. One of the best cakes I have ever had in my life. Hands down.

IMG_0338

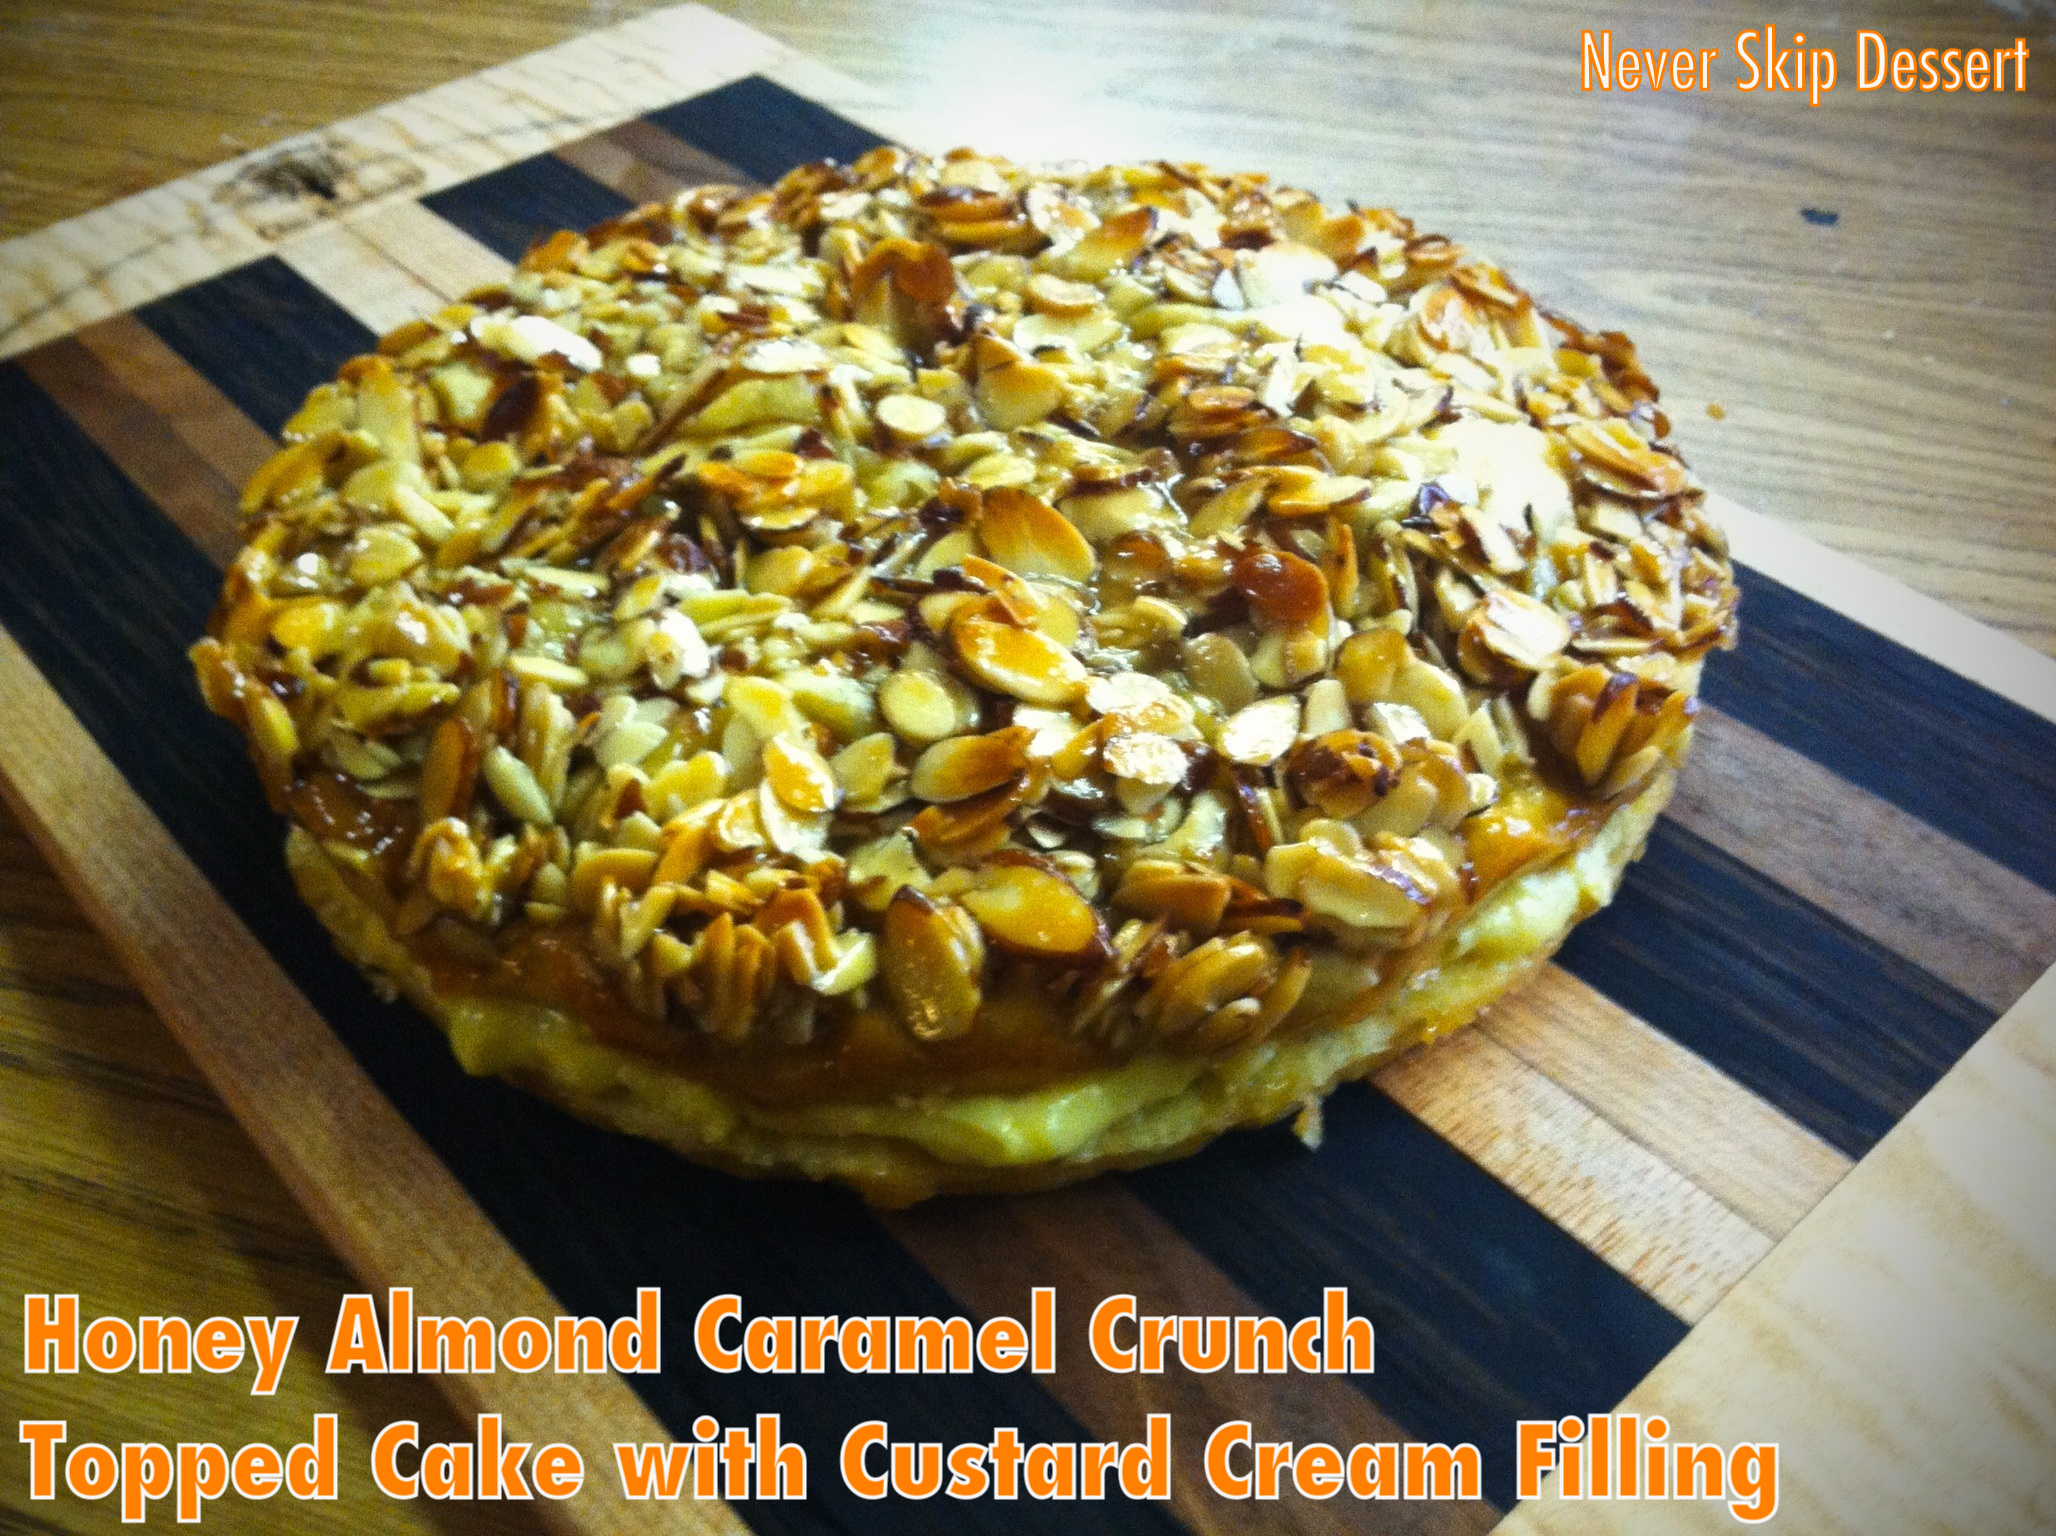
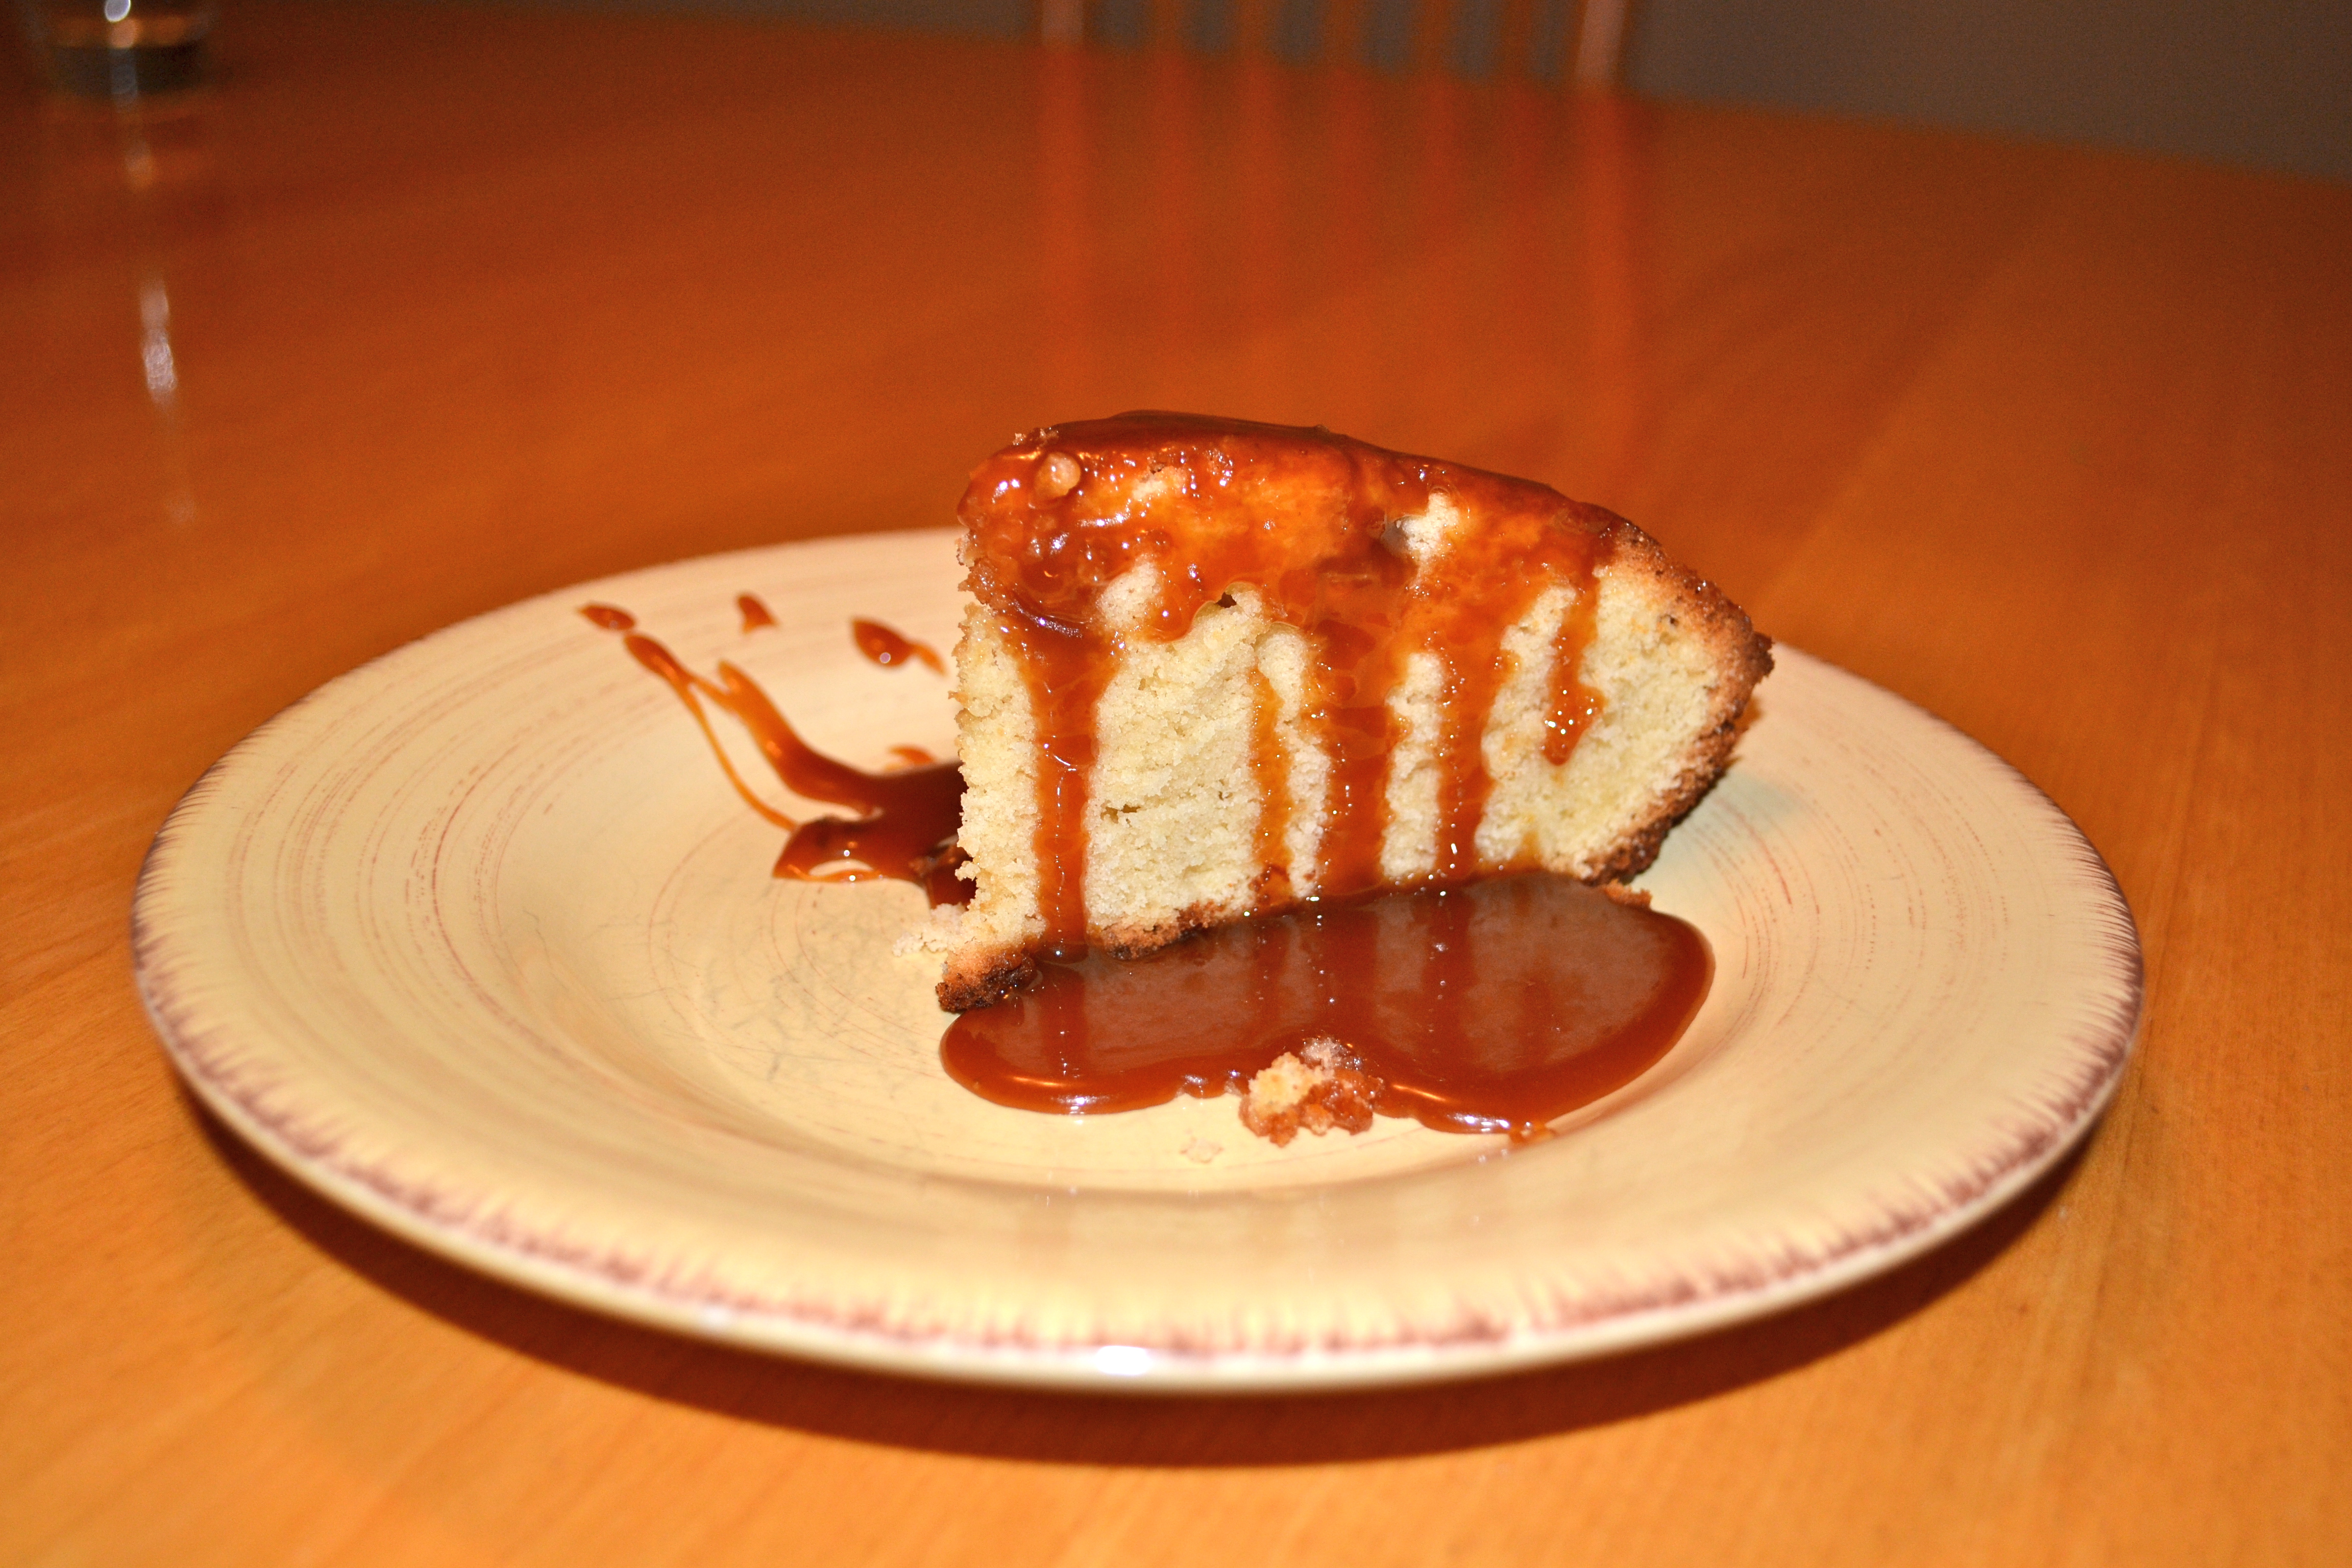
The cake itself is simple – not too sweet and slightly dense. The pastry cream filling in the middle adds a touch of sweetness and pairs perfectly with the cake. The honey almond caramel crunch topping however, is a whole other story. This is what makes the cake.

You make caramel, but it is sweetened with honey so it has a wonderfully, unique flavor. Then you mix almonds into it and you get honey caramel coated almonds – amazing by themselves! Add this to the top of your cake and you’ve got the best cake you’ll ever have.

A couple of things to be aware of: the milk, eggs and butter for the cake need to be at room temperature – so be sure you get those out early. Also, there is a total of an hour and a half of rising time for the cake. Be sure to account for that!

Honey Almond Caramel Crunch Topped Cake with Custard Cream Filling
Makes one 9×9, single layer cake (although you slice the one layer in half for the filling)
Recipe from Smitten Kitchen

Ingredients:
Cake:
2 1/2 teaspoons instant yeast (one 1 1/4 oz package) – not active dry!
3/4 cups whole milk, room temperature
1/4 cup sugar
2 cups all-purpose flour
3/4 teaspoon salt
2 large eggs, room temperature
4 tablespoons unsalted butter, room temperature

Topping:
6 tablespoons unsalted butter, cold
1/3 cup sugar
3 tablespoons honey
2 tablespoons heavy cream
1 1/2 cups sliced almonds
Two pinches of sea salt

Filling:
1 cup whole milk
1 teaspoon vanilla extract
3 large egg yolks
1/4 cup sugar
3 tablespoons all purpose flour
Two pinches of sea salt
2 tablespoons unsalted butter, cold

Directions:
1. Set out the milk, eggs and butter for the cake in advance so they are at room temperature when you are ready to make the cake.

2. First, make the cake batter: Combine all of the cake ingredients in a medium-sized mixing bowl, stirring until combined, then for an additional two minutes. Scrape down the sides, cover with a towel and let rise for one hour.

3. After an hour, butter a 9-inch cake pan. Stir the batter to deflate it slightly and then pour it into the prepared pan. You may have to really shake the pan to get the batter to cover the whole thing. Cover again with a towel and let rise for an additional 30 minutes.

4. During the second rise, make the honey almond caramel topping: In a medium saucepan over medium heat, heat the butter, sugar, honey, cream and salt until the butter is melted. Bring to a simmer and let it boil for 3 to 5 minutes, stirring constantly. The mixture will become a shade darker. Remove from heat and stir in the almonds. It’s no longer going to be liquidy, it’s going to be all almonds 🙂 Set aside to cool slightly, until the second rise of the cake is completed.

5. Preheat oven to 350 degrees. When the cake has finished its second rise, scoop out the almond topping and spread it evenly over the top of the cake. (Save yourself a little bit to snack on too!) Bake the cake for 20-25 minutes, until the almonds are slightly browned and a toothpick inserted into the middle comes out clean. Transfer to a cooling rack and allow to cool for ten minutes before removing it from the pan. Run a knife around the edges before you remove it and then invert it onto another cooling rack or plate. The almonds won’t fall off when you invert it, so don’t worry. Let cool completely.

6. While the cake is cooling, make the custard filling: Warm the milk in a medium saucepan and then pour into a bowl or cup (ideally with a spout). Set aside. In a new saucepan, or the previous one cleaned and dried, whisk the yolks and sugar vigorously for one minute – off the heat. Whisk in flour and salt. Drizzle in the warm milk, a spoonful at a time, whisking constantly. Once you’ve added half the milk, add the rest in a steady drizzle. Return the saucepan to the stove and cook on medium-high heat until it bubbles. Reduce to a simmer for one to two minutes, whisking constantly. Remove from heat and add the butter and vanilla extract. Let the custard cool completely.

7. When the custard and cake are both cool, you can assemble the cake. Using a serrated knife, slice the cake in half and place the bottom half on a serving platter. Spread the pastry cream on top of the bottom layer and then place the top half back onto the cake. Serve and enjoy!

P1000386

Filed Under: Cake, Desserts Tagged With: birthday, cake, Desserts

Vanilla Bean Cake with Salted Caramel Sauce

March 8, 2013 by Mackenzie

This recipe is one I made more than two months ago for Steve’s birthday! It’s been buried on my “to blog” list and I just haven’t had a chance to write it up! But with spring break upon us, I have all the time in the world to blog and cook and bake and blog and bake and cook and blog and…. 🙂 It’s going to be a great weekend 😀 We don’t leave until Monday morning for Arizona and with all of my suite and all my friends gone – I literally have nothing to do except cook and bake and blog about it 😀 Don’t worry, I don’t plan on eating all of it. I plan on giving it to some boys I know who are staying here over break, and bringing some of it to AZ for the team.

But back to this recipe… It’s pretty easy to whip up and the vanilla bean/salted caramel combo is to die for. The cake is quite dense, and almost has a cornbread-feel to it (or maybe I was just hungry for cornbread). I think we all agreed that the leftovers the second day were even better than having it the first day – not sure why, but hey! That just means another excuse to eat cake!

Vanilla Bean Cake with Salted Caramel Sauce

Vanilla Bean Cake with Salted Caramel Sauce
Makes one 9-inch cake
Recipe from Food and Wine

Ingredients:

Cake:
2 1/2 cups all-purpose flour
1 teaspoon baking flour
1 teaspoon salt
2 sticks unsalted butter, softened
1 cup sugar
1/2 cup brown sugar
4 eggs
1 vanilla bean, seeds scraped or 2 tsp vanilla extract
1/4 cup sour cream

Salted Caramel Sauce:
1 cup sugar
1/4 cup water
2 tablespoons light corn syrup
3/4 cup heavy cream
4 tablespoons unsalted butter
1 1/2 tsp sea salt

Directions:
1. Preheat the oven to 350 degrees. Butter and flour a nine-inch round cake pan. Cut out a circle pf waxed paper the size of the pan and place in bottom. Spray lightly with cooking spray so that it comes out easily. In a medium bowl, mix the dry ingredients, for the cake, together (flour, baking powder, salt). In a large bowl, beat the butter with an electric mixer until creamy. Add both sugars and beat until fluffy. Add the eggs one at a time, beating well in between and then add the sour cream and the vanilla. Slowly mix in the dry ingredients and mix until smooth.

2. Pour batter into prepared pan. Bake for 50 minutes to 1 hour
, until golden and springy and a toothpick inserted into the center comes out clean. Let cool in pan for 20 minutes then invert onto a wire rack, remove parchment paper carefully and allow to cool completely.

3. When the cake is almost cool, make the caramel sauce. In a medium saucepan, combine the sugar, water and corn syrup and bring to a boil. Using a wet pastry brush, wash down any crystals on the side of the pan. Boil over high heat until a deep amber caramel forms, about 6 minutes. Remove from the heat and carefully whisk in the cream, butter and salt. Let cool.

4. When ready to serve, poke the top of the cake all over with a skewer and pour the caramel sauce over the cake, allowing it to seep in and drip down the side. Cut into wedges and serve.

Vanilla Bean Cake with Salted Caramel Sauce


Filed Under: Desserts Tagged With: cake, Desserts, salted caramel

Salted Caramel Brownies

February 28, 2013 by Mackenzie

Salted Caramel Brownies
Salted Caramel anything is automatically my favorite dessert – I love salted caramel ice cream (especially from Molly Moon’s in Seattle), salted caramels themselves (Fran’s has the BEST – also in Seattle), salted caramel frozen yogurt (new flavor at Chill in STL this month), salted caramel milkshakes (Bailey’s Range in STL has awesome ones!), salted caramel pie, salted caramel chocolate chip cookies… you name it and I love it. So when I saw these brownies on Smitten Kitchen’s blog (a blog Libby and I follow semi-religiously!), I knew these were going straight to the top of my “Next Up to Bake” list!

I brought them to a College Central Fellowship event and they were devoured!!! I even doubled the recipe and they were GONE. And I’m not ashamed to say I had three (although they were cut small so I didn’t feel quite as guilty!).

This recipe is GREAT and I highly recommend you take them to the next event you need to bring a dessert to – so you can’t eat them all because I totally would have if they had been left on my counter…

Salted Caramel BrowniesSalted Caramel Brownies
Recipe from Smitten Kitchen
Makes an 8×8 pan

Ingredients:

Caramel:
1/2 cup sugar
4 tablespoons unsalted butter
Heaped 1/4 teaspoon flaky sea salt
3 tablespoons heavy cream

Brownies:
3 oz. unsweetened chocolate, roughly chopped
1 stick unsalted butter
1 cup sugar
2 large eggs
1 teaspoon vanilla extract
Heaped 1/4 teaspoon flaky sea salt
2/3 cup all-purpose flour

Directions:

Caramel:
1. Place a square of parchment paper on a plate – spray the plate to keep the paper from slidding off and also spray the paper just to make sure the caramel will come off easily.

2. Melt sugar in a medium saucepan over medium-high heat – about 5 minutes, stirring to break up chunks. It should be copper colored when it is done, if not, cook until it reaches a nice copper. Remove from heat and stir in the butter, then the cream and salt. Return the saucepan to the stovetop and cook over medium high heat, melting it fully and cooking until it is a shade darker.

3. Pour caramel onto the parchment-plate and place in the freezer. Freeze until solid, about 30-40 minutes.

Brownies:
1. While the caramel is firming up, make the brownies. Heat oven to 350 degrees. Line an 8×8 inch square baking pan with parchment, making sure that it extends up the sides so you can easily lift the whole thing out. Spray with cooking spray.

2. Melt chocolate and butter together in a heatproof bowl over gently simmering water or melt in the microwave in 30 second bursts, stirring in between. (I did the microwave way because I was impatient). Stir until smooth. Add in sugar, then the eggs, one at a time, then the vanilla and salt. Add flour and mix until combined.

Assembly:
1. When the caramel has hardened, chop into rough 1-inch squares. Gently fold 3/4 of the caramel squares into the batter. Pour batter into prepared pan, spreading evenly. Scatter the remaining caramel squares on top of the batter. Bake for 30 minutes or until a toothpick inserted into the middle comes out clean.

Filed Under: Bars, Desserts Tagged With: brownies, Desserts

Christmas Cookies #6: Mocha Cookies

December 23, 2012 by Mackenzie

Chocolate and espresso beans together in a cookie… yes please! This was the sixth cookie recipe we tried during our Christmas cookie craziness and it was a new recipe for both of us – and we loved it!

IMG_2568

Mocha Cookies

Recipe from Fine Cooking

Ingredients:

  • 3/4 cup all-purpose flour
  • 1/3 cup plus 2 tsp. unsweetened natural cocoa powder
  • 1/2 cup plus 1 tbsp sugar
  • 1/8 tsp salt
  • 1/8 tsp baking soda
  • 7 tbsp unsalted butter, slightly softened
  • 1.5 tbsp whole milk
  • 1/2 tsp vanilla extract
  • 3 oz. bittersweet or semisweet chocolate, chopped coarsely
  • 1/4 tsp finely ground coffee beans, plus 28 whole beans
  • 1/4 cup turbinado sugar

Directions:

In a food processor, combine the flour, cocoa, sugar, salt, and baking soda. Pulse several times to mix thoroughly. Cut the butter into about 12 chunks and add them to the bowl. Pulse several times. Combine the milk and vanilla in a small cup. With the processor running, add the milk mixture and continue to process until the dough clumps around the blade or the sides of the bowl. Add the coffee and chocolate and mix thoroughly.Transfer the dough to a large bowl or cutting board and knead with your hands a few times to make sure the dough is evenly blended.

Shape dough into a log about 14 inches long and 1 1/4 inches in diameter. Wrap in waxed paper and refridgerate until firm, one hour or overnight.

Preheat oven to 350F. Line a cookie sheet with parchment paper. Put the turbinado sugar in a small bowl. Slice dough into 1/2 inch slices. Coat both sides with sugar and arrange 1 1/2 inches apart on the lined sheets. Press a coffee bean into the center of each cookie. Bake until the cookies puff and show very faint cracks on the surface, 9 to 10 minutes. Let cookies cool on a rack.

Filed Under: Cookies, Desserts Tagged With: chocolate, coffe, Cookies, Desserts, espresso

Christmas Cookies #5: Peppermint Bark

December 15, 2012 by Mackenzie

This recipe is from Food Network Magazine and is a copycat recipe to William Sinoma’s peppermint bark! It was fantastic!!

IMG_2569

Peppermint Bark

Recipe from Food Network

Ingredients:

  • 12 ounces good-quality semisweet chocolate, chopped into 1/2-inch pieces
  • 1 1/2 teaspoons peppermint extract
  • 1 pound good-quality white chocolate, chopped into 1/2-inch pieces
  • 3 candy canes or 12 round hard peppermint candies, crushed

Directions:

Line a 9-by-13-inch baking dish with aluminum foil, shiny-side up; smooth out any wrinkles. Heat 1 inch of water in a saucepan over low heat until steaming.

Put all but 3/4 cup of the semisweet chocolate in a heatproof bowl. Set the bowl over the saucepan of steaming water (do not let the bowl touch the water) and stir until one-third of the chocolate is melted. Remove the bowl from the saucepan; keep the steaming water over low heat. Gradually stir the reserved 3/4 cup semisweet chocolate into the bowl, a few pieces at a time, until all of the chocolate is melted. Return the bowl to the saucepan, 5 to 10 seconds at a time, to help melt the chocolate, if needed. Do not rush this step: It may take up to 10 minutes to melt the chocolate.

Wipe off any moisture from the bottom of the bowl. Stir 3/4 teaspoon peppermint extract into the chocolate, then quickly pour into the prepared baking dish and spread in an even layer. Firmly tap the dish against the counter to remove any air bubbles. Set aside at room temperature until almost set, about 10 minutes.

Meanwhile, put all but 1 cup of the white chocolate in a large heatproof bowl and repeat the melting process over the steaming water; dry off the bottom of the bowl. Stir in the remaining 3/4 teaspoon peppermint extract; pour over the semisweet chocolate and spread in an even layer. Sprinkle immediately with the crushed candy canes, gently pressing them into the white chocolate. Set aside at room temperature until firm, about 1 hour. Lift the bark out of the pan using the foil and break it into pieces. Store in an airtight container at room temperature for up to 2 weeks.

Filed Under: Bars, Christmas, Desserts Tagged With: Bark, Christmas, Desserts, Peppermint

Christmas Cookies #4: Peanut Butter Kiss Cookies

December 13, 2012 by Mackenzie

Image

I love these cookies! Peanut butter and chocolate… who wouldn’t love this combination?

Peanut Blossom Cookies
Recipe from joyofbaking.com

Ingredients:

1/2 cup unsalted butter, room temperature
3/4 cup peanut butter
1/3 cup light brown sugar
1/3 cup white sugar
1 large egg
1 teaspoon vanilla
2 tablespoon milk
1 1/2 cups all-purpose flour
1 teaspoon baking soda
1/4 teaspoon salt
1/3 cup turbinado sugar
48 chocolate kisses, unwrapped

Directions:

Line three baking sheets with parchment paper.

In the bowl of your electric mixer (or with a hand mixer), beat the butter until creamy and smooth. Add the peanut butter and sugars and beat until light and fluffy (about 2 – 3 minutes). Add the egg and vanilla extract and beat to combine. Beat in the milk. In a separate bowl whisk together the flour, baking soda, and salt. Add to the peanut butter mixture and beat until incorporated. Cover and chill the batter for about an hour, or until firm enough to roll into balls.

Preheat oven to 375 degrees F and place rack in the center of the oven.

Roll the batter into 1 inch round balls. Place the turbinado sugar in a shallow bowl and roll each ball in the sugar. Place on the prepared baking sheet, spacing about 2 inches apart.

Bake the cookies for about 8 – 10 minutes, or until the cookies are lightly browned. Immediately upon removing the cookies from the oven, place a unwrapped Chocolate Kiss into the center of each cookie, pressing down gently until the cookie just starts to crack. Cool completely on a wire rack.

Makes about 4 dozen cookies.

Image

Filed Under: Christmas, Cookies, Desserts Tagged With: Christmas, christmas cookie recipe, Cookies, Desserts, hershey kiss, peanut butter

« Previous Page
Next Page »

Meet Mackenzie

Hi! I'm Mackenzie! I'm currently a Fulbright English Teaching Assistant in Indonesia! I'm writing all about my year on this blog and hope you'll follow along on this journey! Read More…

Disclaimer:

Students and Indonesian Friends: Please don't take anything I say here as critical of my experience or you and your culture. Rather, through this blog I want to share my experience in your country with my friends and family in America! I may write and laugh about a lot of things that are different but none of it is bad, it's just different!

This blog is not an official Department of State website, and the views and information presented here are my own and do not represent the Fulbright Program or the Department of State.

My Latest Posts on Instagram

[instagram-feed]

My Latest Reads

My Latest Reads

Between the World and Me
5 of 5 stars
Between the World and Me
by Ta-Nehisi Coates
If You Follow Me: A Novel
3 of 5 stars
If You Follow Me: A Novel
by Malena Watrous
The Goldfinch
4 of 5 stars
The Goldfinch
by Donna Tartt
Missoula: Rape and the Justice System in a College Town
4 of 5 stars
Missoula: Rape and the Justice System in a College Town
by Jon Krakauer
Station Eleven
4 of 5 stars
Station Eleven
by Emily St. John Mandel
Fight Back and Win
2 of 5 stars
Fight Back and Win
by Gloria Allred

goodreads.com

Archives

  • August 2017 (1)
  • June 2017 (2)
  • March 2017 (1)
  • February 2017 (1)
  • January 2017 (1)
  • December 2016 (1)
  • November 2016 (3)
  • October 2016 (3)
  • September 2016 (2)
  • August 2016 (2)
  • June 2016 (1)
  • May 2016 (3)
  • April 2016 (1)
  • March 2016 (4)
  • February 2016 (2)
  • January 2016 (1)
  • December 2015 (3)
  • November 2015 (2)
  • October 2015 (4)
  • September 2015 (5)
  • August 2015 (6)
  • June 2015 (2)
  • March 2015 (1)
  • December 2014 (4)
  • November 2014 (3)
  • October 2014 (3)
  • September 2014 (4)
  • August 2014 (5)
  • July 2014 (4)
  • June 2014 (2)
  • April 2014 (1)
  • March 2014 (4)
  • February 2014 (1)
  • January 2014 (3)
  • December 2013 (5)
  • November 2013 (3)
  • October 2013 (1)
  • September 2013 (4)
  • August 2013 (3)
  • July 2013 (2)
  • June 2013 (6)
  • May 2013 (6)
  • April 2013 (6)
  • March 2013 (3)
  • February 2013 (7)
  • December 2012 (10)
  • November 2012 (4)
  • October 2012 (1)
  • September 2012 (3)
  • July 2012 (3)
  • June 2012 (5)
  • May 2012 (18)

Mackenzie

Hi! I'm Mackenzie! I'm currently a Fulbright English Teaching Assistant in Indonesia! I'm writing all about my year on this blog and hope you'll follow along on this journey! Read More…

A Look Back

Palangkaraya smog
This blog is not an official U.S. Department of State website and the views and opinions expressed here are entirely my own, and do not represent the U.S. Department of State or the Fulbright Program.

Copyright © 2025 · Foodie Child Theme by Shay Bocks · Built on the Genesis Framework · Powered by WordPress