The Year of Living Audaciously

Former food blog, now travel blog - following my year as a Fulbright ETA in Indonesia

  • Home
  • About Me
    • Travels and Life Updates
    • Privacy Policy
  • Fellow Fulbrighters
  • Never Skip Dessert
    • Recipes By Category
    • Recipe Index
    • The Best of the Best
    • The Social Kitchen Project
  • Recommended

Christmas Cookies #2: Gingerbread Men (and women!)

December 9, 2012 by Mackenzie

IMG_2571

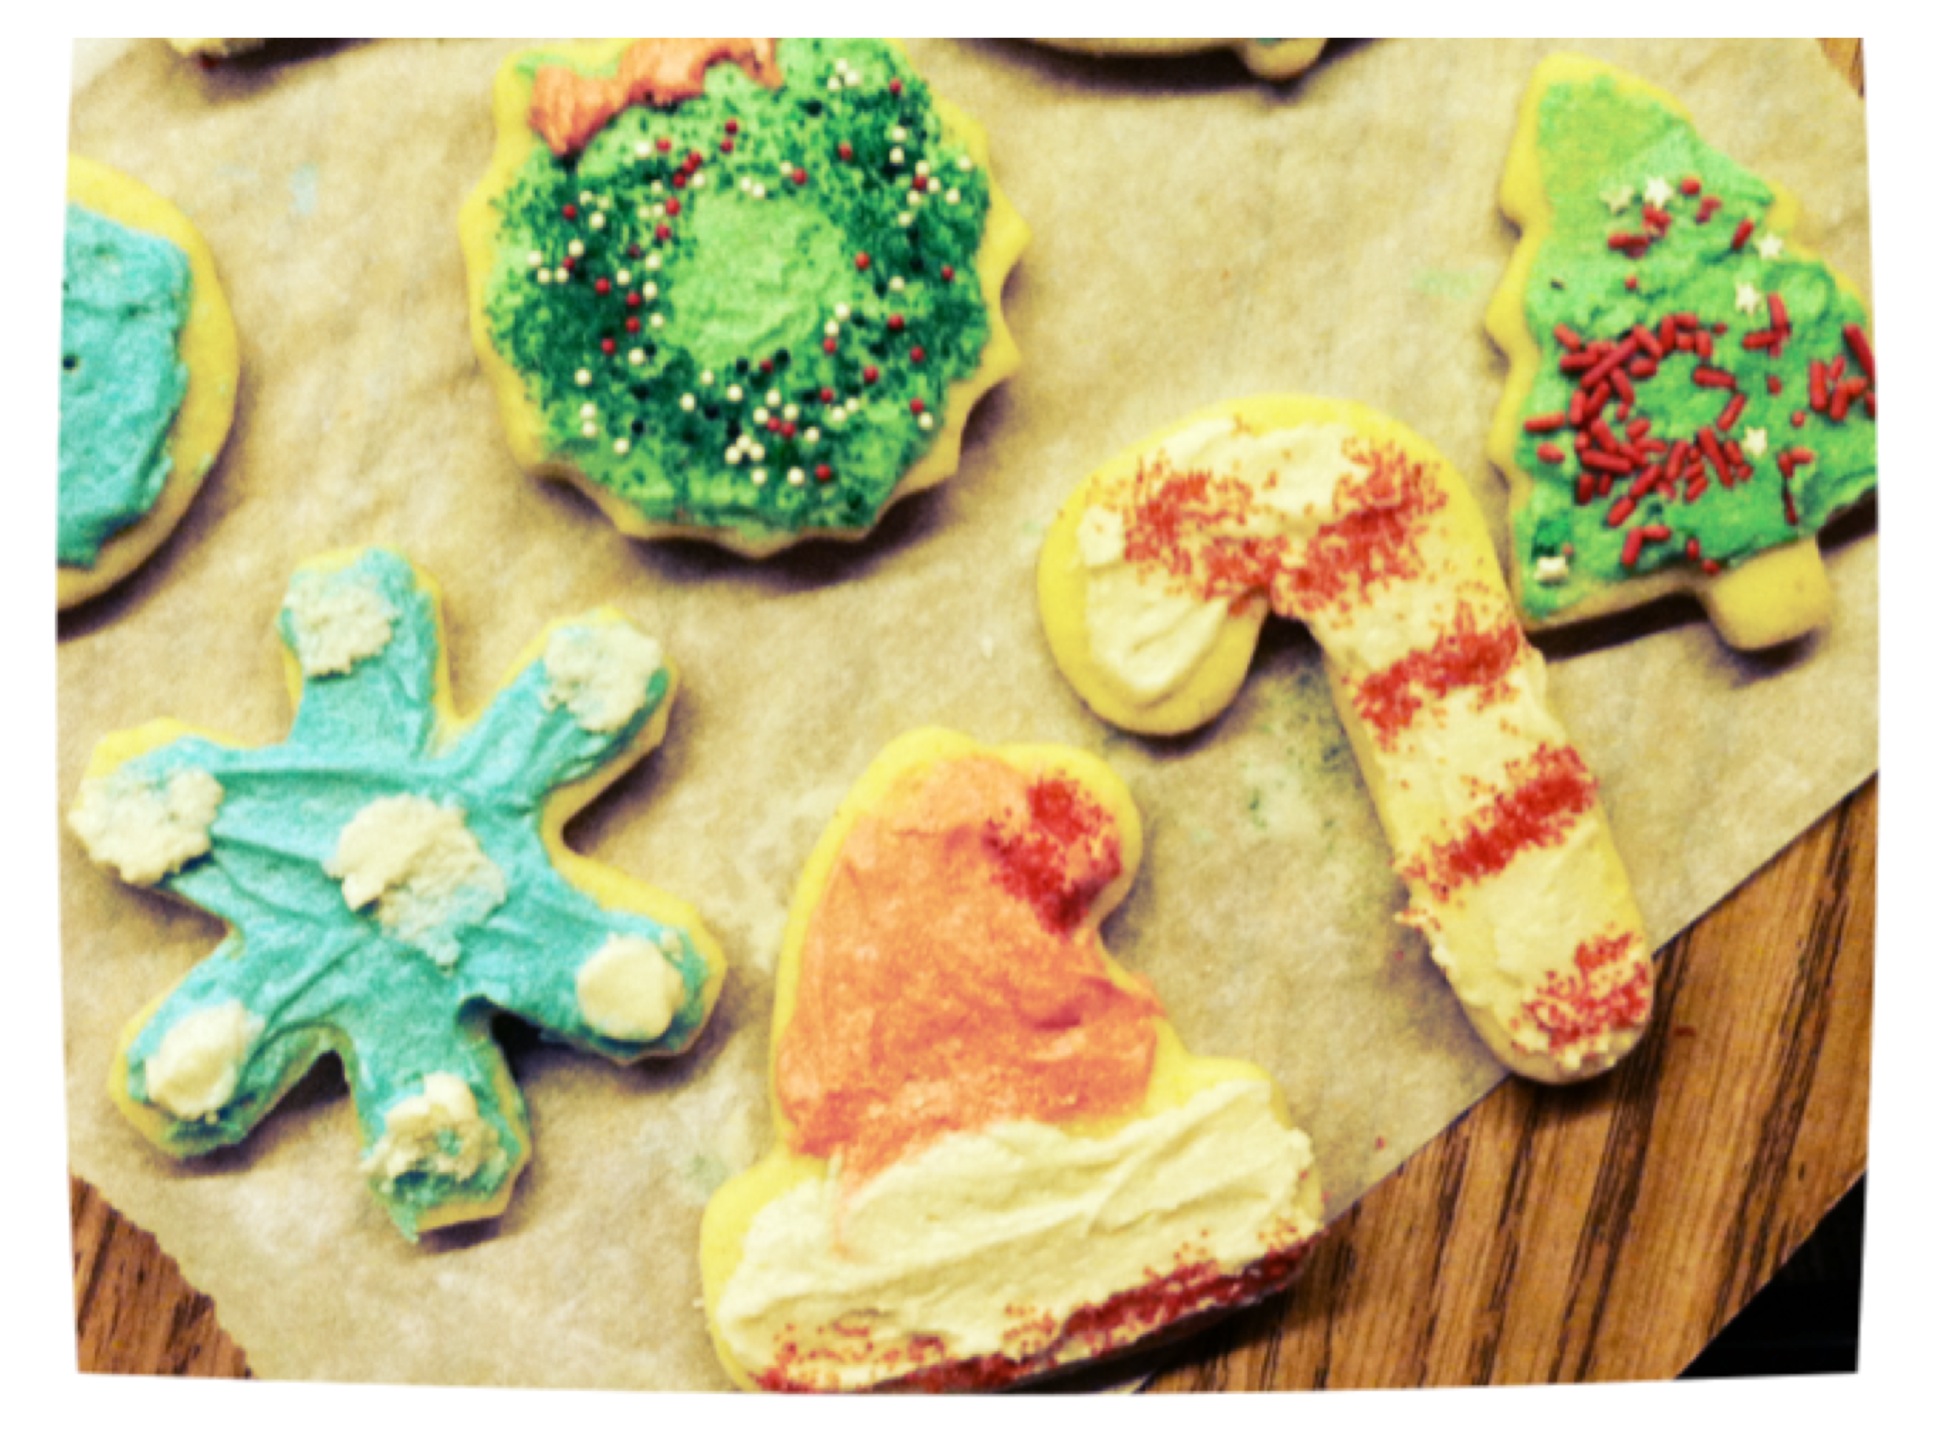
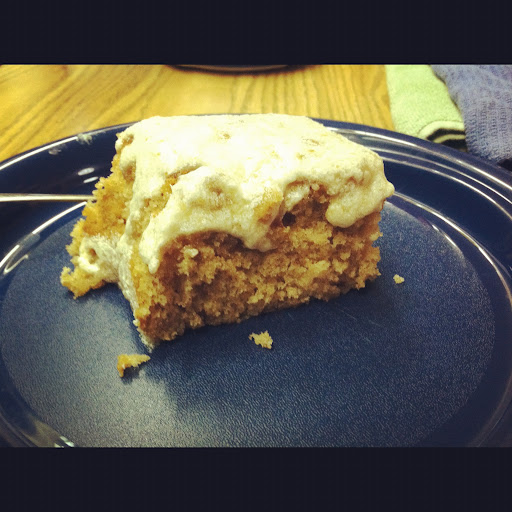
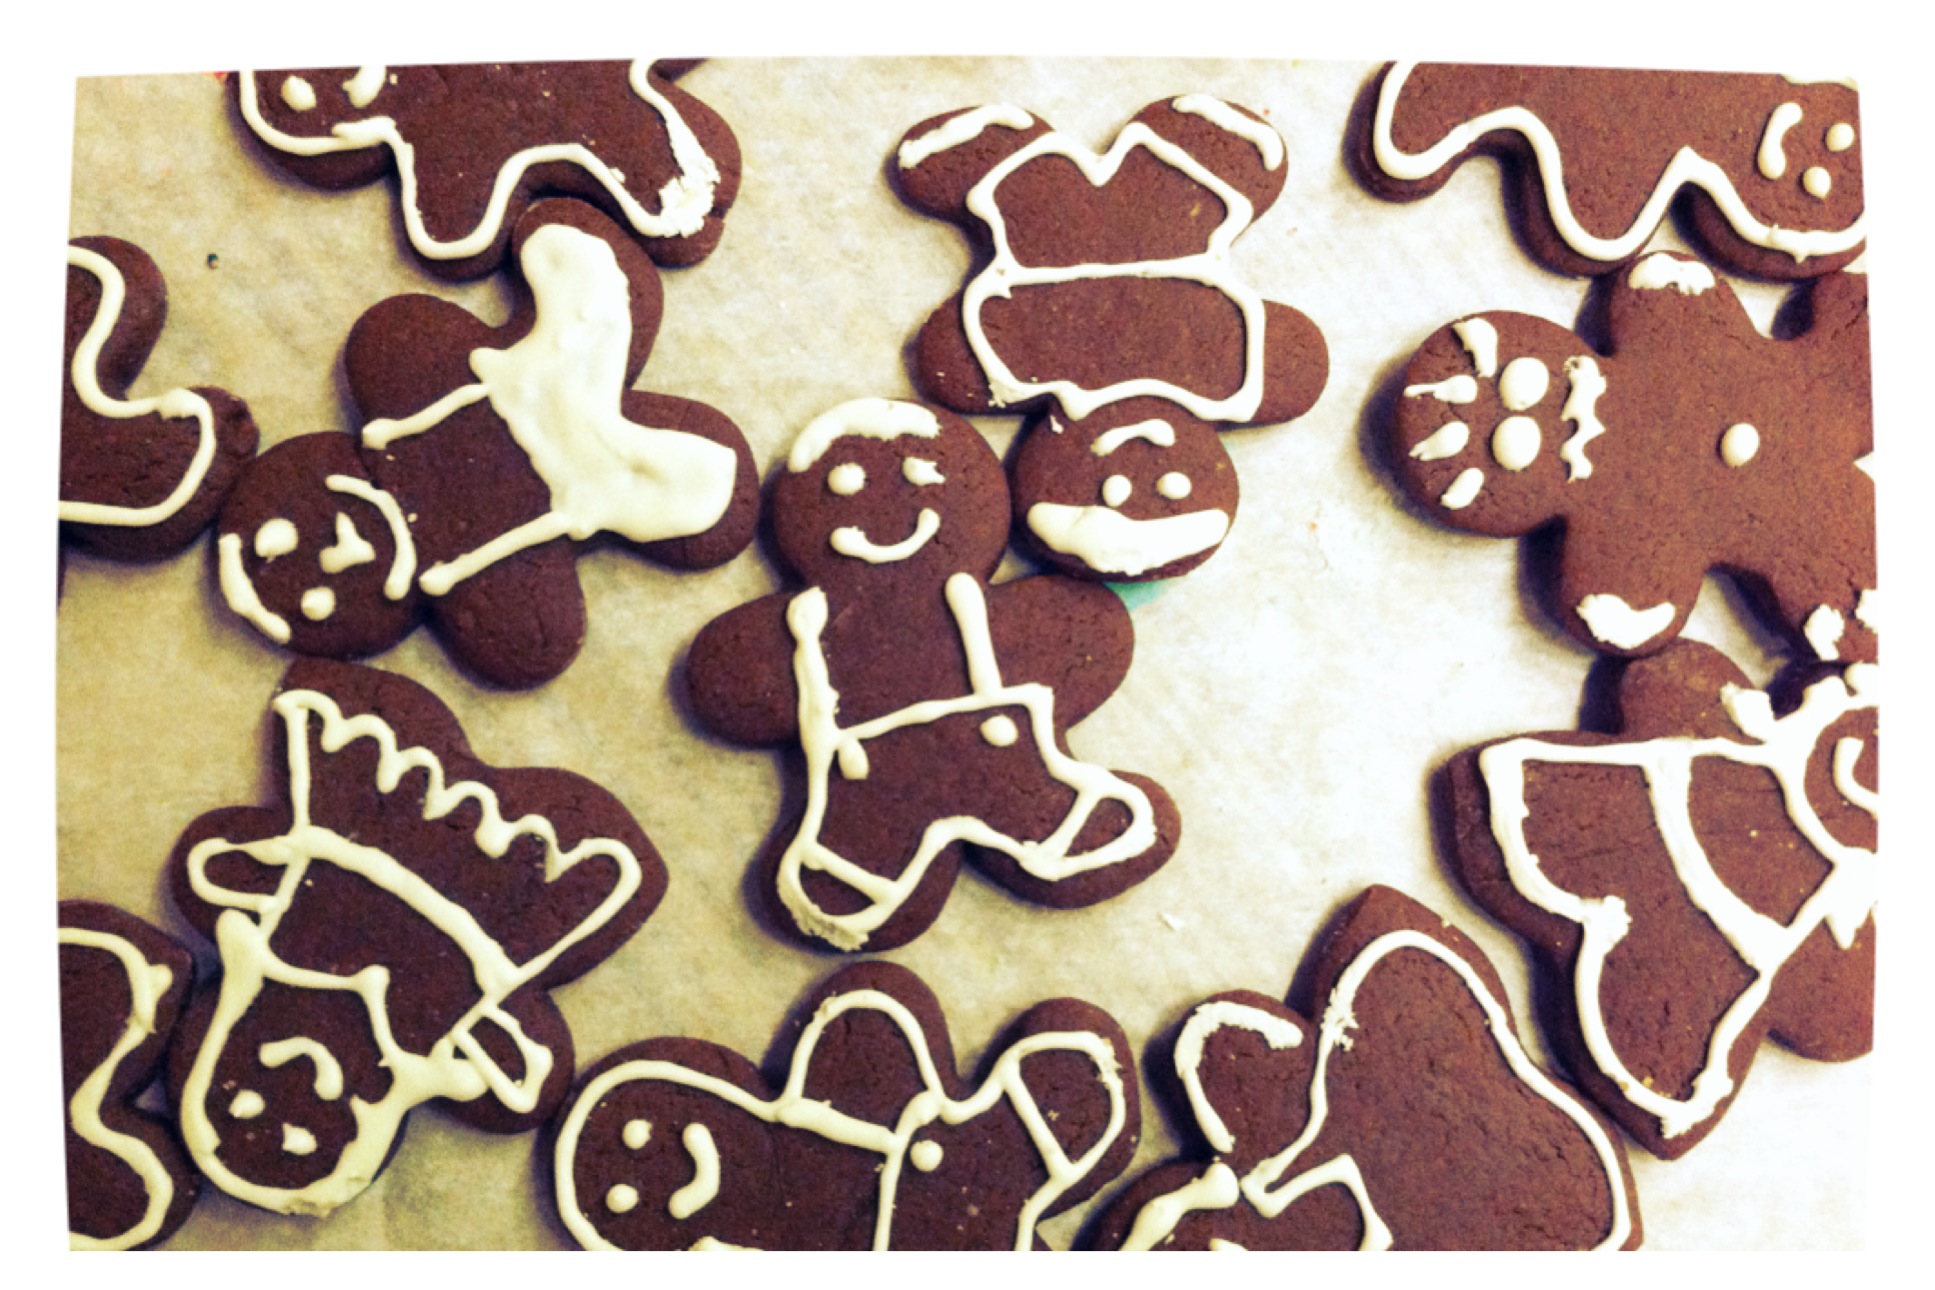
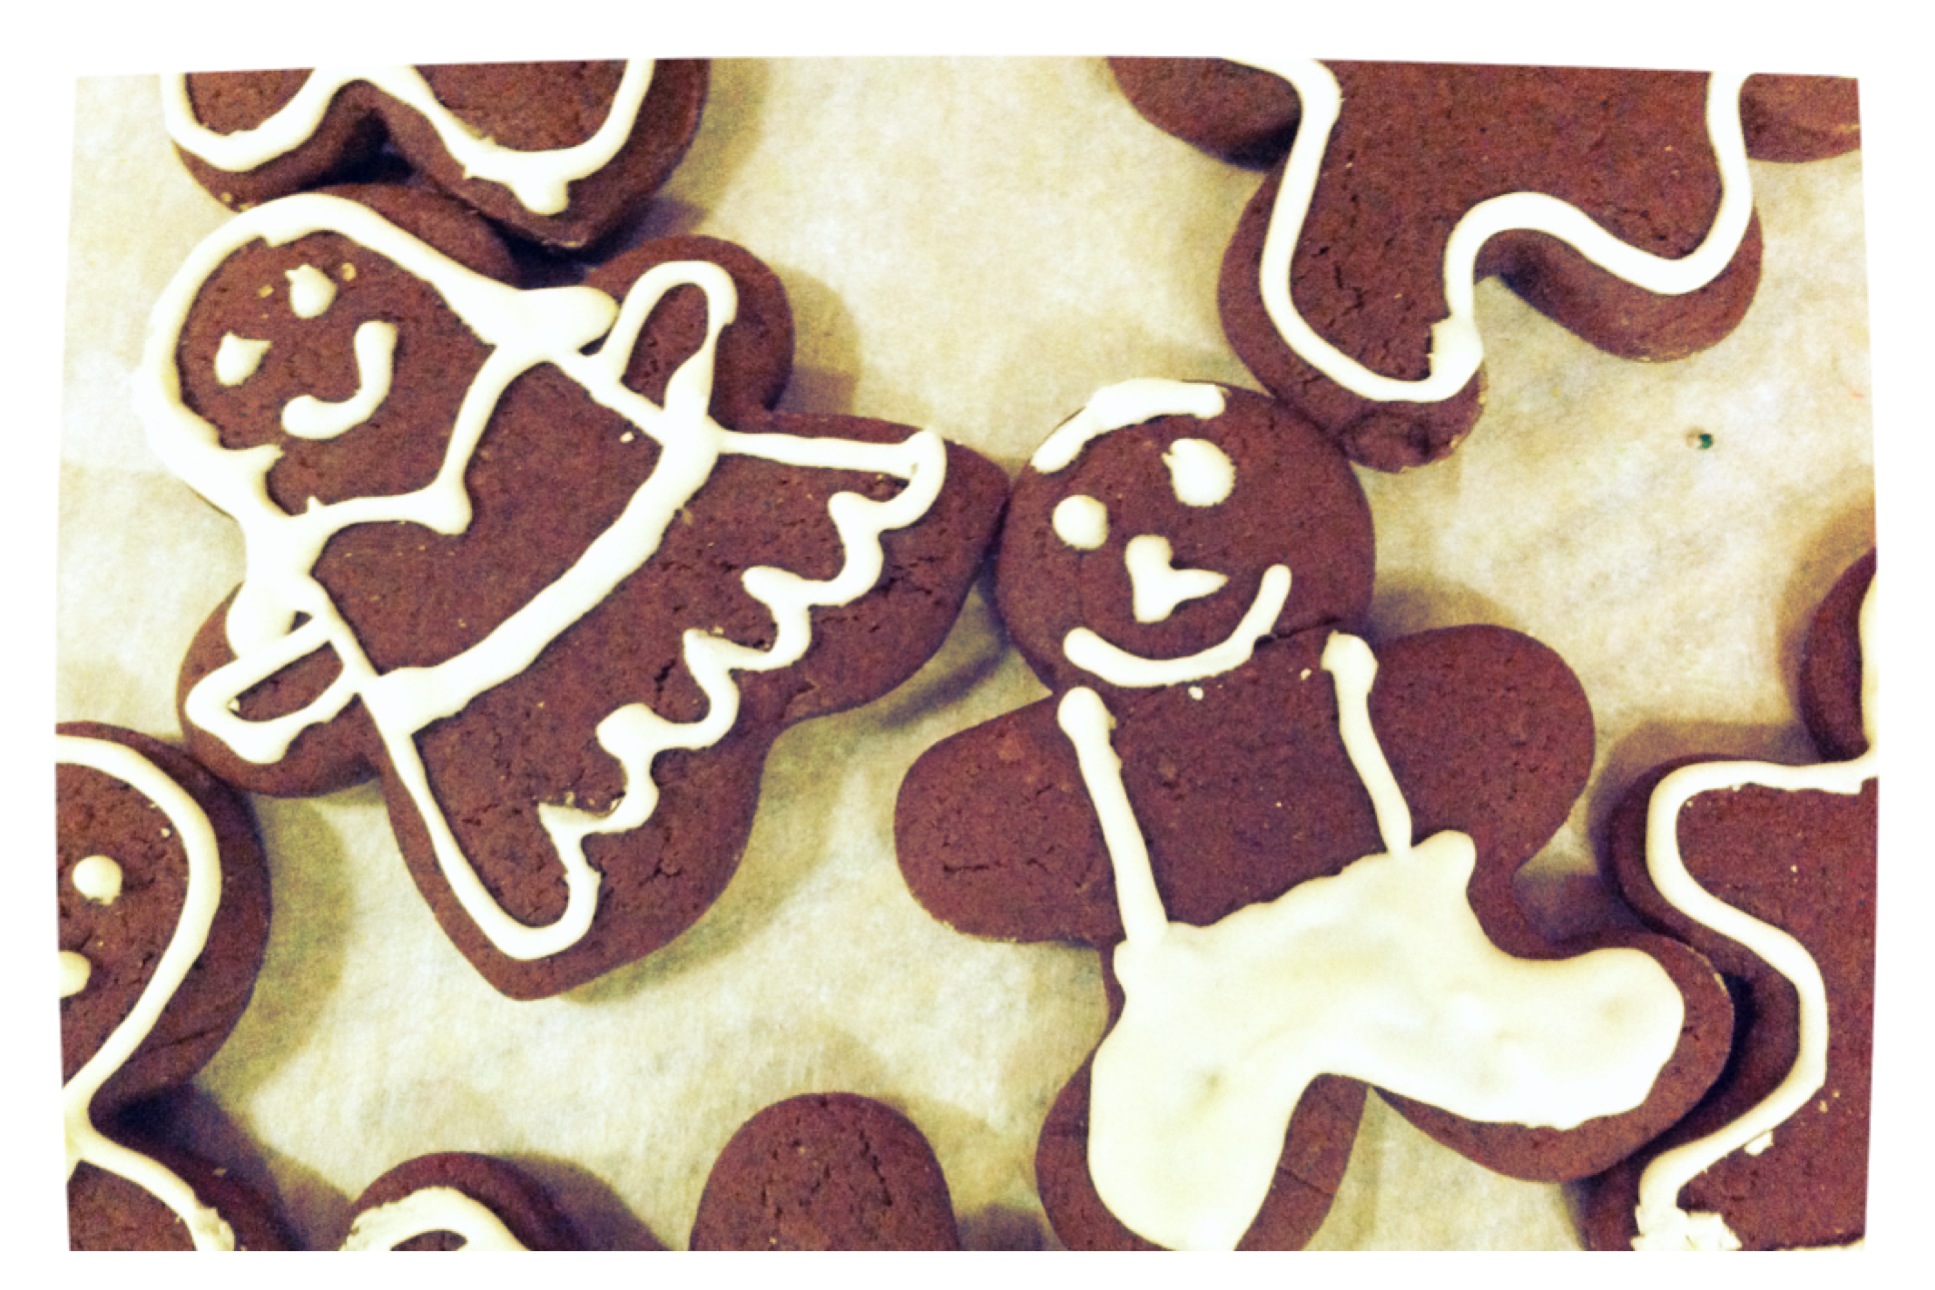
In our Christmas Cookie Baking Extravaganza… we made 6 different kinds of cookies! Here is recipe number 2! These gingerbread men were chewy, had the perfect amount of spice and are so fun to decorate!

IMG_2572

Gingerbread Men (and Women!)

Recipe from Food Network.com

Ingredients

  • 3 cups all purpose flour
  • 1 teaspoon baking soda
  • 3/4 teaspoon ground cinnamon
  • 3/4 teaspoon ground ginger
  • 1/2 teaspoon ground allspice
  • 1/2 teaspoon ground cloves
  • 1/2 teaspoon salt
  • 1/4 teaspoon freshly milled black pepper
  • 8 tablespoons (1 stick) unsalted butter, at room temperature
  • 1/4 cup vegetable shortening, at room temperature
  • 1/2 cup packed light brown sugar
  • 2/3 cup unsulfured molasses
  • 1 large egg
  • Royal Icing (recipe follows)

Directions

Position the racks in the top and bottom thirds of the oven and preheat to 350 degrees F.

Sift the flour, baking soda, cinnamon, ginger, allspice, cloves, salt and pepper through a wire sieve into a medium bowl. Set aside.

In a large bowl, using a hand-held electric mixer at high speed, beat the butter and vegetable shortening until well-combined, about 1 minute. Add the brown sugar and beat until the mixture is light in texture and color, about 2 minutes. Beat in the molasses and egg. Using a wooden spoon, gradually mix in the flour mixture to make a stiff dough. Divide the dough into two thick disks and wrap each disk in plastic wrap. Refrigerate until chilled, about 3 hours. (The dough can be prepared up to 2 days ahead.)

To roll out the cookies, work with one disk at a time, keeping the other disk refrigerated. Remove the dough from the refrigerator and let stand at room temperature until just warm enough to roll out without cracking, about 10 minutes. (If the dough has been chilled for longer than 3 hours, it may need a few more minutes.) Place the dough on a lightly floured work surface and sprinkle the top of the dough with flour. Roll out the dough 1/8 inch thick, being sure that the dough isn’t sticking to the work surface (run a long meal spatula or knife under the dough occasionally just to be sure, and dust the surface with more flour, if needed). For softer cookies, roll out slightly thicker. Using cookie cutters, cut out the cookies and transfer to nonstick cookie sheets, placing the cookies 1 inch apart. Gently knead the scraps together and form into another disk. Wrap and chill for 5 minutes before rolling out again to cut out more cookies.

Bake, switching the positions of the cookies from top to bottom and back to front halfway through baking, until the edges of the cookies are set and crisp, 10 to 12 minutes. Cool on the sheets for 2 minutes, then transfer to wire racks to cool completely. Decorate with Royal Icing. (The cookies can be prepared up to 1 week ahead, stored in airtight containers at room temperature.)

  • ROYAL ICING
  • 1 pound (4 1/2 cups) confectioners’ sugar
  • 3 large egg whites

Make ahead: The icing can prepared up to 2 days ahead, stored in an airtight container with a moist paper towel pressed directly on the icing surface, and refrigerated.

This icing hardens into shiny white lines, and is used for piping decorations on gingerbread people or other cookies.

In a medium bowl, using a hand-held electric mixer at low speed, beat the confectioners’ sugar, egg-white powder and water until combined. Increase the speed to high and beat, scraping down the sides of the bowl often, until very stiff, shiny and thick enough to pipe; 3 to 5 minutes. (The icing can be prepared up to 2 days ahead, stored in an airtight container with a moist paper towel pressed directly on the icing surface, and refrigerated.)

To pipe line decorations, use a pastry bag fitted with a tube with a small writing tip about 1/8-inch wide or with a ziploc with a bit of the corner cut off. If necessary, thin the icing with a little warm water. To fill the pastry bag, fit it with the tube. Fold the top of the bag back to form a cuff and hold it in one hand. Using a rubber spatula, scoop the icing into the bag. Unfold the cuff and twist the top of the bag closed. Squeeze the icing down to fill the tube. Always practice first on a sheet of wax paper or aluminum foil to check the flow and consistency of the icing.

Filed Under: Christmas, Cookies, Desserts, Seasonal Tagged With: Christmas, Cookies, gingerbread, parties

Christmas Cookies #1: Libby’s Sugar Cookies

December 8, 2012 by Mackenzie

IMG_2573

We had a Christmas cookie-making extravaganza today and of course, we had to make sugar cookies! These are Libby’s family’s recipe and they are oh so good! Soft and sweet and perfect for decorating!

IMG_2574

Libby’s Sugar Cookies

Recipe from Libby’s family!

Ingredients:
1 1/2 cups butter
2 cups white sugar
4 eggs
1 tsp. vanilla
5 cups flour
2 tsp. baking powder
1 tsp. salt

Directions:
1. Cream together butter and sugar. Add eggs and vanilla. Mix well.
2. Add flour, baking powder and salt. Mix well. Cover and chill dough for at least an hour (or overnight).
3. Preheat oven to 400 degrees.
4. Roll out dough on floured surface to 1/4-1/2 inch thick. Cut with cookie cutters. Bake 6-10 minutes on ungreased pan. Cool completely.

Filed Under: Christmas, Cookies, Desserts, Seasonal Tagged With: Christmas, christmas cookie recipe, Cookies, frosting

Candy Cane Cookies

December 5, 2012 by Mackenzie

IMG_2527

I absolutely love Christmas cookies. I love baking them because they are a special kind of cookie that you only bake once a year… I love eating them because, well, they are just delicious!!! And I love all the memories I have making Christmas cookies with my family.

This is probably my favorite Christmas cookie recipe! Enjoy!

IMG_2526

Candy Cane Cookies

Makes about 20 cookies.

Ingredients:

2 1/2 cups all purpose flour

1/4 teaspoon salt

1 cup unsalted butter, room temperature

1 cup powdered sugar

2 large egg yolks

1 tsp. vanilla extract

1/2 tsp almond extract

Red food coloring

Directions:

Preheat oven to 375 degrees. In a bowl, whisk the flour and the salt. In a separate bowl, beat the butter and the sugar until creamy. Add the egg yolks, vanilla and almond extracts and beat until combined. Scrape down the sides of the bowl as needed. Add the flour mixtrue, in three additions, and beat until you have a smooth dough.

Remove half the dough from the mixing bowl. Add the red food coloring to the remaining half and beat on low speed until well blended. Refridgerate dough for 15 minutes.

Take a walnut sized piece of red dough and a walnut sized piece of white dough. Separately, roll each color on a lightly floured surface, into a 4-5 inch long rope. Place the two ropes side by side, gently press together and twist the two ropes to form a sprial. Place the cookies on a parchment lined baking sheet, spacing the cookies about 2 inches apat. Shape each cookie into a cane shape by bending one end into a hook.

Bake cookies for 8-10 minutes or until set and the edges of the cookies are just starting to brown. Do not overbake. Remove from oven and let cookies cool completely on baking sheet. Cover and store in an airtight container for about a week. These cookies can be frozen.

20121205-133249.jpg

Filed Under: Christmas, Cookies Tagged With: candy canes, christmas cookie recipe, Cookies, Desserts

Cinnamon Quinoa Bake

November 30, 2012 by Mackenzie

This is perfect for breakfast or a midmorning snack. It’s even better with jam spread over the top and a cup of coffee!
 
Photo from Gabby’s Gluten-Free blog
Cinnamon Quinoa Bake
Recipe from
Gabby’s Gluten-Free
Makes 9-12 bars
 
Ingredients
2 1/2 cups cooked quinoa, cooled (1 cup dry)
4 eggs, beaten
1/3 cup vanilla soy milk
1/3 cup maple syrup
1 teaspoon vanilla extract
1 tablespoon cinnamon
 
Directions
1. Preheat the oven to 375ºF and place the cooked quinoa in a large mixing bowl. Line an 8-by-8-inch baking pan with lightly greased parchment.
2. In a small bowl, whisk together eggs, soy milk, vanilla extract, and cinnamon until thoroughly combined. Add maple syrup and whisk.
3. Add egg mixture to cooked and cooled quinoa. Stir with a large spoon to combine. Pour into the parchment-lined baking dish and spread it around to ensure that it’s even.
4. Bake for 20 to 25 minutes until set and golden.
5. Using parchment, remove bake from pan as soon as possible so that it doesn’t steam.
6. Cool completely and cut into squares. Delicious when warmed in the microwave and jam spread on top.

Filed Under: Bars, Breakfast Tagged With: Bars, Breakfast, Cinnamon, healthy, quinoa

Snickerdoodle Cake!

September 1, 2012 by Mackenzie

This cake was awesome! It was our first baking attempt of the year – it’s definitely going to be interesting with no easily accessible kitchen! We made up the batter in our room and then ran it down to the kitchen next door to bake it… worked just fine! I see a lot of “no bake” items in our future though!

Okay so this Snickerdoodle cake is from pinterest and the picture looked incredible! So when we were trying to figure out what to make – I kept returning to that recipe and… well pretty soon it was in progress!

Ours wasn’t nearly as pretty as the one in the original link – but it sure tasted fantastic!!!

Snickerdoodle Cake
Makes 1 9/13 or 2 round cakes (to layer)
Recipe from foodwithfamily

For the cake:
1 1/2 cups all-purpose flour
1 1/2 cups cake flour (we substituted with 1 1/3 cups AP flour and 1/4 cup cornstarch)
1 Tbs baking powder
1/2 tsp. salt
1 Tbs. ground cinnamon
2 sticks butter, softened to room temp.
1 3/4 cups fine or superfine sugar (we just used regular)
4 large eggs, room temp.
1 Tbs. vanilla extract
1 1/4 cups whole milk, warmed to room temp.

For the buttercream: (we made this up because we didn’t have enough butter but it was still really good so i’ll share it with you. Find the directions to the original recipe in the link above)
1 stick of butter
2 cups powdered sugar
1/4 cup of brown sugar
1/2 Tbs ground cinnamon
1/2 cup milk
These are REALLY rough estimates. We really just eyeballed it until it tasted/looked good 🙂

To Bake the Cake:

Preheat the oven to 235. Butter and flour your pan(s) (tip is to use the butter wrappers from the butter you’re about to use!)

In a mixing bowl, whisk together the flours, baking powder, salt and cinnamon. Set aside.

Cream together the butter and sugar until fluffy and pale in color.

Beat the eggs in one at a time, fully incorporating each egg and scraping down the bowl in between each addition. Beat in vanilla.

Add about 1/3 of the milk, beat to incorporate, then 1/3 of the flour mixture, again beating to incorporate.

Repeat this process, scraping down the bowl as necessary, until all of the milk and flour are mixed in evenly – starting and ending with the dry ingredients.

Pour the batter into the bans and bake, rotating midway through, for about 35 minutes (we did 40) or until it tests done.

Let the cakes cool in the pan on a rack for 5 minutes before turning onto the racks to finish cooling.

To Make the Buttercream:

Beat together butter, brown sugar and cinnamon until fluffy. Add the powdered sugar and vanilla and beat. Add milk to desired consistency.

Frost and you’re good to go!

Filed Under: Cake, Desserts, Easy

Blueberry Chocolate Chip Frozen Yogurt

July 30, 2012 by Mackenzie

I’ve made several batches of ice cream this summer with my new Kitchenaid Ice Cream Maker 🙂 And it’s been awesome! Molly Moon’s Ice Cream is my favorite ice creamery in the Seattle area and they came out with a cookbook this year. It’s got some fantastic recipes in it and I have love recreating them! I’m not going to give out the recipes in the book because I want to support this local business and make you buy the book!

However, I tried a frozen yogurt recipe from pinterest last week and it was great! So here it is!
Blueberry Chocolate Chip Frozen Yogurt 
Recipe adapted from Simply Recipes
Makes about 1 quart
 
Ingredients: 
3 cups fresh or frozen blueberries (I used fresh)
3 Tbsp lemon juice
3/4 cup to 1 cup sugar (depending on how sweet your blueberries are, and how sweet you want the result to be) – I did 3/4 cups because my blueberries were fresh and sweet!
1/4 teaspoon salt
1/8 teaspoon cinnamon
1 1/2 cups full fat plain yogurt (full fat yogurt is preferred, if you are use low-fat or non-fat yogurt, substitute 1/4 cup of it with heavy whipping cream – which is what I did)
1/2 cup whole milk
3/4 cup mini chocolate chips
Directions: 
1. Place the blueberries, lemon juice, sugar, salt and cinnamon in a medium saucepan. Heat on medium heat, stirring, until all of the sugar has dissolved. While the mixture is heating, use a potato masher to mash up the blueberries. When all of the sugar has dissolved, remove from heat and let cool for 10 minutes.
2. Stir in the yogurt and milk until completely incorporated. Chill the mixture in the refrigerator for several hours (or overnight) until completely cold.
3. Process the blueberry yogurt mixture in your ice cream maker according to manufacturer’s instructions (usually about 25 minutes). In the last 5 minutes, add the chocolate chips. Let firm up a bit by freezing it for several hours.

Filed Under: Desserts, Ice cream, Seasonal, Summer

« Previous Page
Next Page »

Meet Mackenzie

Hi! I'm Mackenzie! I'm currently a Fulbright English Teaching Assistant in Indonesia! I'm writing all about my year on this blog and hope you'll follow along on this journey! Read More…

Disclaimer:

Students and Indonesian Friends: Please don't take anything I say here as critical of my experience or you and your culture. Rather, through this blog I want to share my experience in your country with my friends and family in America! I may write and laugh about a lot of things that are different but none of it is bad, it's just different!

This blog is not an official Department of State website, and the views and information presented here are my own and do not represent the Fulbright Program or the Department of State.

My Latest Posts on Instagram

[instagram-feed]

My Latest Reads

My Latest Reads

Between the World and Me
5 of 5 stars
Between the World and Me
by Ta-Nehisi Coates
If You Follow Me: A Novel
3 of 5 stars
If You Follow Me: A Novel
by Malena Watrous
The Goldfinch
4 of 5 stars
The Goldfinch
by Donna Tartt
Missoula: Rape and the Justice System in a College Town
4 of 5 stars
Missoula: Rape and the Justice System in a College Town
by Jon Krakauer
Station Eleven
4 of 5 stars
Station Eleven
by Emily St. John Mandel
Fight Back and Win
2 of 5 stars
Fight Back and Win
by Gloria Allred

goodreads.com

Archives

  • August 2017 (1)
  • June 2017 (2)
  • March 2017 (1)
  • February 2017 (1)
  • January 2017 (1)
  • December 2016 (1)
  • November 2016 (3)
  • October 2016 (3)
  • September 2016 (2)
  • August 2016 (2)
  • June 2016 (1)
  • May 2016 (3)
  • April 2016 (1)
  • March 2016 (4)
  • February 2016 (2)
  • January 2016 (1)
  • December 2015 (3)
  • November 2015 (2)
  • October 2015 (4)
  • September 2015 (5)
  • August 2015 (6)
  • June 2015 (2)
  • March 2015 (1)
  • December 2014 (4)
  • November 2014 (3)
  • October 2014 (3)
  • September 2014 (4)
  • August 2014 (5)
  • July 2014 (4)
  • June 2014 (2)
  • April 2014 (1)
  • March 2014 (4)
  • February 2014 (1)
  • January 2014 (3)
  • December 2013 (5)
  • November 2013 (3)
  • October 2013 (1)
  • September 2013 (4)
  • August 2013 (3)
  • July 2013 (2)
  • June 2013 (6)
  • May 2013 (6)
  • April 2013 (6)
  • March 2013 (3)
  • February 2013 (7)
  • December 2012 (10)
  • November 2012 (4)
  • October 2012 (1)
  • September 2012 (3)
  • July 2012 (3)
  • June 2012 (5)
  • May 2012 (18)

Mackenzie

Hi! I'm Mackenzie! I'm currently a Fulbright English Teaching Assistant in Indonesia! I'm writing all about my year on this blog and hope you'll follow along on this journey! Read More…

A Look Back

Salty and nutty, this pecan butter is a must-try!
CGI - New York City
This blog is not an official U.S. Department of State website and the views and opinions expressed here are entirely my own, and do not represent the U.S. Department of State or the Fulbright Program.

Copyright © 2025 · Foodie Child Theme by Shay Bocks · Built on the Genesis Framework · Powered by WordPress