The Year of Living Audaciously

Former food blog, now travel blog - following my year as a Fulbright ETA in Indonesia

  • Home
  • About Me
    • Travels and Life Updates
    • Privacy Policy
  • Fellow Fulbrighters
  • Never Skip Dessert
    • Recipes By Category
    • Recipe Index
    • The Best of the Best
    • The Social Kitchen Project
  • Recommended

Pumpkin Gingerbread with Pumpkin Spice Glaze

September 20, 2014 by Mackenzie

Pumpkin Gingerbread with Pumpkin Spice

Guess who is headed to New York today??? EEEEK!

I’m volunteering at the Clinton Global Initiative Annual Meeting – and absolutely cannot wait! (See this post that I wrote a few weeks ago for all the details!) I can’t wait to see who I may get to meet, to connect with other inspiring young adults, and hang out with Obama and the Clintons 😉 Plus, I’m never going to complain about taking a week off of school and work! Although that did make this last week quite horrendous… And I don’t even want to think about what will happen when I get back. But for now, I’m jumping on the plane and jetting off to NYC!

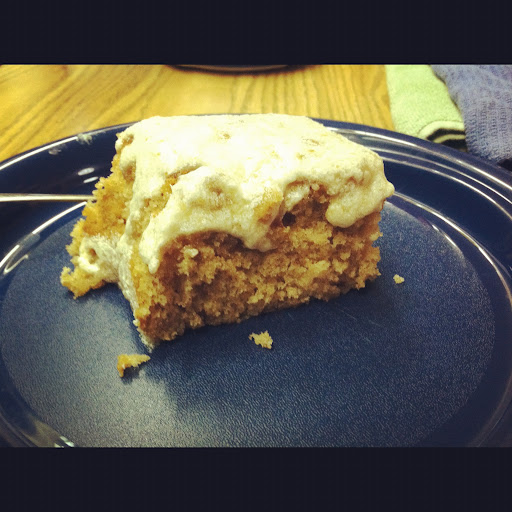
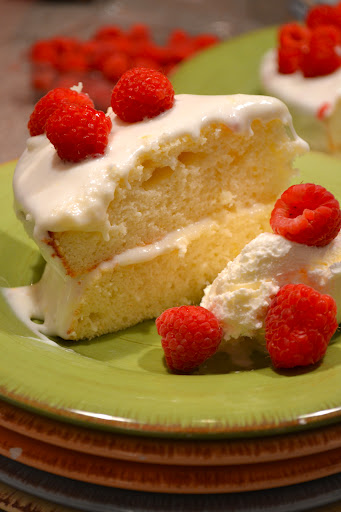
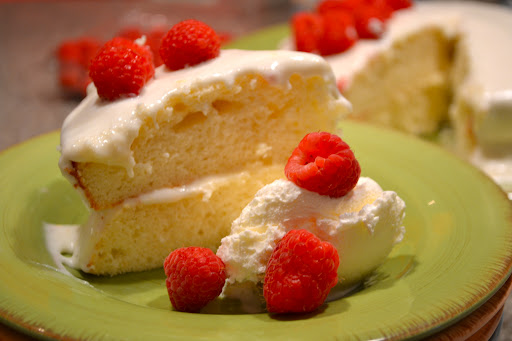
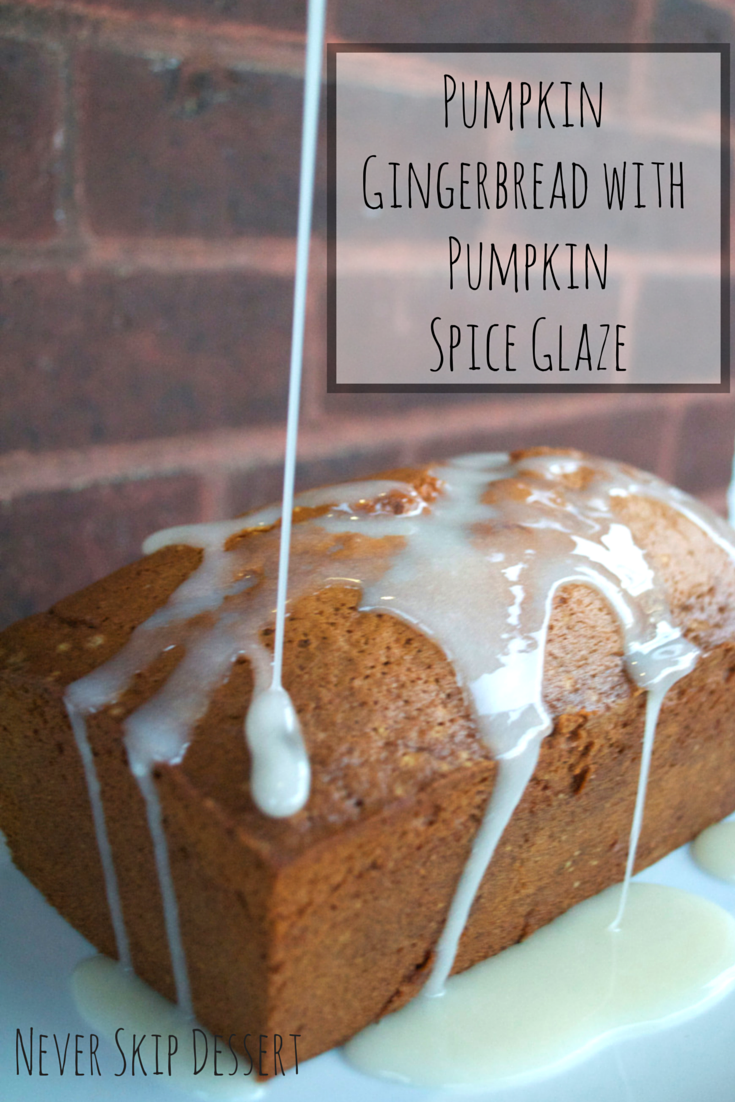
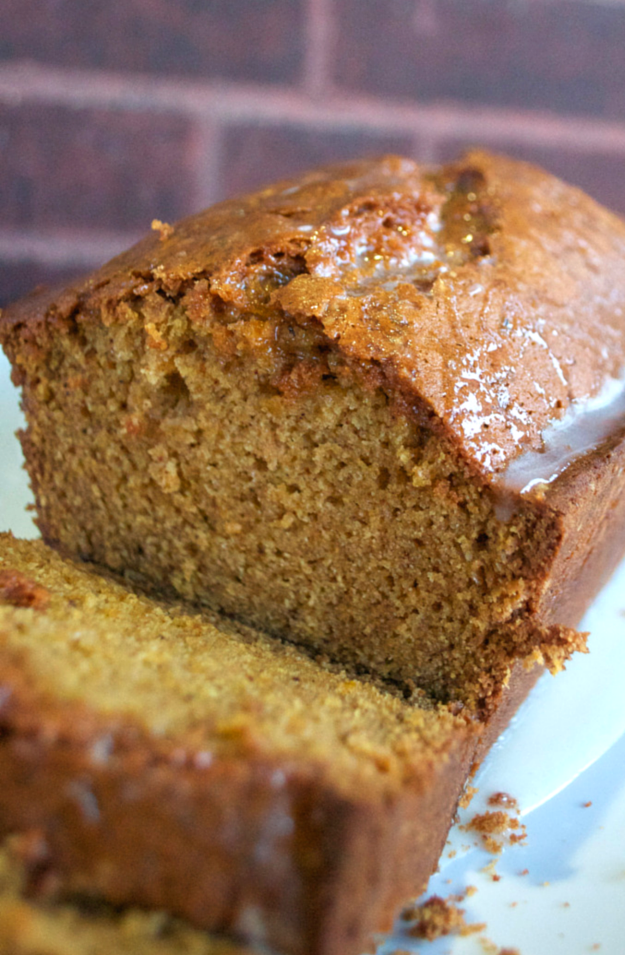
Before I leave though, I have to share with you this amazing pumpkin bread recipe. I’m not sure how I had time to make it but Thursday afternoon arrived, I finished my classes for the week (and for the next ten days really!), and I decided I just really, really needed a baking break 🙂 I also had yet to bake with pumpkin this year – so I was ready to officially usher in fall.

Pumpkin Gingerbread with Pumpkin Spice Glaze

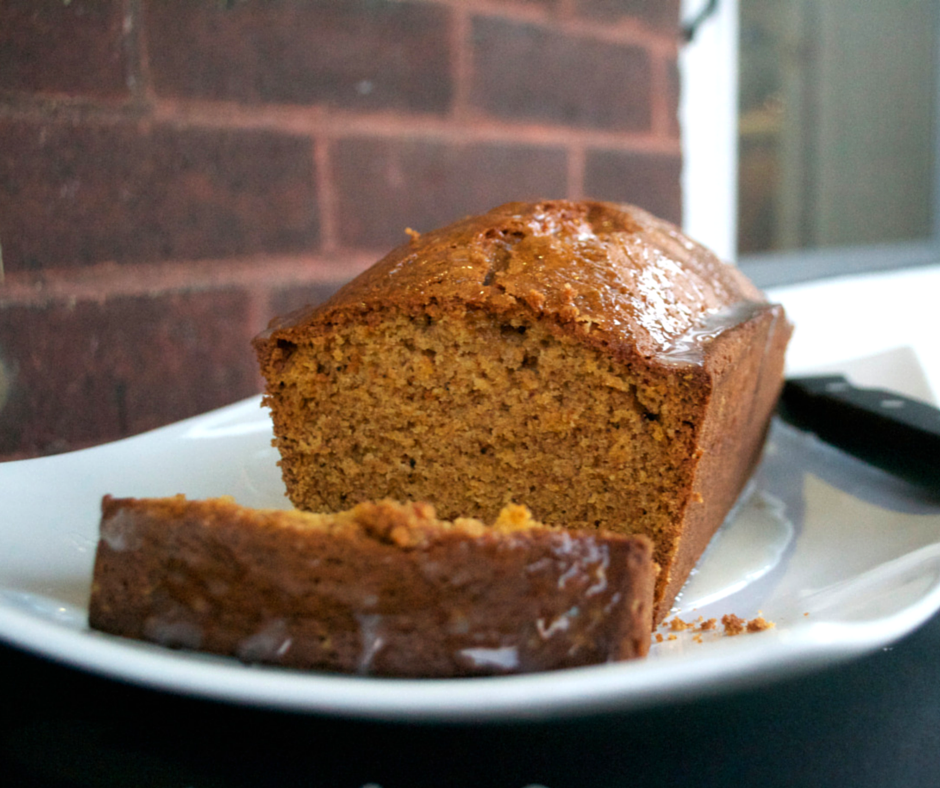
This recipe is from my great-grandmother although I added my own spin with the pumpkin spice glaze. My grandma gave me my great-grandmother’s recipe card several years ago and I have been making this bread each fall since!

When Libby came home, she walked in the door and said “What have you been making? Please tell me it’s pumpkin bread!” She said each year, her mom would surprise her and her siblings with pumpkin bread one crisp fall day and that always signaled that fall was here! Well Libby, here you go!

Pumpkin Gingerbread with Pumpkin Spice Glaze
Recipe Type: Bread, Fall, Breakfast, Dessert
Author: Mackenzie
Prep time: 20 mins
Cook time: 1 hour 10 mins
Total time: 1 hour 30 mins
Serves: 1 loaf
Recip from my Great Grandma Mildred
Ingredients
  • 1 1/2 cups sugar
  • 1/2 cup vegetable oil
  • 2 eggs
  • 1/2 cup pumpkin
  • 1 3/4 cups flour
  • 1 teaspoon baking soda
  • 3/4 teaspoon salt
  • 1/4 teaspoon baking powder
  • 1 teaspoon ginger
  • 1/2 teaspoon cinnamon
  • 1/2 teaspoon nutmeg
  • 1/2 teaspoon ground cloves
  • 1/2 teaspoon allspice
  • 1/3 cup water
  • 1/2 cup (or more if necessary) powdered sugar
  • 2-3 tablespoons milk
  • 2 drops pumpkin spice extract (or add some of the spices above!)
Instructions
  1. Preheat oven to 350 degrees.
  2. In a large mixing bowl, beat together the sugar, oil and eggs until light in color, about 2 minutes. Beat in pumpkin.
  3. In a separate bowl, stir together the flour, baking soda, salt, baking powder, and spices. Alternately add the dry ingredients and water into the pumpkin mixture, maxing in between additions. Do not overbeat.
  4. Pour batter into greased loaf pan and bake for 1 hour and 10 minutes or until a toothpick inserted into the center comes out clean. Allow to cool in pans for ten minutes and then invert onto a wire rack to cool completely.
  5. In a small bowl, stir together the powdered sugar, milk and pumpkin spice extract. Drizzle over the bread and allow to set.
3.2.2802


Filed Under: Bread, Breakfast, Cake, Desserts, Fall, Seasonal Tagged With: Bread, Breakfast, Desserts, fall, Feature, gingerbread, pumpkin, pumpkin spice

Red Wine Velvet Cake

June 18, 2013 by Mackenzie

To complete Indonesia Cooking Marathon #2, we made this Red Wine Velvet Cake from the Smitten Kitchen Cookbook. In Tom’s words, it was “Super Fantastic!” But really, it was divine.

Instead of using food coloring to get the deep red color, this recipe calls for red wine. Although the alcohol cooks out, the flavor of the wine is still strong in the cake – giving this red velvet cake a delicious, unique flavor! A perfect “adult” cake 😉

20130619-060813.jpg

I made a simple cream cheese frosting to go with it, but boy, it really finished it off well! Top it off with a scoop of vanilla ice cream and I think you’ll really enjoy this recipe!

Red Wine Velvet Cake
Recipe adapted from The Smitten Kitchen Cookbook
Makes one 2-layer, 8-inch round cake

Ingredients:

Cake:
8 tablespoons unsalted butter
1 1/2 cups all-purpose flour
1 cup firmly packed dark brown sugar
1/3 cup granulated sugar
2 large eggs, at room temperature
1 cup red wine
1 teaspoon vanilla extract
2/3 cup Dutch cocoa powder
1/4 teaspoon baking soda
1/2 teaspoon baking powder
1/2 teaspoon cinnamon
1/2 teaspoon table salt

Cream Cheese Frosting:
Ingredients:
8 oz cream cheese
1 1/6 cup powdered sugar
Pinch of salt
1/2 to 1 teaspoon vanilla
2-4 tablespoons milk

Directions:
1. Preheat oven to 325 degrees. Line the bottom of two 8-inch, round cake pans with parchment paper and lightly coat with butter (sides too). In a large bowl, cream the butter until smooth with an electric mixer. Add the sugars and beat until fluffy, about three minutes. Add the eggs and beat well, then beat in the red wine and vanilla.

2. Add the rest of the cake ingredients to the wet mixture, piling it all on top before mixing it all together with a rubber spatula. Divide batter between prepared pans and bake for 25 minutes or until a toothpick comes out clean. Cool in pan on rack for ten minutes, then flip out and cool completely on a wire rack.

3. In a medium bowl, beat the cream cheese with the powdered sugar, salt and vanilla with an electric mixture, until light and fluffy (1-2 minutes). Add milk to reach desired consistency.

4. Place the first cake layer on the serving platter and spread 1/2 the frosting over it (I just did the tops and not the sides). Place the second layer on top and spread the rest of the frosting over it. I sprinkled some dark chocolate shards over the top, add if you want! Chill in the fridge until ready to serve.

20130619-061749.jpg

Filed Under: Cake, Desserts Tagged With: cake, Desserts

Honey Almond Caramel Crunch Topped Cake with Custard Cream Filling

April 30, 2013 by Mackenzie

Libby’s birthday was last weekend and we made this cake to celebrate! IT WAS AMAZING. One of the best cakes I have ever had in my life. Hands down.

IMG_0338

The cake itself is simple – not too sweet and slightly dense. The pastry cream filling in the middle adds a touch of sweetness and pairs perfectly with the cake. The honey almond caramel crunch topping however, is a whole other story. This is what makes the cake.

You make caramel, but it is sweetened with honey so it has a wonderfully, unique flavor. Then you mix almonds into it and you get honey caramel coated almonds – amazing by themselves! Add this to the top of your cake and you’ve got the best cake you’ll ever have.

A couple of things to be aware of: the milk, eggs and butter for the cake need to be at room temperature – so be sure you get those out early. Also, there is a total of an hour and a half of rising time for the cake. Be sure to account for that!

Honey Almond Caramel Crunch Topped Cake with Custard Cream Filling
Makes one 9×9, single layer cake (although you slice the one layer in half for the filling)
Recipe from Smitten Kitchen

Ingredients:
Cake:
2 1/2 teaspoons instant yeast (one 1 1/4 oz package) – not active dry!
3/4 cups whole milk, room temperature
1/4 cup sugar
2 cups all-purpose flour
3/4 teaspoon salt
2 large eggs, room temperature
4 tablespoons unsalted butter, room temperature

Topping:
6 tablespoons unsalted butter, cold
1/3 cup sugar
3 tablespoons honey
2 tablespoons heavy cream
1 1/2 cups sliced almonds
Two pinches of sea salt

Filling:
1 cup whole milk
1 teaspoon vanilla extract
3 large egg yolks
1/4 cup sugar
3 tablespoons all purpose flour
Two pinches of sea salt
2 tablespoons unsalted butter, cold

Directions:
1. Set out the milk, eggs and butter for the cake in advance so they are at room temperature when you are ready to make the cake.

2. First, make the cake batter: Combine all of the cake ingredients in a medium-sized mixing bowl, stirring until combined, then for an additional two minutes. Scrape down the sides, cover with a towel and let rise for one hour.

3. After an hour, butter a 9-inch cake pan. Stir the batter to deflate it slightly and then pour it into the prepared pan. You may have to really shake the pan to get the batter to cover the whole thing. Cover again with a towel and let rise for an additional 30 minutes.

4. During the second rise, make the honey almond caramel topping: In a medium saucepan over medium heat, heat the butter, sugar, honey, cream and salt until the butter is melted. Bring to a simmer and let it boil for 3 to 5 minutes, stirring constantly. The mixture will become a shade darker. Remove from heat and stir in the almonds. It’s no longer going to be liquidy, it’s going to be all almonds 🙂 Set aside to cool slightly, until the second rise of the cake is completed.

5. Preheat oven to 350 degrees. When the cake has finished its second rise, scoop out the almond topping and spread it evenly over the top of the cake. (Save yourself a little bit to snack on too!) Bake the cake for 20-25 minutes, until the almonds are slightly browned and a toothpick inserted into the middle comes out clean. Transfer to a cooling rack and allow to cool for ten minutes before removing it from the pan. Run a knife around the edges before you remove it and then invert it onto another cooling rack or plate. The almonds won’t fall off when you invert it, so don’t worry. Let cool completely.

6. While the cake is cooling, make the custard filling: Warm the milk in a medium saucepan and then pour into a bowl or cup (ideally with a spout). Set aside. In a new saucepan, or the previous one cleaned and dried, whisk the yolks and sugar vigorously for one minute – off the heat. Whisk in flour and salt. Drizzle in the warm milk, a spoonful at a time, whisking constantly. Once you’ve added half the milk, add the rest in a steady drizzle. Return the saucepan to the stove and cook on medium-high heat until it bubbles. Reduce to a simmer for one to two minutes, whisking constantly. Remove from heat and add the butter and vanilla extract. Let the custard cool completely.

7. When the custard and cake are both cool, you can assemble the cake. Using a serrated knife, slice the cake in half and place the bottom half on a serving platter. Spread the pastry cream on top of the bottom layer and then place the top half back onto the cake. Serve and enjoy!

P1000386

Filed Under: Cake, Desserts Tagged With: birthday, cake, Desserts

Snickerdoodle Cake!

September 1, 2012 by Mackenzie

This cake was awesome! It was our first baking attempt of the year – it’s definitely going to be interesting with no easily accessible kitchen! We made up the batter in our room and then ran it down to the kitchen next door to bake it… worked just fine! I see a lot of “no bake” items in our future though!

Okay so this Snickerdoodle cake is from pinterest and the picture looked incredible! So when we were trying to figure out what to make – I kept returning to that recipe and… well pretty soon it was in progress!

Ours wasn’t nearly as pretty as the one in the original link – but it sure tasted fantastic!!!

Snickerdoodle Cake
Makes 1 9/13 or 2 round cakes (to layer)
Recipe from foodwithfamily

For the cake:
1 1/2 cups all-purpose flour
1 1/2 cups cake flour (we substituted with 1 1/3 cups AP flour and 1/4 cup cornstarch)
1 Tbs baking powder
1/2 tsp. salt
1 Tbs. ground cinnamon
2 sticks butter, softened to room temp.
1 3/4 cups fine or superfine sugar (we just used regular)
4 large eggs, room temp.
1 Tbs. vanilla extract
1 1/4 cups whole milk, warmed to room temp.

For the buttercream: (we made this up because we didn’t have enough butter but it was still really good so i’ll share it with you. Find the directions to the original recipe in the link above)
1 stick of butter
2 cups powdered sugar
1/4 cup of brown sugar
1/2 Tbs ground cinnamon
1/2 cup milk
These are REALLY rough estimates. We really just eyeballed it until it tasted/looked good 🙂

To Bake the Cake:

Preheat the oven to 235. Butter and flour your pan(s) (tip is to use the butter wrappers from the butter you’re about to use!)

In a mixing bowl, whisk together the flours, baking powder, salt and cinnamon. Set aside.

Cream together the butter and sugar until fluffy and pale in color.

Beat the eggs in one at a time, fully incorporating each egg and scraping down the bowl in between each addition. Beat in vanilla.

Add about 1/3 of the milk, beat to incorporate, then 1/3 of the flour mixture, again beating to incorporate.

Repeat this process, scraping down the bowl as necessary, until all of the milk and flour are mixed in evenly – starting and ending with the dry ingredients.

Pour the batter into the bans and bake, rotating midway through, for about 35 minutes (we did 40) or until it tests done.

Let the cakes cool in the pan on a rack for 5 minutes before turning onto the racks to finish cooling.

To Make the Buttercream:

Beat together butter, brown sugar and cinnamon until fluffy. Add the powdered sugar and vanilla and beat. Add milk to desired consistency.

Frost and you’re good to go!

Filed Under: Cake, Desserts, Easy

Lemonade Cake

May 24, 2012 by Mackenzie

Lemonade Cake
I know you’re saying, “what?! lemonade in a cake?!”
Yeah. I did too. So I made it. And woah. Woah. WOAH.
Lemonade Cake
 
Cake:
1 1/3 cups granulated sugar
6 Tbsp. butter, softened
1 Tbsp. grated lemon rind
3 Tbsp. thawed lemonade concentrate
2 tsp. vanilla extract
2 large eggs
2 large egg whites
2 cups all purpose flour
1 tsp. baking powder
1/2 teaspoon baking soda
1 1/4 cups fat-free buttermilk
Cooking spray
Frosting:
2 Tbsp. butter, softened
2 tsp. grated lemon rind
2 tsp. thawed lemonade concentrate
1/2 tsp. vanilla extract
8 oz. 1/3-less-fat cream cheese
3 1/2 cups powdered sugarServe with raspberries and yogurt ice cream
Preheat oven to 350 degrees.
To prepare cake, place sugar, butter, lemon rind, lemonade concentrate and vanilla in a large bowl; beat with a mixer at medium speed until well blended (about 5 minutes). Add eggs and egg whites, 1 at at time, beating well after each addition. Combine flour, baking powder, salt and baking soda; stir well with a whisk. Add flour mixture; beat well after each addition.
Using wax paper, trace two circles of the bottom of a round 9-inch cake pan and cut out. Place into the bottom of the pan and it will really help the cake to come out cleanly after it is baked. Pour batter into 2 (9-inch) round cake pans coated with cooking spray; sharply tap pans once on counter to remove air bubbles. Bake at 350 degrees for 20 minutes or until tooth pick inserted in center comes out clean. Cool in pans for 10 minutes on a wire rack, remove from pans. Cool completely on a wire rack and remove wax paper from bottom once cooled.
To prepare frosting, place 2 tablespoons butter, lemon rind, lemonade concentrate, vanilla extract and cream cheese in a large bowl; beat with a mixer at high speed until fluffy. Add powdered sugar, and beat at low speed just until blended (do not overbeat). Chill 1 hour.
Place 1 cake layer on a plate; spread with 1/2 cup frosting. Top with remaining cake layer. Spread remaining frosting over top and sides of cake. Store cake loosely covered in the refrigerator.
Lemonade Cake
Lemonade Cake

Filed Under: Cake, Desserts Tagged With: Feature

Salted Caramel Cupcakes

May 6, 2012 by Mackenzie

Moist chocolate cake filled with homemade caramel… topped with vanilla buttercream and seasalt? What could be better?

I am in love with salted caramel anything – chocolates, cupcakes, cookies, ice cream, you name it! This is one of my favorite salted caramel concotions – they are my go-to “need to bring something to a party” cupcakes and they are always a hit!

I made them last weekend because I had told so many people here at school about them, but hadn’t yet made them! They are on the complicated side – with lots of ingredients and prep – so it’s been hard to find the time and all the ingredients! But with classes behind me and reading week ahead of me – I went for it! My floor and all my friends loved them!

The chocolate cake that I use is pretty incredible too. So if you’re just looking for a basic chocolate cupcake recipe – try these out!

Salted Caramel Cupcakes
Recipe from Marisa Loper but the caramel sauce is from Smitten Kitchen
Makes 36 cupcakes

Ingredients:

Cupcakes:
2 cups all-purpose flour
1 cup cocoa powder
1 1/2 teaspoons baking powder
1 1/2 teaspoons baking soda
1 teaspoon salt
2 eggs
2 cups sugar
1 cup milk
1 stick melted butter
2/3 cup melted chocolate
2 teaspoons vanilla
1 cup sour cream

Caramel Sauce:
1/2 cup sugar
4 tablespoons unsalted butter
3 tablespoons heavy whipping cream
Heaped 1/4 teaspoon sea salt

Buttercream:
1 stick unsalted butter
1 teaspoon vanilla
3 cups powdered sugar
Milk as needed

Sea Salt

Directions:

1. Caramel sauce: melt sugar in a medium saucepan over medium-high heat – about five minutes, stirring to break up chunks. Cook until it reaches a nice copper color. Remove from heat and stir in butter, then the cream and salt. Return the saucepan to the stovetop and cook over medium high heat, melting it fully and cooking until it is a shade darker. Pour into a glass jar and store in the fridge until the cupcakes are done and ready to be assembled.

2. Cupcakes: preheat oven to 350 degrees. Line muffins tins with cupcake liners. Stir together flour, cocoa powder, baking soda, baking powder and salt. In a separate bowl, beat eggs and sugar together. Add the milk, butter, chocolate, vanilla, and sour cream. Beat in the dry ingredients, a cup at a time, to the wet ingredients. Beat until well combined. Pour batter in muffin tins 2/3 cup full. Bake for 8-12 minutes, or until a toothpick comes out clean. Remove from oven and let cool.

3. Buttercream: in a large bowl, beat the butter and vanilla until smooth. Add powdered sugar in one cup increments and beat on high. Add a couple tablespoons of milk to reach desired thickness.

4. Assembly: once cupcakes are cool, use a paring knife to cut a small circle in the tops of the cupcakes, about the size of a nickel. Use a teaspoon to take out a small hole of cake. Make sure to keep these intact and don’t eat them! Pour some caramel sauce into the hole, it will dissolve into the cake. Replace the top and then frost the cupcakes! Drizzle more caramel sauce over the top and sprinkle with sea salt!

Filed Under: Cake, Cupcakes, Desserts Tagged With: Buttercream, Cupcakes, Desserts, salted caramel

Meet Mackenzie

Hi! I'm Mackenzie! I'm currently a Fulbright English Teaching Assistant in Indonesia! I'm writing all about my year on this blog and hope you'll follow along on this journey! Read More…

Disclaimer:

Students and Indonesian Friends: Please don't take anything I say here as critical of my experience or you and your culture. Rather, through this blog I want to share my experience in your country with my friends and family in America! I may write and laugh about a lot of things that are different but none of it is bad, it's just different!

This blog is not an official Department of State website, and the views and information presented here are my own and do not represent the Fulbright Program or the Department of State.

My Latest Posts on Instagram

[instagram-feed]

My Latest Reads

My Latest Reads

Between the World and Me
5 of 5 stars
Between the World and Me
by Ta-Nehisi Coates
If You Follow Me: A Novel
3 of 5 stars
If You Follow Me: A Novel
by Malena Watrous
The Goldfinch
4 of 5 stars
The Goldfinch
by Donna Tartt
Missoula: Rape and the Justice System in a College Town
4 of 5 stars
Missoula: Rape and the Justice System in a College Town
by Jon Krakauer
Station Eleven
4 of 5 stars
Station Eleven
by Emily St. John Mandel
Fight Back and Win
2 of 5 stars
Fight Back and Win
by Gloria Allred

goodreads.com

Archives

  • August 2017 (1)
  • June 2017 (2)
  • March 2017 (1)
  • February 2017 (1)
  • January 2017 (1)
  • December 2016 (1)
  • November 2016 (3)
  • October 2016 (3)
  • September 2016 (2)
  • August 2016 (2)
  • June 2016 (1)
  • May 2016 (3)
  • April 2016 (1)
  • March 2016 (4)
  • February 2016 (2)
  • January 2016 (1)
  • December 2015 (3)
  • November 2015 (2)
  • October 2015 (4)
  • September 2015 (5)
  • August 2015 (6)
  • June 2015 (2)
  • March 2015 (1)
  • December 2014 (4)
  • November 2014 (3)
  • October 2014 (3)
  • September 2014 (4)
  • August 2014 (5)
  • July 2014 (4)
  • June 2014 (2)
  • April 2014 (1)
  • March 2014 (4)
  • February 2014 (1)
  • January 2014 (3)
  • December 2013 (5)
  • November 2013 (3)
  • October 2013 (1)
  • September 2013 (4)
  • August 2013 (3)
  • July 2013 (2)
  • June 2013 (6)
  • May 2013 (6)
  • April 2013 (6)
  • March 2013 (3)
  • February 2013 (7)
  • December 2012 (10)
  • November 2012 (4)
  • October 2012 (1)
  • September 2012 (3)
  • July 2012 (3)
  • June 2012 (5)
  • May 2012 (18)

Mackenzie

Hi! I'm Mackenzie! I'm currently a Fulbright English Teaching Assistant in Indonesia! I'm writing all about my year on this blog and hope you'll follow along on this journey! Read More…

A Look Back

This blog is not an official U.S. Department of State website and the views and opinions expressed here are entirely my own, and do not represent the U.S. Department of State or the Fulbright Program.

Copyright © 2025 · Foodie Child Theme by Shay Bocks · Built on the Genesis Framework · Powered by WordPress