The Year of Living Audaciously

Former food blog, now travel blog - following my year as a Fulbright ETA in Indonesia

  • Home
  • About Me
    • Travels and Life Updates
    • Privacy Policy
  • Fellow Fulbrighters
  • Never Skip Dessert
    • Recipes By Category
    • Recipe Index
    • The Best of the Best
    • The Social Kitchen Project
  • Recommended

Peppermint Bark Popcorn

December 18, 2014 by Mackenzie

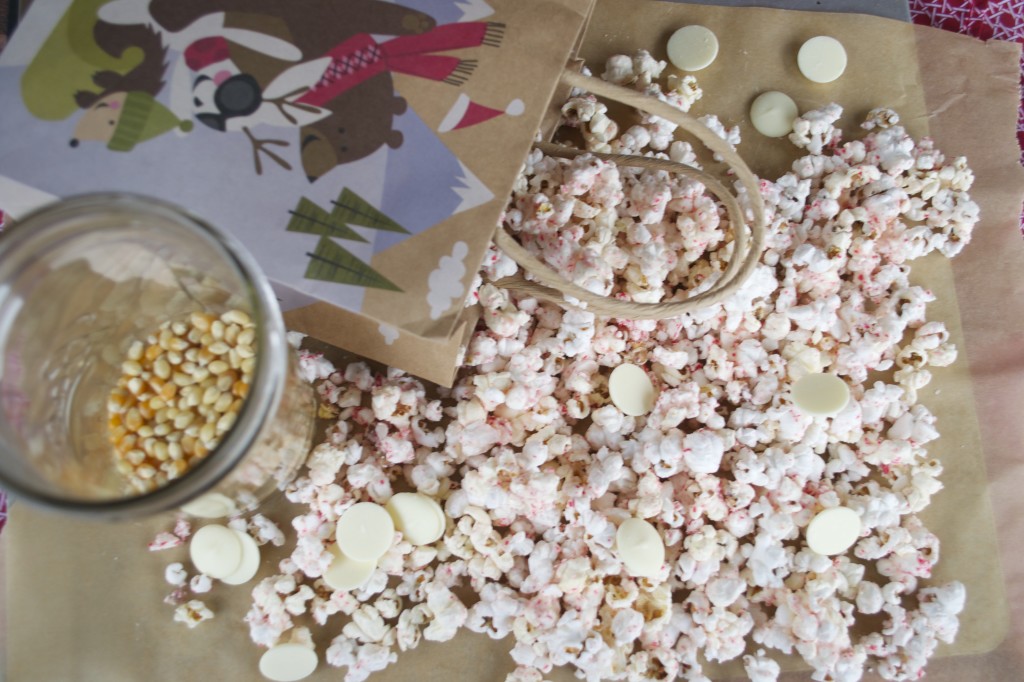
Peppermint Bark Popcorn

I’m excited to be writing this post from Seattle! Woohoo! After a long day of traveling, with 2 flights, 3 mean flight attendants, 2 nice flight attendants, 1 allergic seat mate and finally 2 nice guys who put up with a sleepy, smelly puppy… we made it! She’s happy to have a yard, I’m happy to have someone else to pass the responsibilities off to and we’re both happy to be home with our momma, Tom and Spence!

Home with the fam

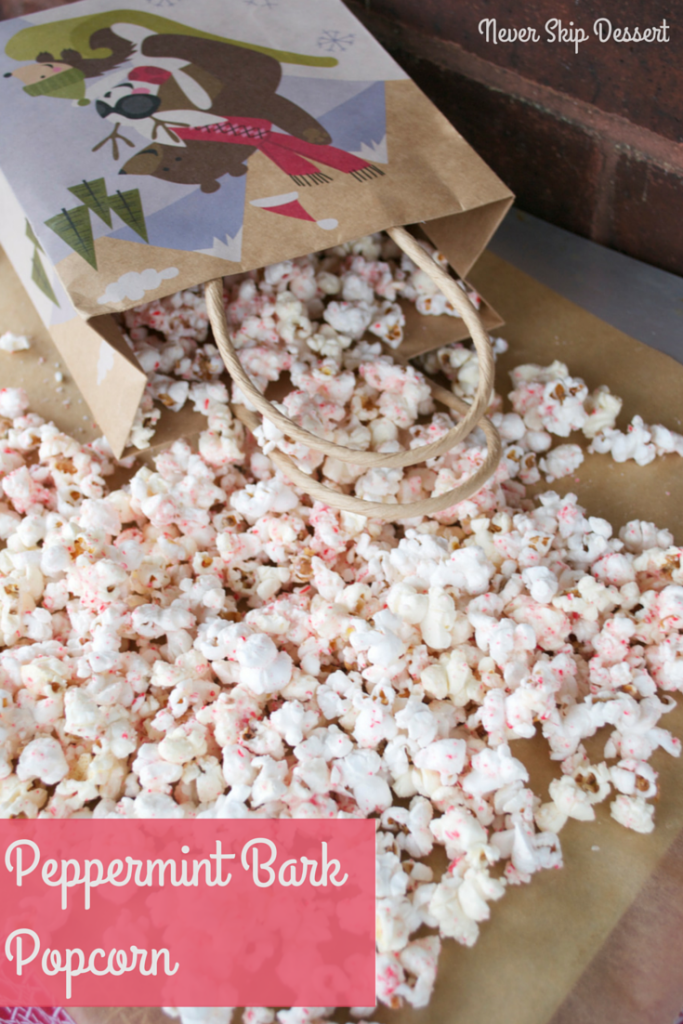
Before I left, I had to proctor and grade exams for the class I’m a TA for. I knew we had a long night of grading ahead of us so I decided to bring this Peppermint Bark Popcorn as a treat to munch on all night.

Peppermint Bark Popcorn

I was inspired by this post from Plain Chicken and knew I had to give it a shot. I had tried making it a few times in the last week and each time was a failure! Either I didn’t let the oil get hot enough and burned the kernels before they popped or the white chocolate didn’t melt and I had clumps of chocolate in my popcorn (not complaining). But I finally figured out the trick of it and am ready to share the recipe with you! It’s really quite easy to make and is perfect for a family movie night or to wrap up as gifts for friends! Let me know what you think!

Peppermint Bark Popcorn

Peppermint Bark Popcorn with Homemade Popcorn
Recipe Type: Snack
Cuisine: Christmas
Author: Mackenzie
Prep time: 20 mins
Total time: 20 mins
An easy Christmas treat! I make my popcorn over the stove so I know exactly what is in it – no creepy chemicals please! Once you get the hang of it, it’s easy!
Ingredients
  • 2 tablespoons olive oil
  • 1/3 cup popcorn kernels
  • 2 teaspoons peppermint extract, divided
  • 3 oz candy canes, crushed
  • 1 cup melting white chocolate chips, (don’t use chocolate chips – they don’t always melt well. Buy the melting chocolate – it’s so worth it)
Instructions
  1. In a large pot with a lid, heat the oil over medium-high heat. Important: wait until it is HOT. Drop a kernel or two into the oil, swish it around so it’s coated, put the lid on and wait for it to pop. Don’t add the rest of the kernels until this one has popped and the oil is hot enough. Otherwise, you’ll just burn your kernels and they will never pop (trust me on this).
  2. When the first kernel has popped, add the rest of the kernels, swish them all around so they are coated in oil, put the lid on with a crack of air and watch them pop! When they have slowed down, turn the heat off and shake the pot to get the last ones to pop. Pour 1 teaspoon of peppermint extract over the popcorn and stir it in with a big wooden spoon.
  3. While the popcorn is popping, remove the wrappers from the candy canes. Crush them by hand or in a food processor (so much easier). Pour half of the crushed candy canes over the popcorn and stir to mix.
  4. Melt the chocolate according to package directions. Pour the remaining half of the candy canes into the white chocolate and stir. Pour the melted chocolate over the popcorn and mix well.
  5. Cover a baking sheet with parchment paper and spread the popcorn over it to allow the chocolate to harden.
3.2.2885


Filed Under: Appetizers, Christmas, Desserts, Easy, Seasonal, Snacks, Winter Tagged With: candy canes, Christmas, Desserts, gift, holiday, Peppermint, popcorn, snack

Pear Butter

December 14, 2014 by Mackenzie

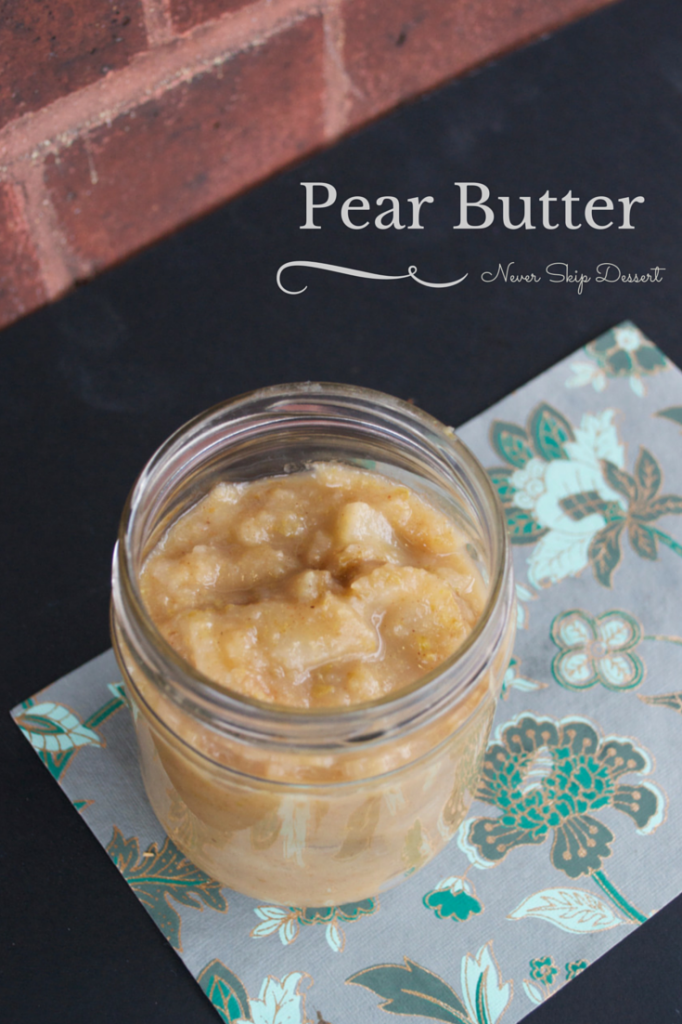
Pear Butter

Oh, it’s been so nice to have free time again! I’ve been able to go to the gym most days or at least take a big walk with Calli, have been able to cook and join my friends for meals, watch The West Wing, and sleep! Two nights ago I fell asleep on the couch and fell asleep there again yesterday afternoon! But who cares, right? Yes, I should be working more on my thesis then I am, but hey – I’ve got a great start on it and am trying to spend at least two hours a day on it. That should give me a solid start come January when I really need to get cracking.

Pear Butter

I head back to Seattle on Wednesday and am looking forward to spending time with my family and seeing old friends! I’ve only spent 11 days in Seattle since January so it will be some much needed family time before I venture off into the unknown come May!

Pear Butter

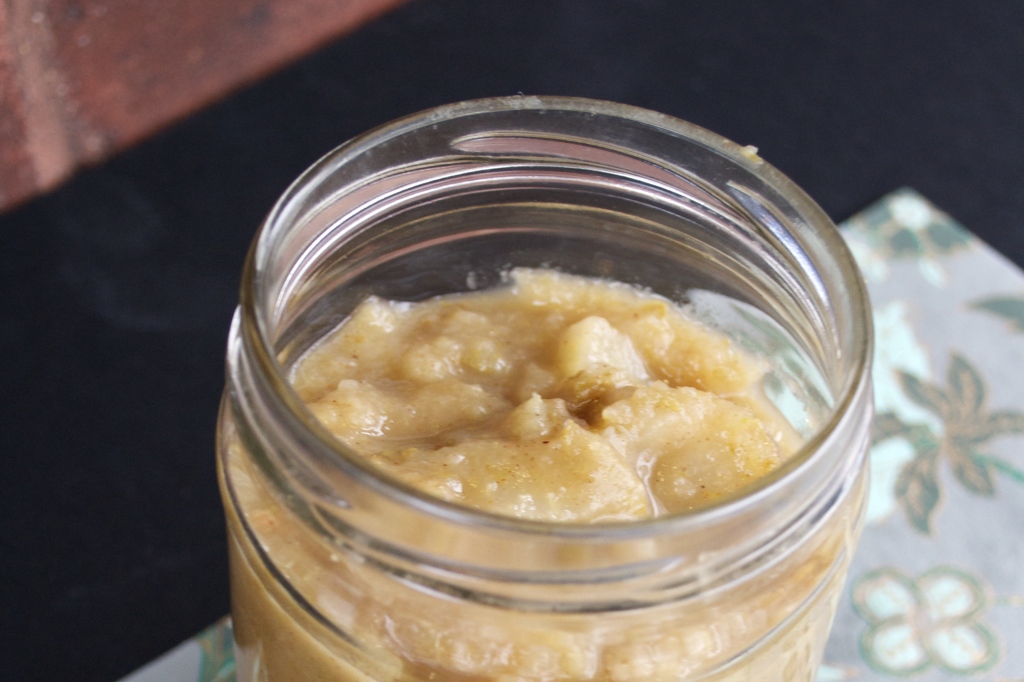
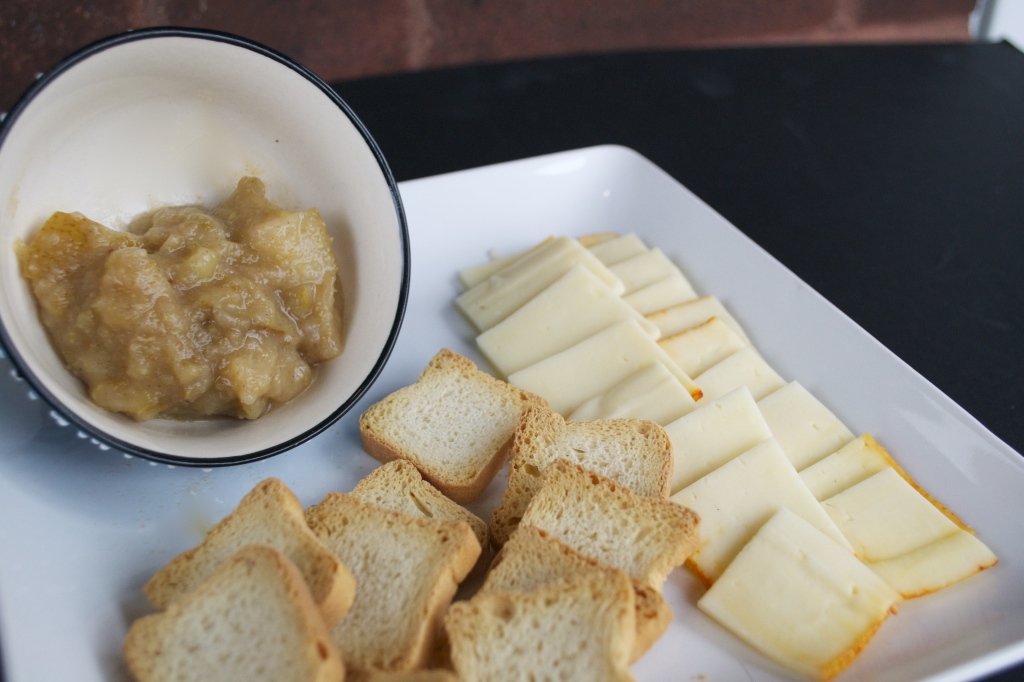
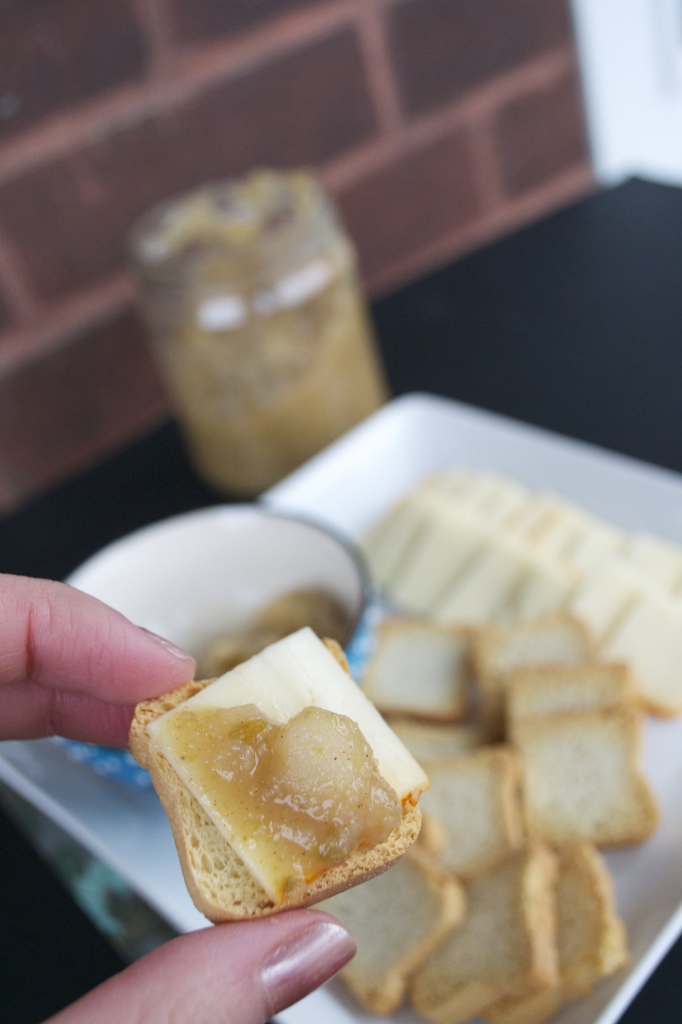
This week the Coop had our annual Winter Potluck and I brought this Pear Butter with Brie and crackers. Oh my goodness, it was delicious! I found the recipe in the Weight Watcher’s Holiday magazine and was excited to have an opportunity to try it! The recipe itself is so easy to make – have you ever made homemade applesauce? It’s just like that. You cut the pears into small bite-sized pieces and boil it down with apple cider. I used an immersion blender to make it smooth and voila – a delicious and easy appetizer! It’s a perfect spread on crackers and cheese or toast, or even just to eat like applesauce!

Pear Butter

Pear Butter
Recipe Type: Appetizer
Author: Mackenzie
Prep time: 10 mins
Cook time: 15 mins
Total time: 25 mins
Serves: 12 servings
A great holiday appetizer! Quick, easy and only 1 WW point per 1/4 cup.
Ingredients
  • 5 Comice pears, cored and chopped into bite-sized pieces
  • 1 1/2 cups apple cider
  • 1/2 teaspoon cinnamon
  • Pinch of nutmeg
  • Serve with cheese and crackers
Instructions
  1. In a medium/large saucepan, add the chopped pears, apple cider, and the cinnamon and nutmeg. Cook over medium-high heat to get a roiling boil. Continue to cook at medium heat until the pears are soft, 10-15 minutes.
  2. From here, you can do a couple of things. I used an immersion blender to puree the pears while still in the saucepan. It left a few small chunks but I loved it that way and it was super easy.
  3. Alternatively, you can remove the pears and puree them separately in a food processor. Continue to simmer the remaining liquid until it reduces to a syrup. Then pour the syrup into the food processor and blend it with the pears. This will probably get you a smoother substance but I couldn’t find the Coop’s food processor so I was left with the immersion blender.
  4. Serve with crackers and cheese for a great appetizer!
3.2.2885


Filed Under: Appetizers, Christmas, Easy, Healthy, Seasonal, Sides, Snacks, Weight Watchers, Winter Tagged With: Appetizer, apple cider, butter, Christmas, dips, Easy, healthy, holiday, Pears, sauce, Thanksgiving, Weight Watchers

Caramelized Onion & Gruyere Tart

November 13, 2014 by Mackenzie

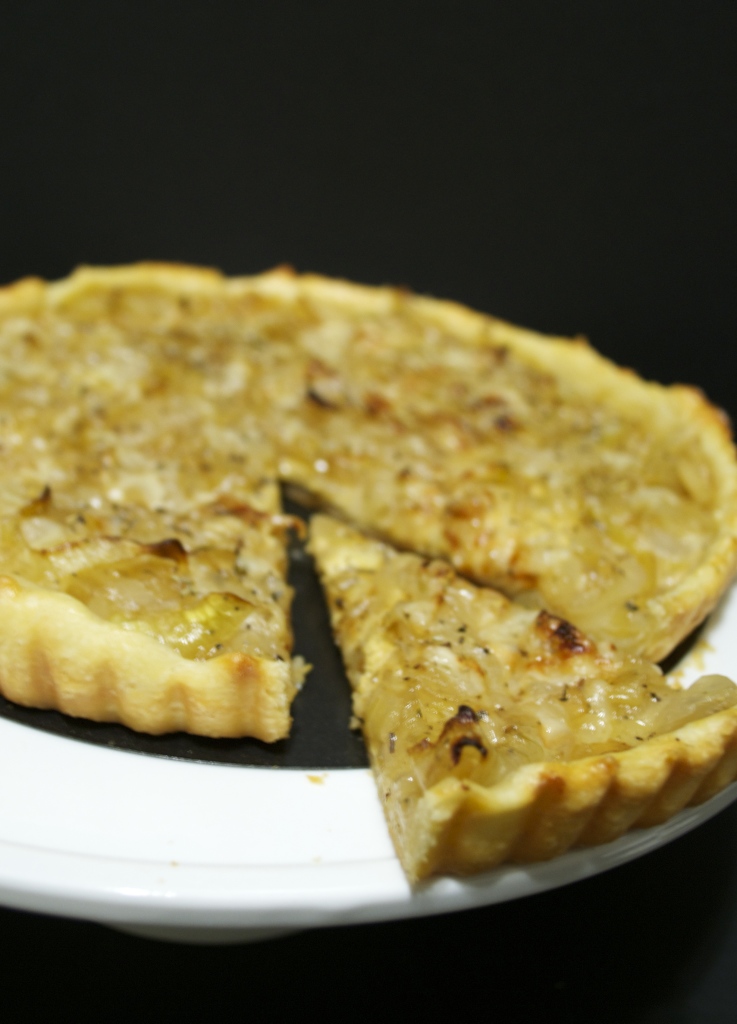
Caramelized Onion & Gruyere Tart

I cannot believe it’s mid-November – the time is flying! I only have two more full weeks of class this semester. How is that possible?! I’m not ready for this semester to be done… I feel like I’m just getting into the groove with my classes – I love the material and my professors… Gosh, it’s crazy to think I’ll be on the downhill slide of college in just a little over a month!

I registered for my final semester of classes this week. It hasn’t quite hit me that this is the end. No more pouring over course listings, no more playing with my registration worksheet – I’m set for this last semester! It’s going to be a light semester and I am so looking forward to that! That’s what your senior spring semester is supposed to be, right? 🙂 Although I’m sure I’ll be filling my spare time pouring over job listings and writing cover letters… oh, what fun!

Caramelized Onion & Gruyere Tart

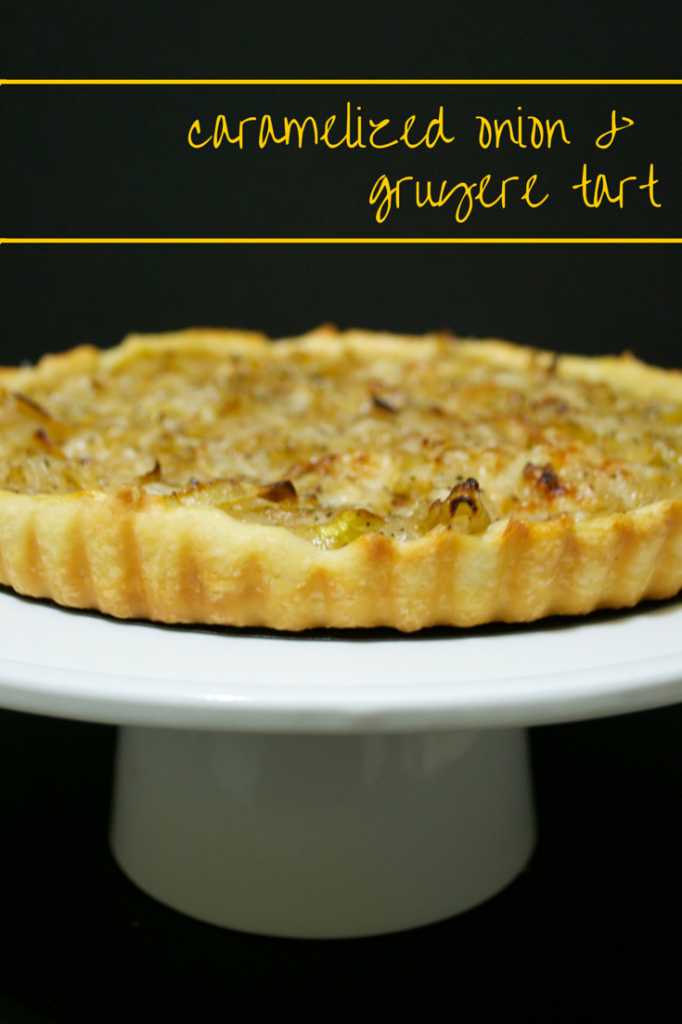
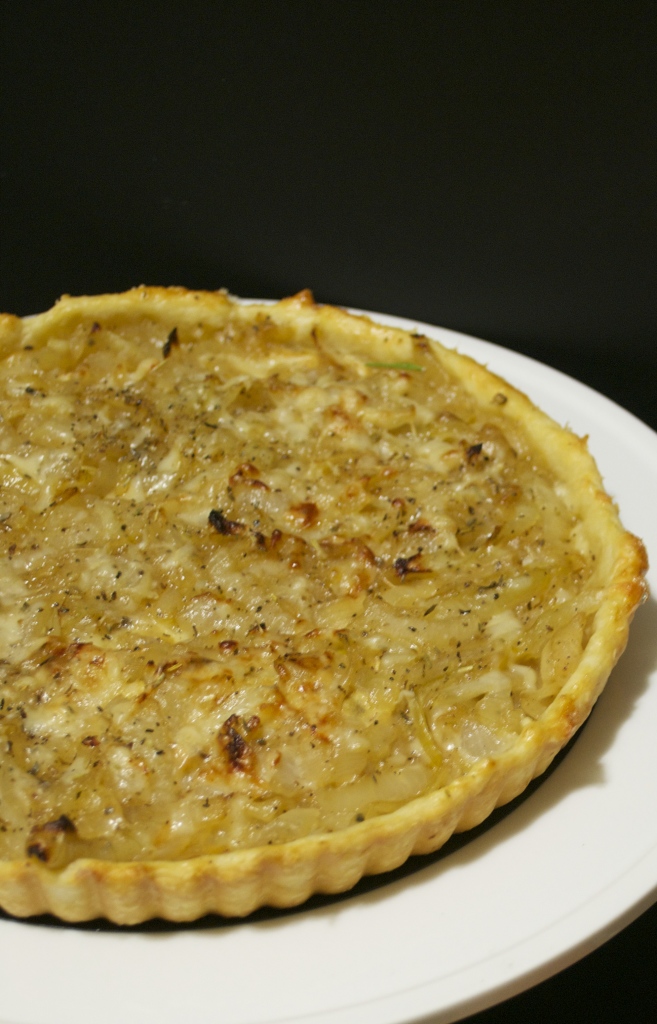
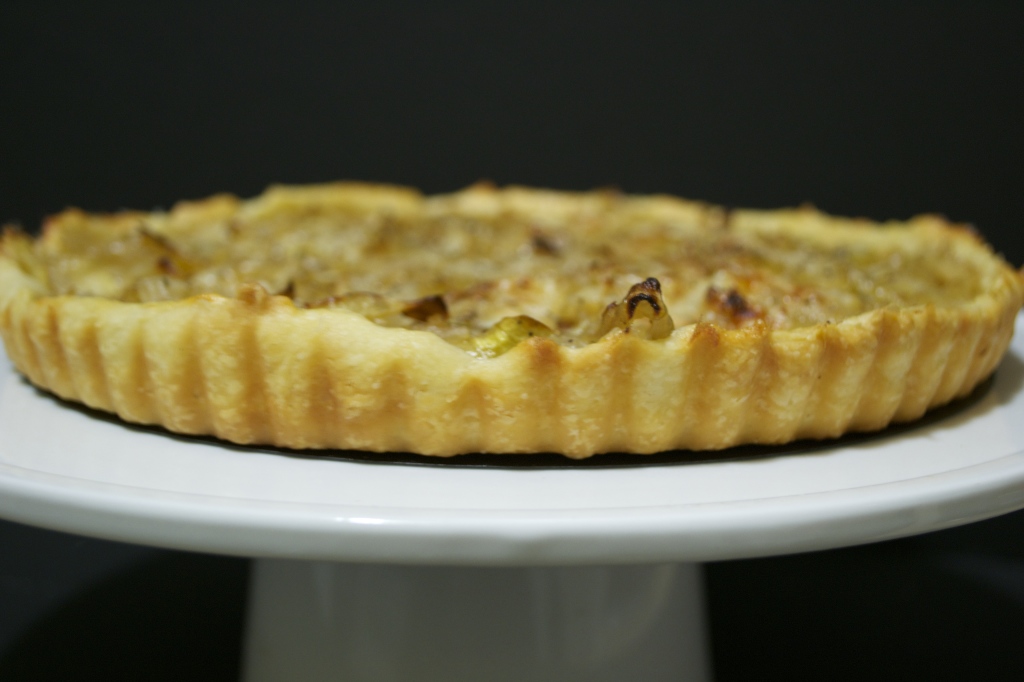
Today I’ve got this delicious savory tart to share with you! I needed a quick and easy dish to bring to a potluck and I started day-dreaming about a tart with caramelized onions, creamy cheese and herbs while I was in class today. So I came home and created this Caramelized Onion and Gruyere Tart! It turned out wonderfully, and beautiful too! I almost wish I hadn’t brought it to the potluck because I only got a small slice and I would have loved to have more! I’ll just have to make it again!

Caramelized Onion & Gruyere Tart

I combined a couple of different recipes for this: the crust is from Williams Sonoma and the filling I adapted from Lovely Bits Blog. The end result was fantastic and I will definitely be making this again – it was so easy and perfect on a chilly winter night. Caramelized Onion & Gruyere Tart

Caramelized Onion & Gruyere Tart
Recipe Type: Appetizer, Dinner
Cuisine: Savory
Author: Mackenzie
Prep time: 1 hour 10 mins
Cook time: 20 mins
Total time: 1 hour 30 mins
Serves: 8 slices
A savory tart with a flaky crust and mouthwatering filling. It is easy to make and wonderfully shareable! You’ll amaze your guests!
Ingredients
  • 1 cup all-purpose flour
  • 1/4 teaspoon salt
  • 1/4 teaspoon sugar
  • 6 tablespoons unsalted butter, cut into 1/2-inch cubes
  • 3-4 tablespoons ice water
  • 2 tablespoons butter
  • 2 large vidalia (sweet) onions, halved and sliced thin
  • 1/2 teaspoon salt
  • 1/2 teaspoon pepper
  • 1 teaspoon sugar
  • 1 egg white, lightly beaten
  • 3 tablespoons dijon mustard
  • 3/4 cup shredded gruyere cheese
  • Fresh rosemary or dried herbs
Instructions
  1. Prepare the crust: In a food processor, pulse together the flour, salt and sugar just to combine. Add the butter and pulse until pea-sized pieces form. Add the water and pulse until dough comes together in a ball. Gather dough into a ball, form into a disk and wrap in plastic wrap. Chill for at least 30 minutes.
  2. On a floured surface, roll out the dough into a circle just a little bigger than your tart pan. Carefully transfer the dough to the tart pan. Chill for another 30 minutes while you prepare the filling.
  3. In a large skillet over medium-high heat, melt the butter. Add the onions, salt, pepper, and sugar. Cook onions for 8-10 minutes over medium high heat, stirring occasionally, until tender. Reduce heat to low, cover and cook for 7-10 more minutes, until onions are browned and caramelized.
  4. Preheat oven to 425 degrees. Brush crust with egg white and spread dijon mustard over crust. Sprinkle 1/2 cup of the cheese over the mustard and then top with the caramelized onions. Sprinkle the rest of the cheese over the top and finish with some fresh rosemary or dried herbs sprinkled over the top.
  5. Bake at 425 for 17-19 minutes, until crust is golden and cheese is melted. Let sit for 5 minutes before serving.
3.2.2802


Filed Under: Appetizers, Dinner, Easy, Seasonal, Thanksgiving, Winter Tagged With: Appetizer, caramelized onions, cheese, dough, Easy, gruyere, potluck, rosemary, savory, tart

Salted Pecan Butter

November 7, 2014 by Mackenzie

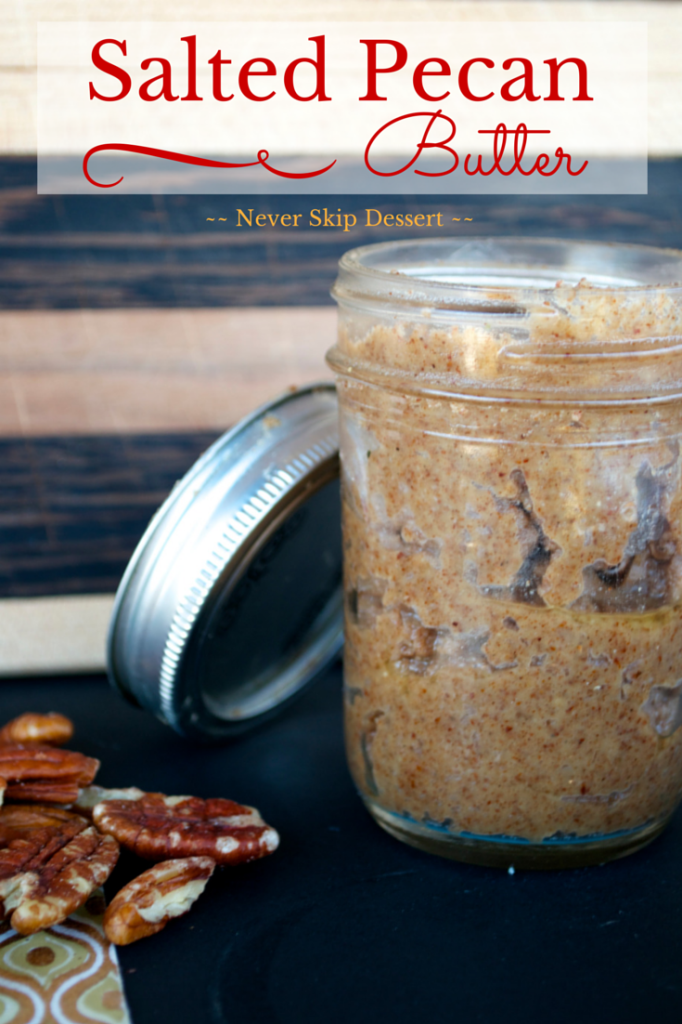
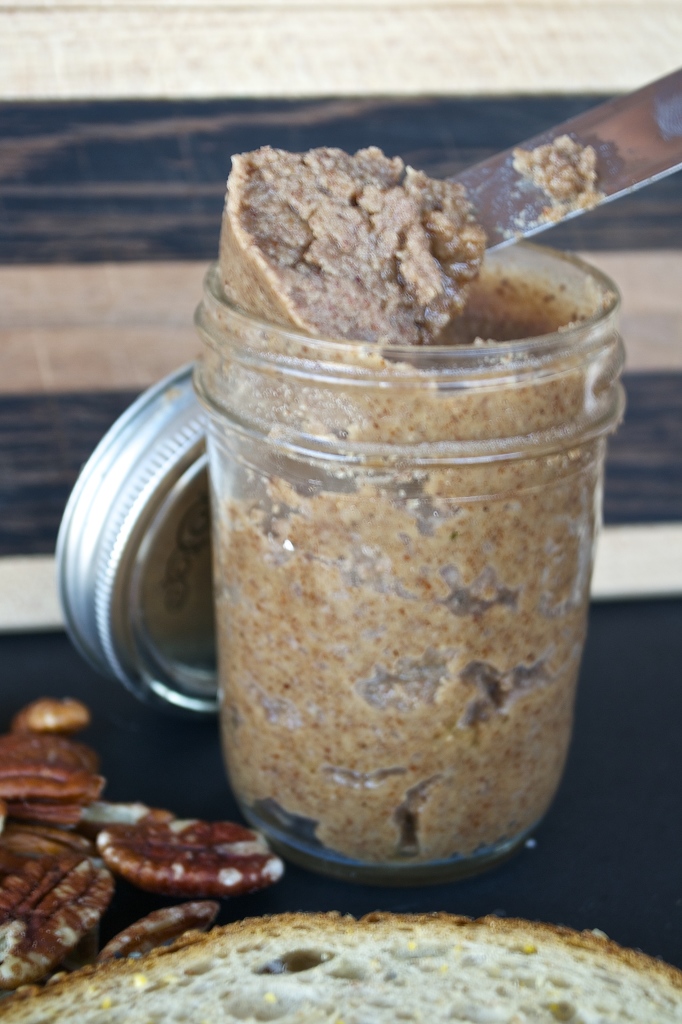
Salted Pecan Butter ~ nutty and salty this pecan butter is easy to make and is a delicious spread on toast!
In classic Mackenzie fashion, the weeks have slipped away and its been a few weeks since my last post! I was hoping to stay more on top of things but of course… that didn’t happen. But I’m perfectly okay with that – blogging is something I do for fun and if there isn’t time for it, that means I’m busy with school or other, more fun things!

The last few weeks have been a little bit of all of both! School has been busy but exciting. I love my classes and although I am taking a heavier than usual load, this has been one of my favorite semesters. I’m deep in the midst of writing my senior honors thesis – it’s an exciting process and call me crazy, but I reward myself at the end of each week with “time” to work on my thesis. Ha! With the end of the semester rapidly approaching, it’s time to crack down and make some serious progress… fun fun! I have all 24 interviews transcribed into a 118 page document and a massive, glorious spreadsheet to start my analysis. This week I’ve been coding the data and I’ll start writing this weekend!

Salted Pecan Butter ~ nutty and salty this pecan butter is easy to make and is a delicious spread on toast!And what have I been up to in the kitchen? Well… I made a crockpot Chicken Tortilla Soup a few weeks ago that was delicious! And so easy! Sadly, the photos I took were just terrible and so I’ll have to make it again before I post it 🙂 But I did hit a home-run with this Salted Pecan Butter!

Libby came home from the farmer’s market last weekend with a tiny jar of pecan butter. It was nutty, creamy and absolutely amazing – so naturally, I had to recreate it. I found a recipe from Cookie and Kate and gave it my own little twist with some extra salt and a dash of cinnamon – and boy, do I have a new favorite treat! It’s a bit unfortunate that pecans are so expensive, but if you can buy them in bulk it would cut down on the price! Regardless, I’m definitely going to be making pecan butter all winter long!

Salty and nutty, this pecan butter is a must-try!

Salted Pecan Butter
Recipe Type: Butter, Side, Spread
Author: Mackenzie
Prep time: 15 mins
Total time: 15 mins
Serves: 1.5 cup
A nutty spread with a hint of a salty undertone and a dash of cinnamon to sweeten it up.
Ingredients
  • 2 cups pecans
  • Sea salt, to taste
  • Cinnamon, to taste
  • Maple syrup, to taste
Instructions
  1. Toast the pecans in a medium skillet over medium heat for 4-7 minutes. Once toasted and fragrant, transfer to food processor.
  2. Blend in a food processor until it is creamy and smooth, like peanut butter! It can take awhile, close to ten minutes, so be patient! Scrap down the sides often!
  3. Once it is smooth and creamy, add a pinch or two of salt, a dash of cinnamon and a teaspoon or two of maple syrup. Blend and taste and adjust flavors to your liking! I added extra salt and LOVED the combination of the nutty spread with salty undertones and a sweet cinnamon finish. Pour into a small jar, seal with a lid and enjoy with toast!
3.2.2802


Filed Under: Appetizers, Breakfast, Easy, Fall, Healthy, Seasonal, Sides, Snacks Tagged With: Breakfast, butter, pecan butter, pecans, spread, toast

Caramel Puppy Chow

September 12, 2014 by Mackenzie

Caramel Puppy Chow2
Why do I always overcommit myself?! I’ve hit an all-time high for maxing out every spare minute of every single day – I’m taking 19.5 credits (so six classes plus a thesis), working 16-20 hours a week at Nordstrom, TAing a class (and grading papers every weekend), on exec for Sigma Iota Rho (running communications for a 100+ person honorary), am trying to find a job/scholarship/fellowship/SOMETHING for next year, and also trying to enjoy my senior year and my friends and the beautiful fall weather. Oh, and trying to workout, blog, cook, and maintain a semi-clean apartment. That’s sane, right?

Ha. On top of that, I’ve had a nasty cold for two weeks, which is making me tired and even more stressed. Before you start pitying me… please know I’m not complaining! Just taking two seconds to vent a bit and give you a little insight into my crazy days… But what I want you to take away is that despite how busy it is, despite how exhausted I am when I collapse into bed at midnight, despite how much I want to roll back over and keep sleeping when my alarm goes off at 6am… I’m blessed and honored to be able to do all that I am. I’m taking 19.5 credits largely because I want to! I don’t actually need half of these classes for my major or even as more credits to graduate – I just enjoy learning and these classes interest me! It’s my last year of school for the near future and I’m not going to be able to take classes like this probably ever again… So I’m absolutely going to take that extra class on Women and the Law. I’m absolutely going to take them all for a grade and not audit any…because I want to read, research and write excellent papers – I have and always will be a student.

But I will say… when I come home after a long day, what I absolutely love is squeezing a half hour in to checking in on my blog and readr people’s comments on my posts or on facebook, watch my pins on pinterest fly around, connect with other bloggers through a facebook group I’m apart of, learn more about SEO optimizations, plug-ins and ad networks… It’s my break. It’s my relief. Cooking is my passion and sharing it through this blog is rapidly becoming almost as therapeutic.

So all that to say… this year could be crazy. I may not sleep a lot. I may be pulled in a zillion different directions. I may feel overwhelmed by two jobs, my classes and the regular duties of life… but I’m going to keep blogging because it’s my outlet… my form of expression…my happy place.

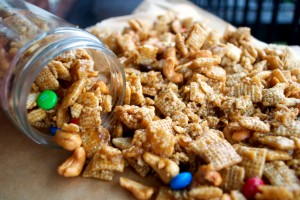
But now we need a recipe! I made this Caramel Puppy Chow for a SIR meeting. We had about 80 people coming and so I made a couple of desserts from Julie’s Eats and Treats to share! These were such a hit! Caramel coated chex mix and cashews with some M&Ms added for good measure… who could resist?Caramel Puppy Chow

Caramel Puppy Chow 3

Caramel Puppy Chow
Recipe Type: Dessert, Snack
Author: Mackenzie
Prep time: 15 mins
Total time: 15 mins
Recipe From Julie’s Eats and Treats
Ingredients
  • 1 (14 oz) box of Rice Chex cereal
  • 1 (8 oz) can of cashews
  • 1 cup butter
  • 1 1/2 cups brown sugar
  • 1/2 cup light corn syrup
  • 1 teaspoon baking soda
  • 1 teaspoon vanilla
  • 1 bag M&Ms
Instructions
  1. In a large bowl, combine the Rice Chex cereal and cashews. Set aside.
  2. In a medium saucepan over medium heat, bring the butter, brown sugar and corn syrup to a boil. When boiling and mixture is melted together, remove pan from heat and stir in baking soda and vanilla. Pour half of caramel mixture over cereal and cashews. Using salad tongs, gently stir the caramel into the cereal. Add the rest of the caramel and carefully stir it all together ensuring all the chex is coated.
  3. Line two baking sheets with wax paper. Spread the cereal in a single layer on the wax paper to dry. Sprinkle m&ms over. When cool, break up caramel chow and serve!
3.2.2802


Filed Under: Appetizers, Desserts, Easy Tagged With: caramel, cashews, Desserts, Feature, kids, m&ms, puppy chow, Snacks

Falafel Hummus

September 6, 2014 by Mackenzie

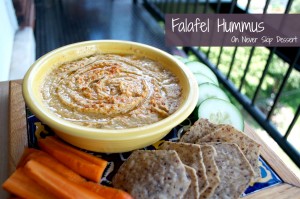
Okay, why have I never attempted to make my own hummus before?! I am a big veggies/hummus/pita eater… its a healthy, easy go-to meal or snack but I ALWAYS go through my hummus so fast! And have you realized how expensive it is to buy? It’s crazy!

Falafel Hummus3

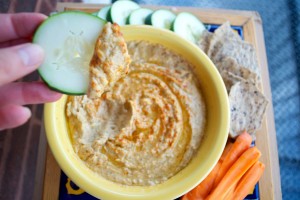
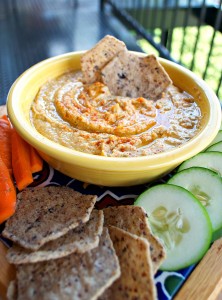
It’s really crazy because of how EASY it is to make your own! I know a lot of people who make their own hummus, I had just never tried it. Well, I saw this recipe for Falafel hummus on pinterest and decided to give it a whirl! I had a can of chickpeas in my pantry and I had all the spices on hand – so it was incredibly easy and inexpensive to make!


Falafel Hummus4Plus, it is so satisfying! It is easy to tweak the flavors and adjust to your liking too! I can’t wait to try more soon!

Falafel Hummus

Falafel Hummus
Recipe Type: side, dip
Cuisine: vegetarian, gluten-free, vegan
Author: Mackenzie
Prep time: 5 mins
Total time: 5 mins
Recipe adapted from VeggieandtheBeastFeast.com
Ingredients
  • 1 (15 oz) can chickpeas, rinsed and drained
  • 2 cloves garlic, minced
  • 1/2 tablespoon dried oregano
  • 1/2 tablespoon ground cumin
  • 1/2 tablespoon ground coriander
  • 1/2 teaspoon chili powder
  • 1/8 teaspoon crushed red pepper
  • 1/2 teaspoon sea salt
  • 2 tablespoons tahini
  • 6 tablespoons water
  • 3 tablespoons olive oil, plus more to drizzle on top
Instructions
  1. Place chickpeas, garlic, oregano, cumin, coriander, chili powder, crushed red pepper, sea salt, tahini and water in a food processor and blend until smooth. Scrap down sides as needed. Pour olive oil in while blending and process until smooth. Add more water if you want a smoother texture.
  2. To serve, transfer to a serving dish, drizzle with olive oil and sprinkle with paprika. Serve with vegetables like cucumbers or carrots or pita and falafel.
3.2.2802


Filed Under: Appetizers, Dinner, Easy, Healthy, Lunch, Sides Tagged With: Appetizer, carrots, chickpeas, cucumber, Dinner, Easy, falafel, Feature, healthy, hummus, Lunch, pita, snack, tahini

Next Page »

Meet Mackenzie

Hi! I'm Mackenzie! I'm currently a Fulbright English Teaching Assistant in Indonesia! I'm writing all about my year on this blog and hope you'll follow along on this journey! Read More…

Disclaimer:

Students and Indonesian Friends: Please don't take anything I say here as critical of my experience or you and your culture. Rather, through this blog I want to share my experience in your country with my friends and family in America! I may write and laugh about a lot of things that are different but none of it is bad, it's just different!

This blog is not an official Department of State website, and the views and information presented here are my own and do not represent the Fulbright Program or the Department of State.

My Latest Posts on Instagram

[instagram-feed]

My Latest Reads

My Latest Reads

Between the World and Me
5 of 5 stars
Between the World and Me
by Ta-Nehisi Coates
If You Follow Me: A Novel
3 of 5 stars
If You Follow Me: A Novel
by Malena Watrous
The Goldfinch
4 of 5 stars
The Goldfinch
by Donna Tartt
Missoula: Rape and the Justice System in a College Town
4 of 5 stars
Missoula: Rape and the Justice System in a College Town
by Jon Krakauer
Station Eleven
4 of 5 stars
Station Eleven
by Emily St. John Mandel
Fight Back and Win
2 of 5 stars
Fight Back and Win
by Gloria Allred

goodreads.com

Archives

  • August 2017 (1)
  • June 2017 (2)
  • March 2017 (1)
  • February 2017 (1)
  • January 2017 (1)
  • December 2016 (1)
  • November 2016 (3)
  • October 2016 (3)
  • September 2016 (2)
  • August 2016 (2)
  • June 2016 (1)
  • May 2016 (3)
  • April 2016 (1)
  • March 2016 (4)
  • February 2016 (2)
  • January 2016 (1)
  • December 2015 (3)
  • November 2015 (2)
  • October 2015 (4)
  • September 2015 (5)
  • August 2015 (6)
  • June 2015 (2)
  • March 2015 (1)
  • December 2014 (4)
  • November 2014 (3)
  • October 2014 (3)
  • September 2014 (4)
  • August 2014 (5)
  • July 2014 (4)
  • June 2014 (2)
  • April 2014 (1)
  • March 2014 (4)
  • February 2014 (1)
  • January 2014 (3)
  • December 2013 (5)
  • November 2013 (3)
  • October 2013 (1)
  • September 2013 (4)
  • August 2013 (3)
  • July 2013 (2)
  • June 2013 (6)
  • May 2013 (6)
  • April 2013 (6)
  • March 2013 (3)
  • February 2013 (7)
  • December 2012 (10)
  • November 2012 (4)
  • October 2012 (1)
  • September 2012 (3)
  • July 2012 (3)
  • June 2012 (5)
  • May 2012 (18)

Mackenzie

Hi! I'm Mackenzie! I'm currently a Fulbright English Teaching Assistant in Indonesia! I'm writing all about my year on this blog and hope you'll follow along on this journey! Read More…

A Look Back

Peanut Butter Kiss Cookies
This blog is not an official U.S. Department of State website and the views and opinions expressed here are entirely my own, and do not represent the U.S. Department of State or the Fulbright Program.

Copyright © 2025 · Foodie Child Theme by Shay Bocks · Built on the Genesis Framework · Powered by WordPress