The Year of Living Audaciously

Former food blog, now travel blog - following my year as a Fulbright ETA in Indonesia

  • Home
  • About Me
    • Travels and Life Updates
    • Privacy Policy
  • Fellow Fulbrighters
  • Never Skip Dessert
    • Recipes By Category
    • Recipe Index
    • The Best of the Best
    • The Social Kitchen Project
  • Recommended

Archives for May 2013

Deep Dish Apple Pie

May 26, 2013 by Mackenzie

http://users.erols.com/rbrwak/

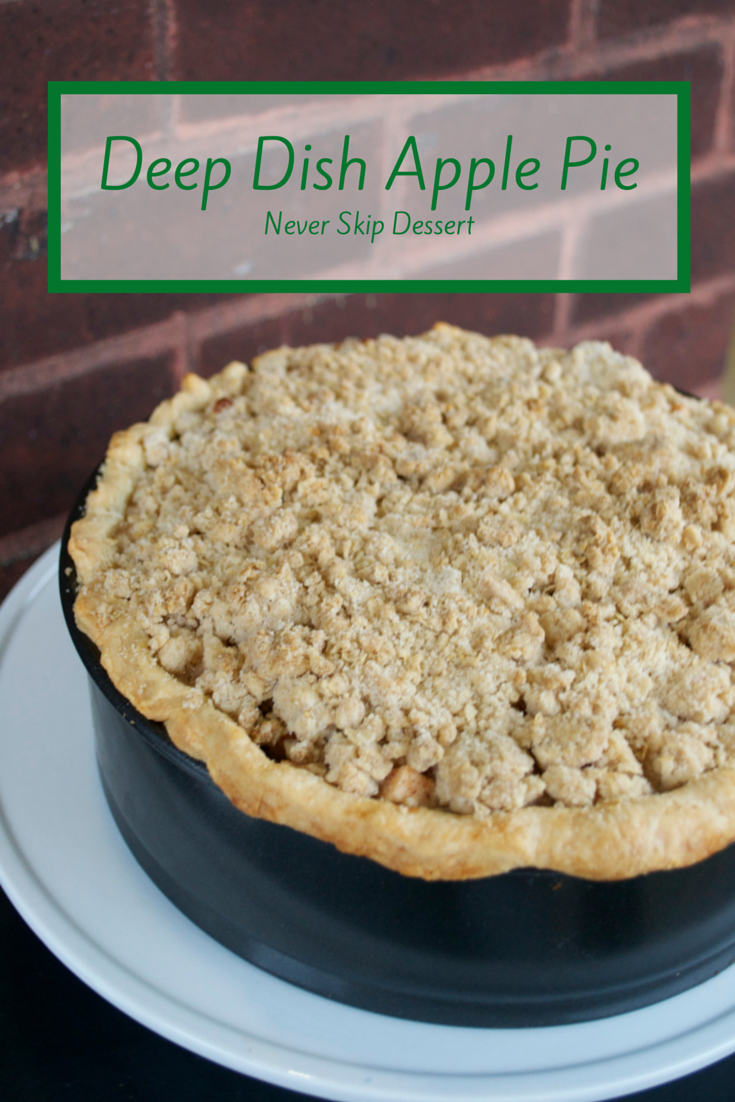
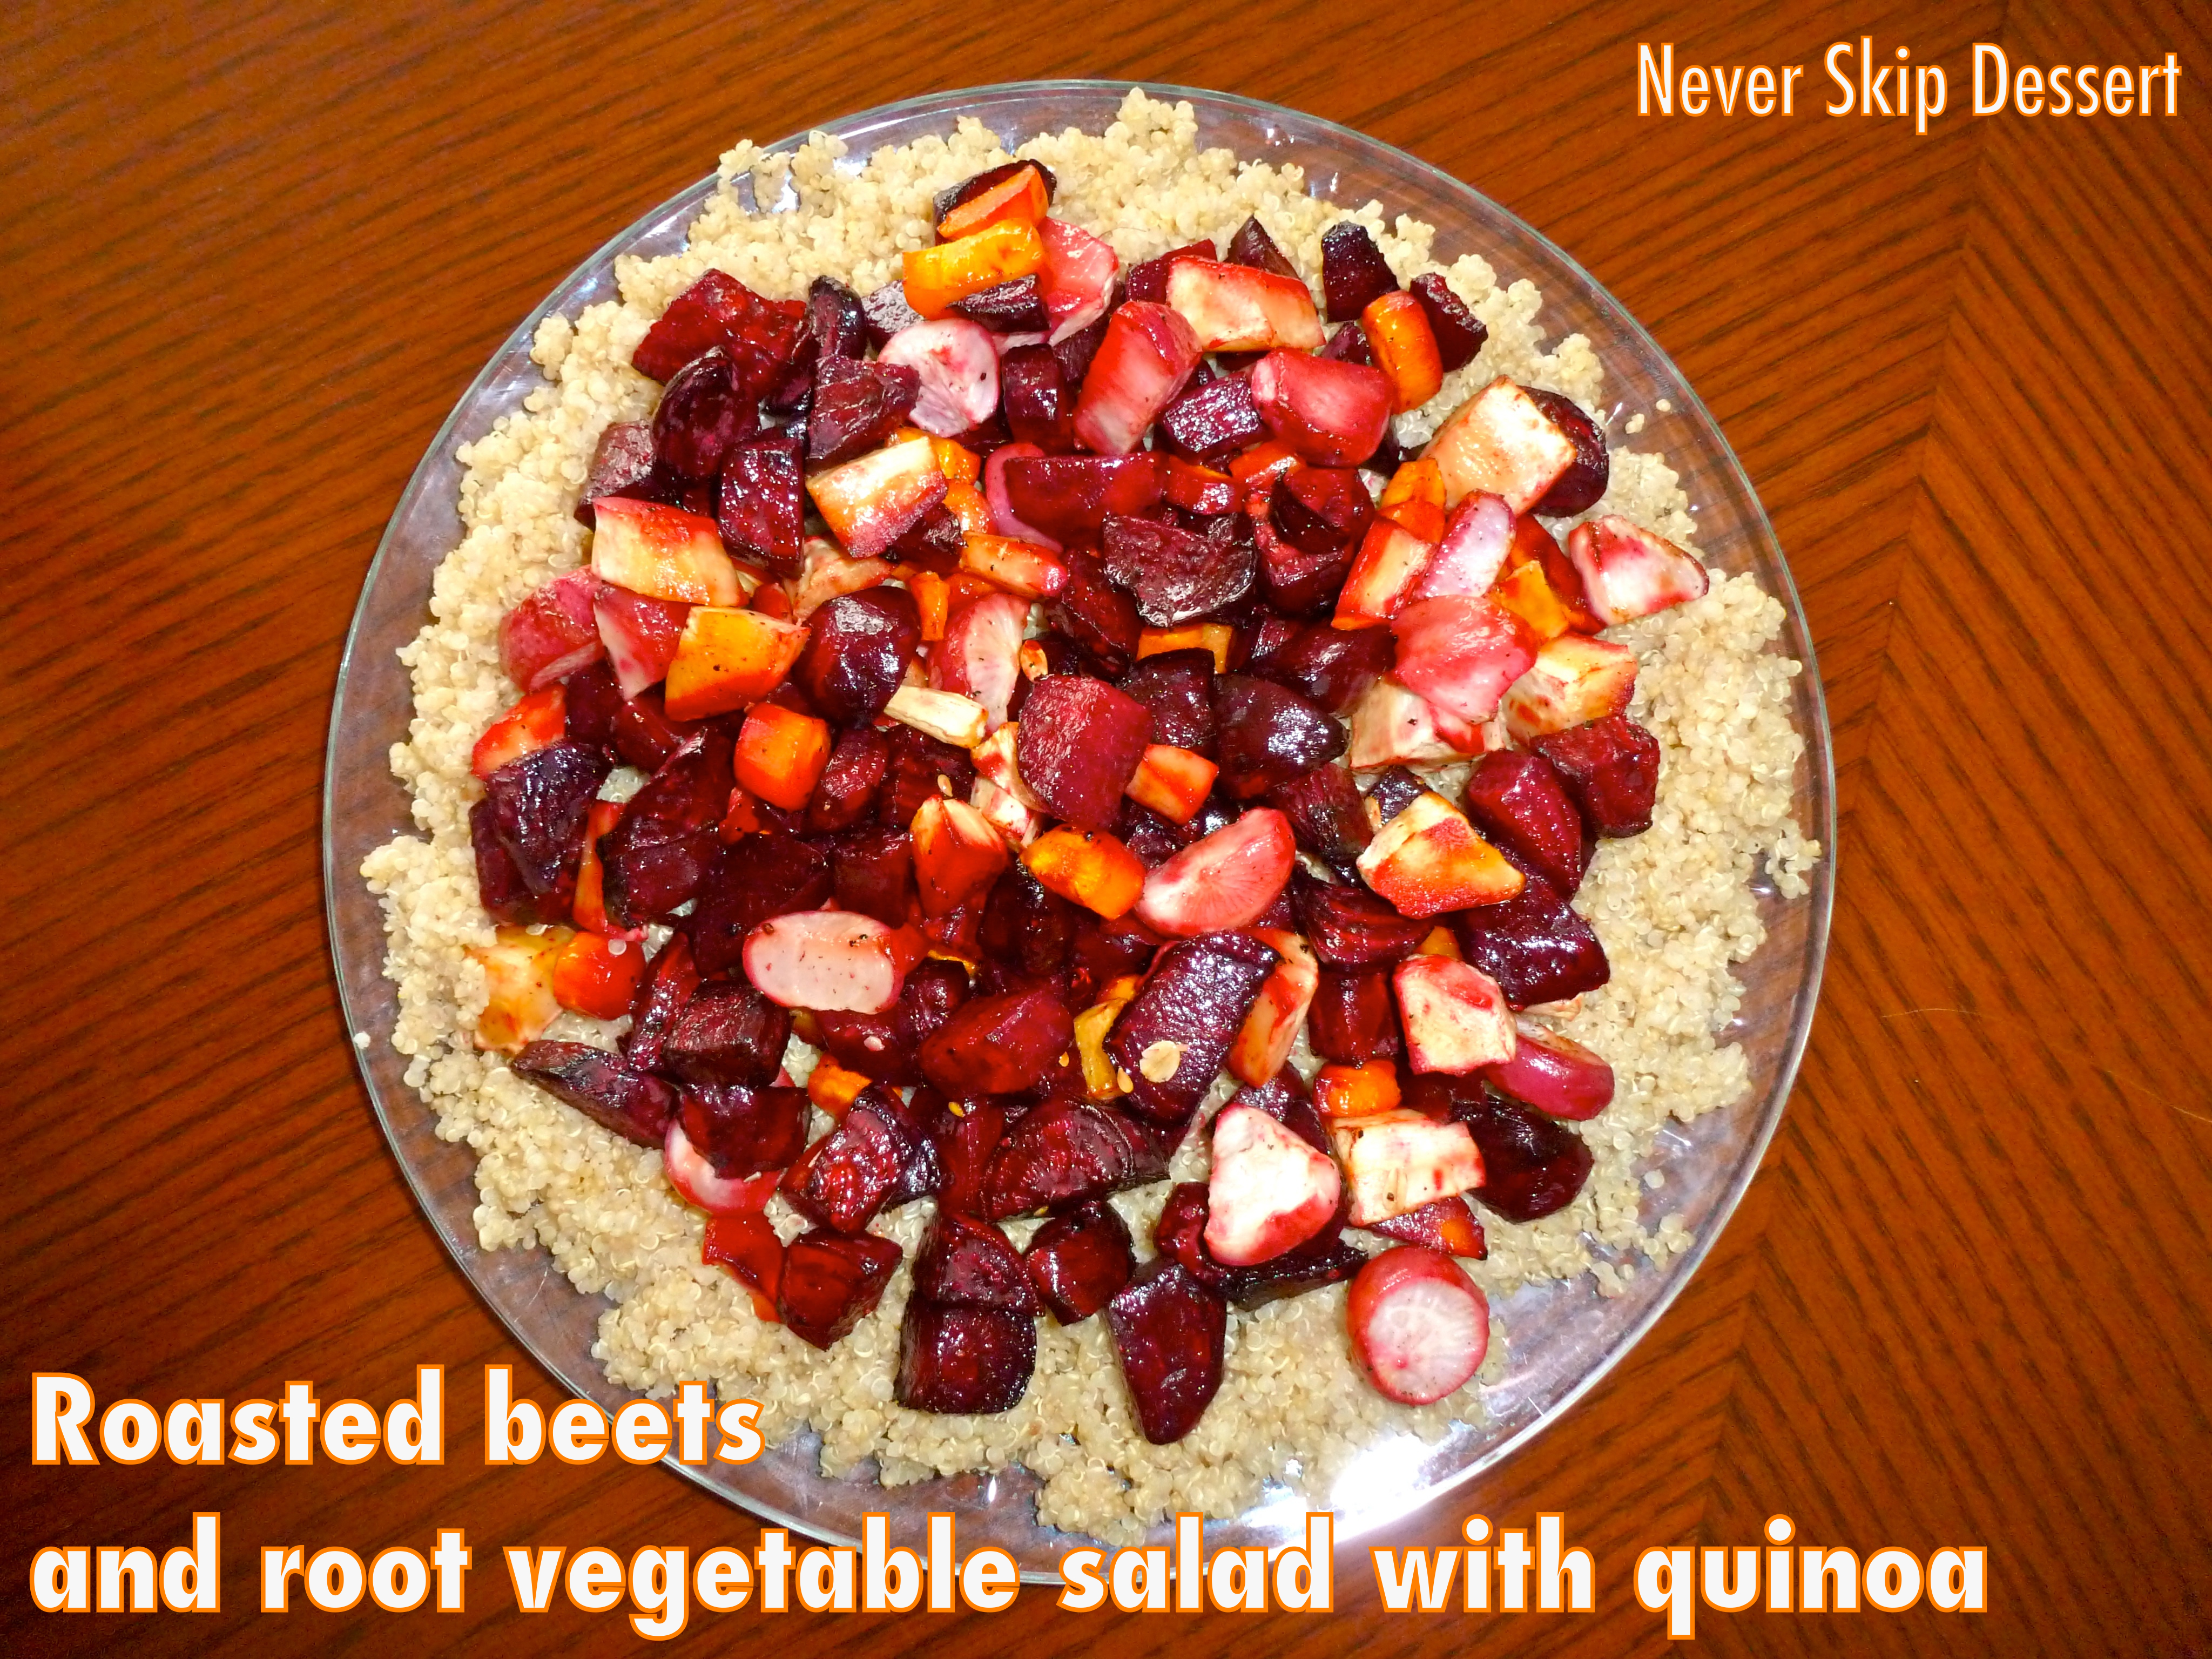
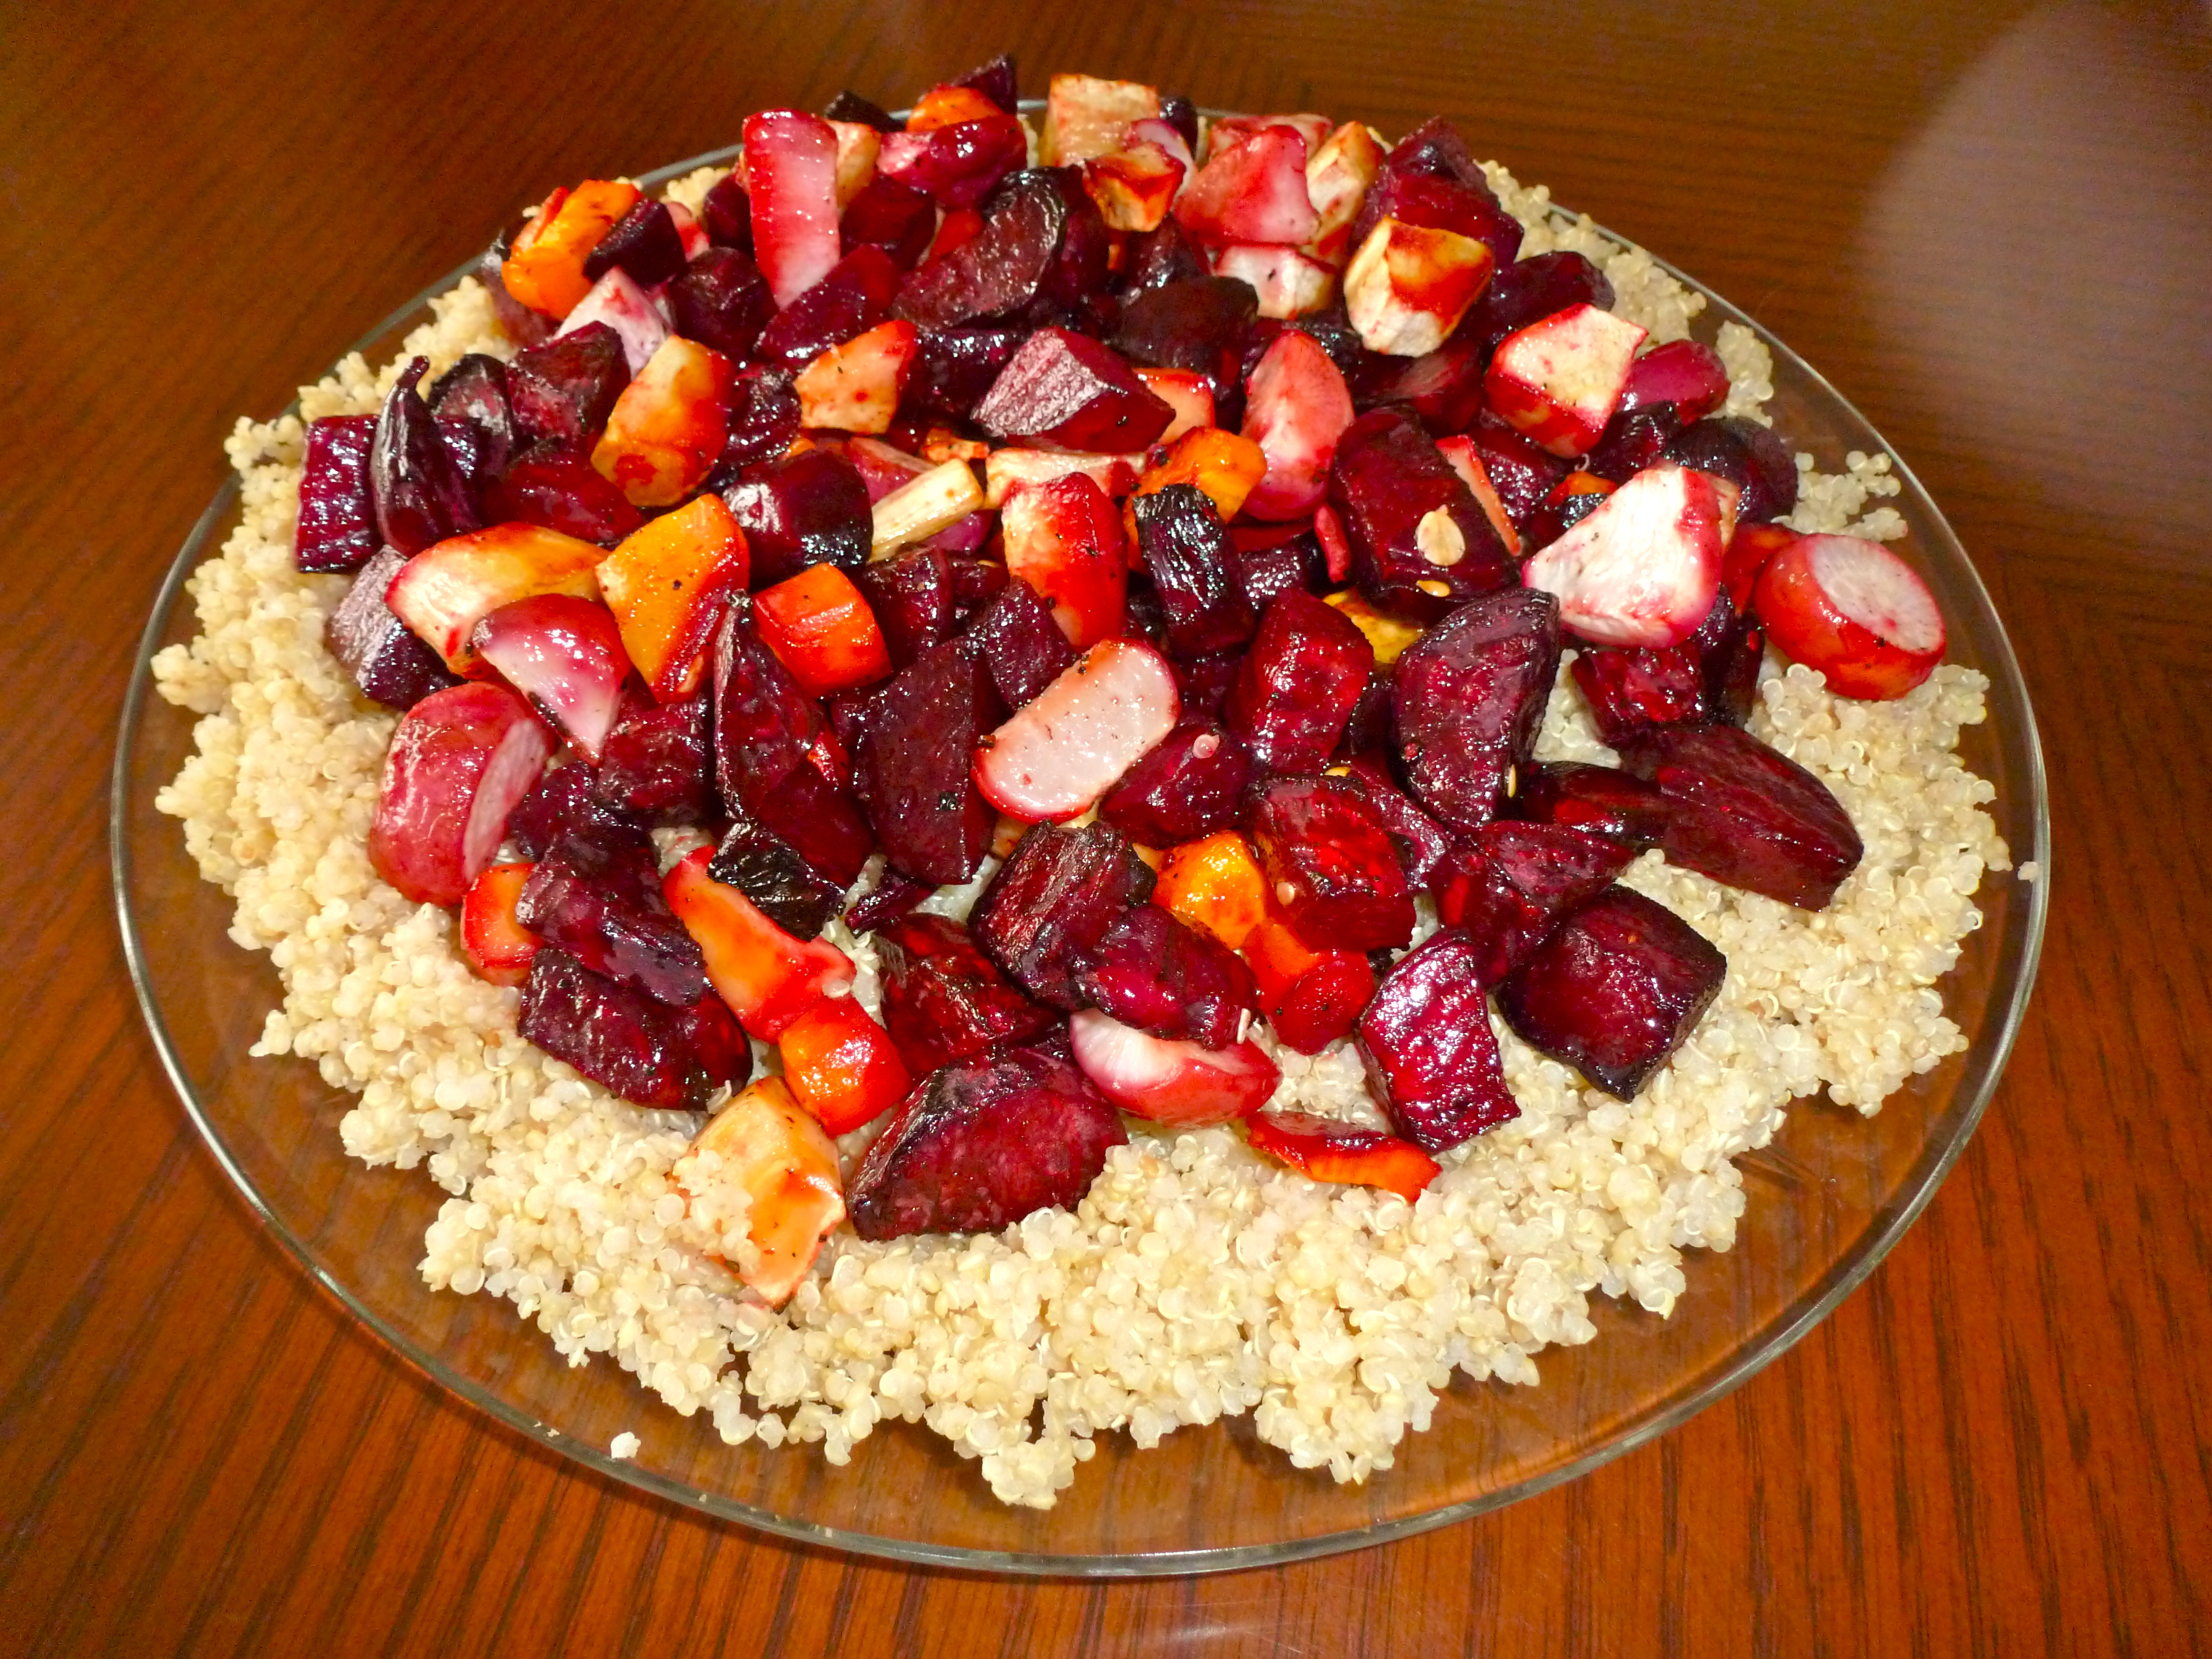
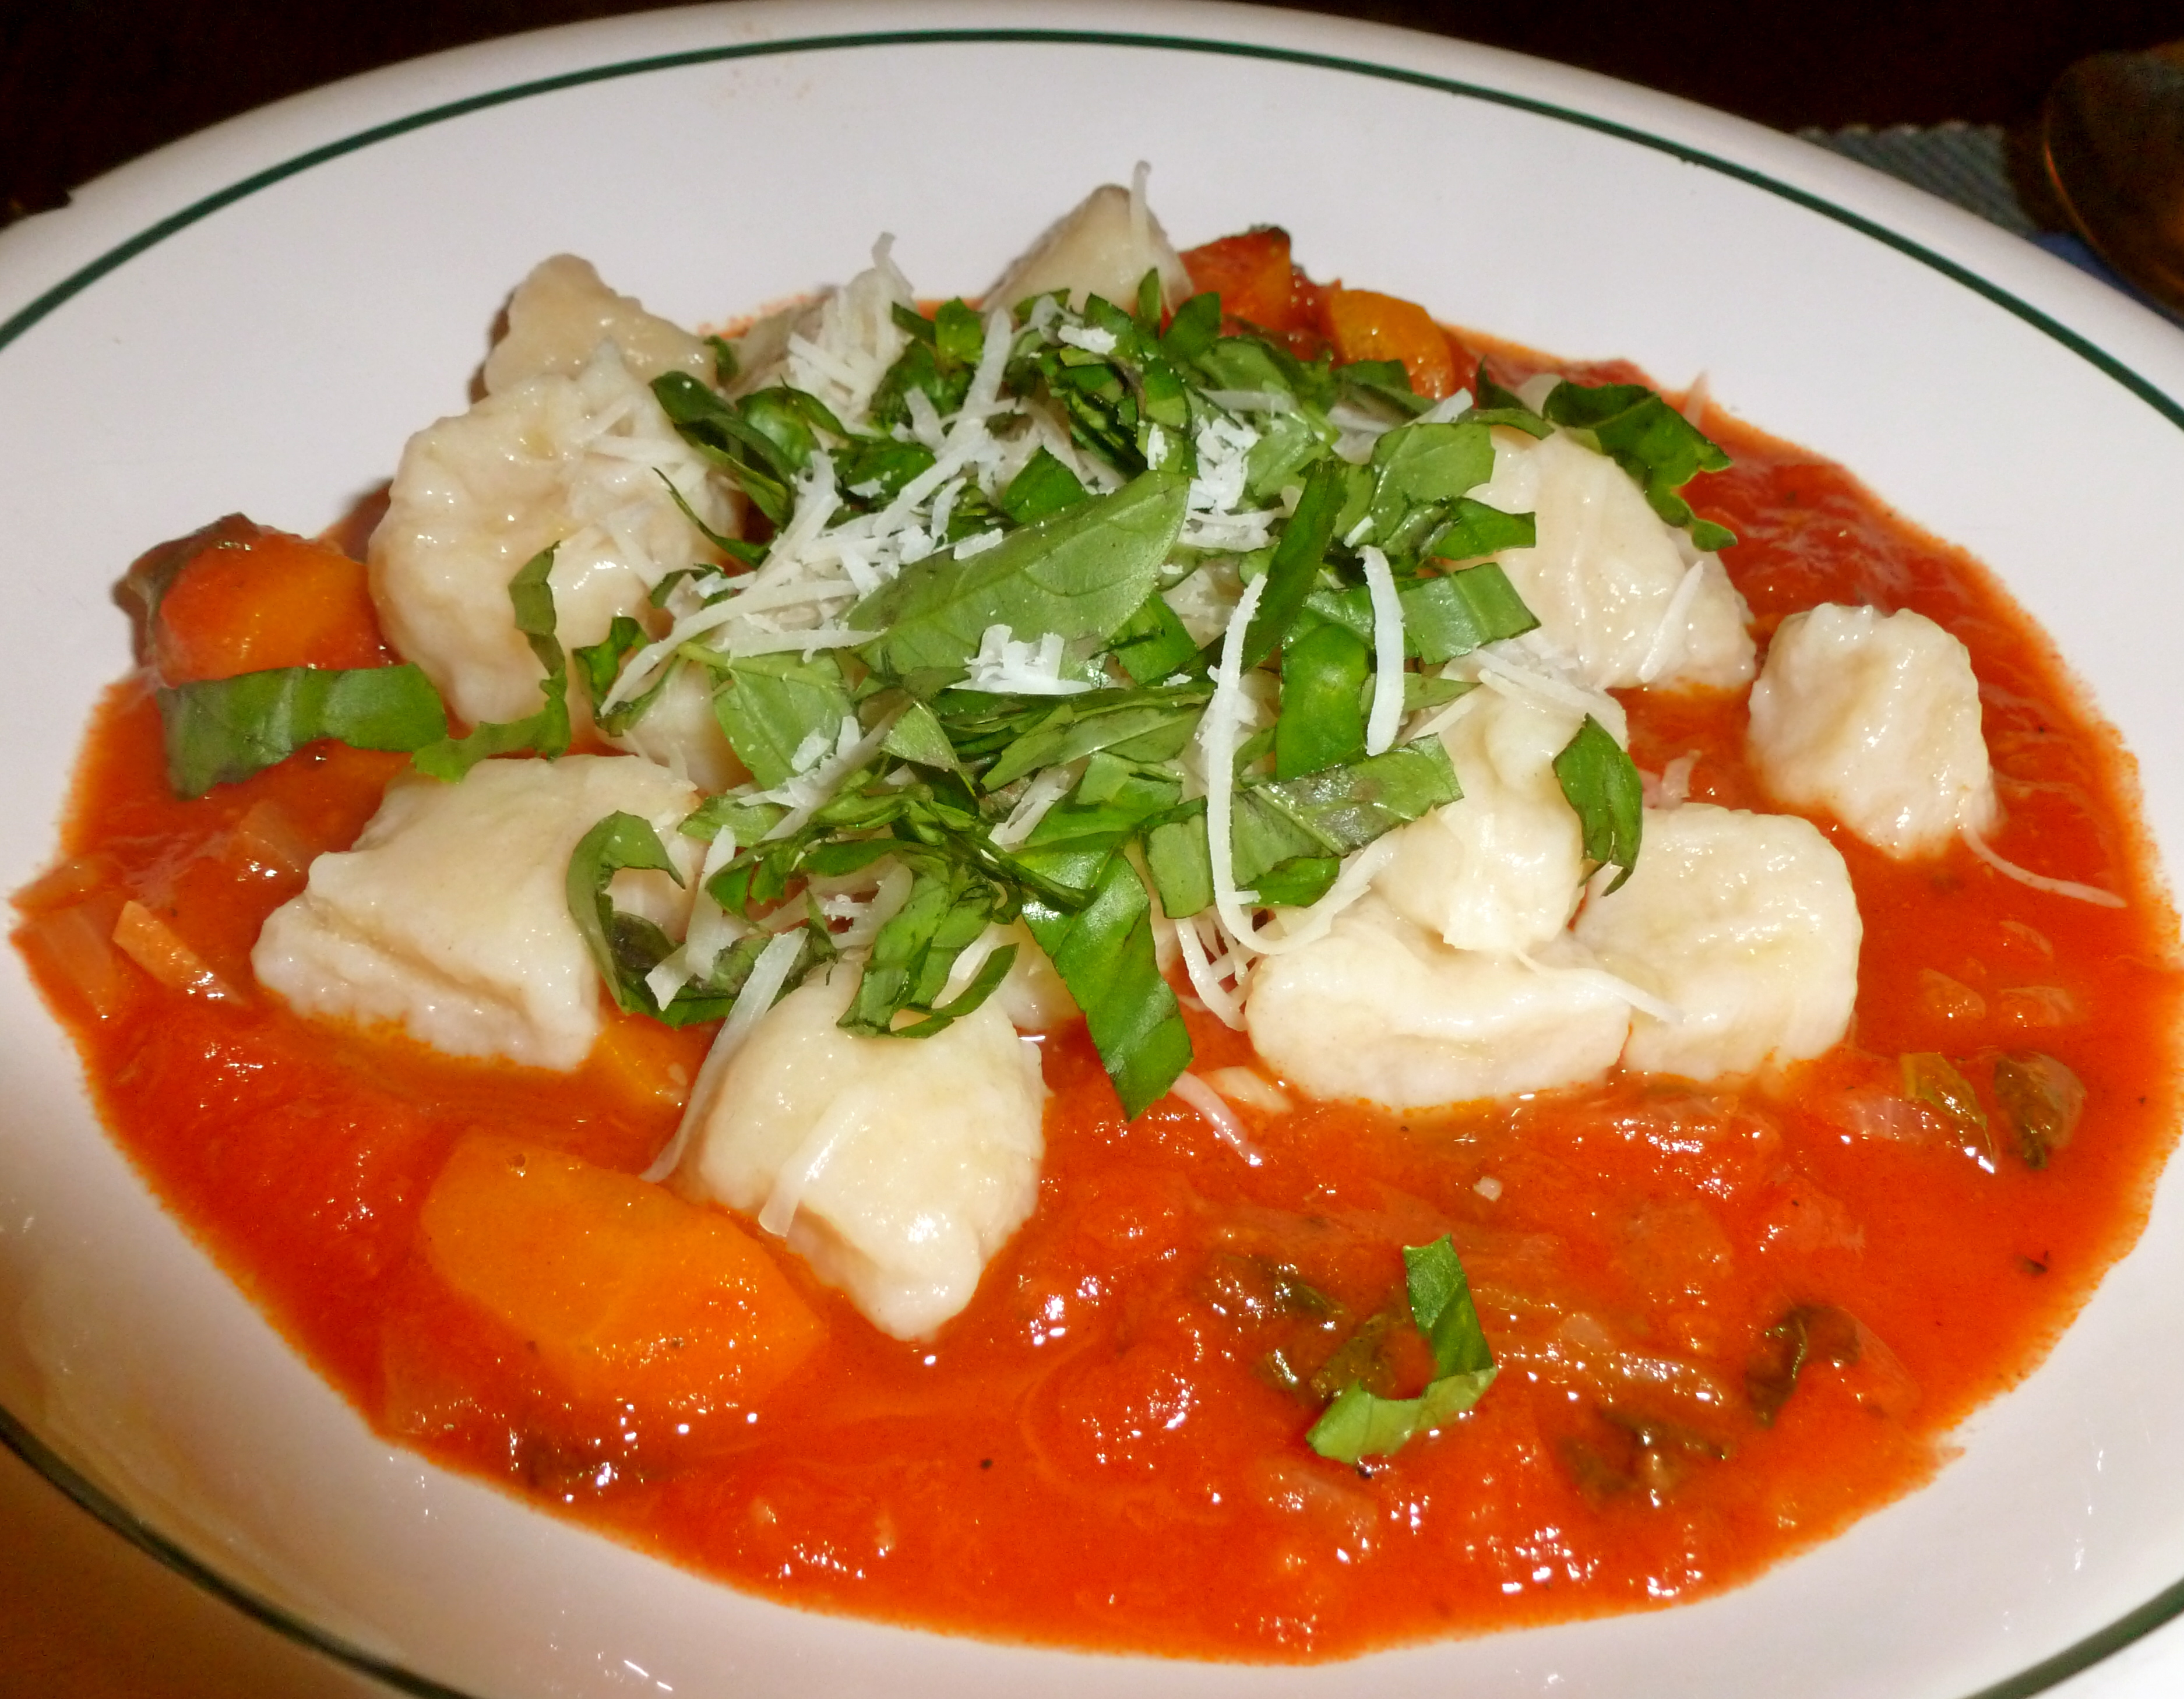
Sunday was quite the day in the kitchen! Not only did we make this gnocchi in tomato vegetable sauce, this roasted beets and root vegetable salad with quinoa, homemade granola, and focaccia bread – but we also made this deep dish apple pie! And my oh my, what a pie!

I’ve made quite a few apple pies in my time. Apple pie is a staple at our Thanksgiving and it’s probably one of my favorite desserts – so I’ve made a fair amount of apple pies! However, I believe this pie has easily defeated any of its other competitors – in sheer size and of course, deliciousness.

Deep Dish Apple Pie

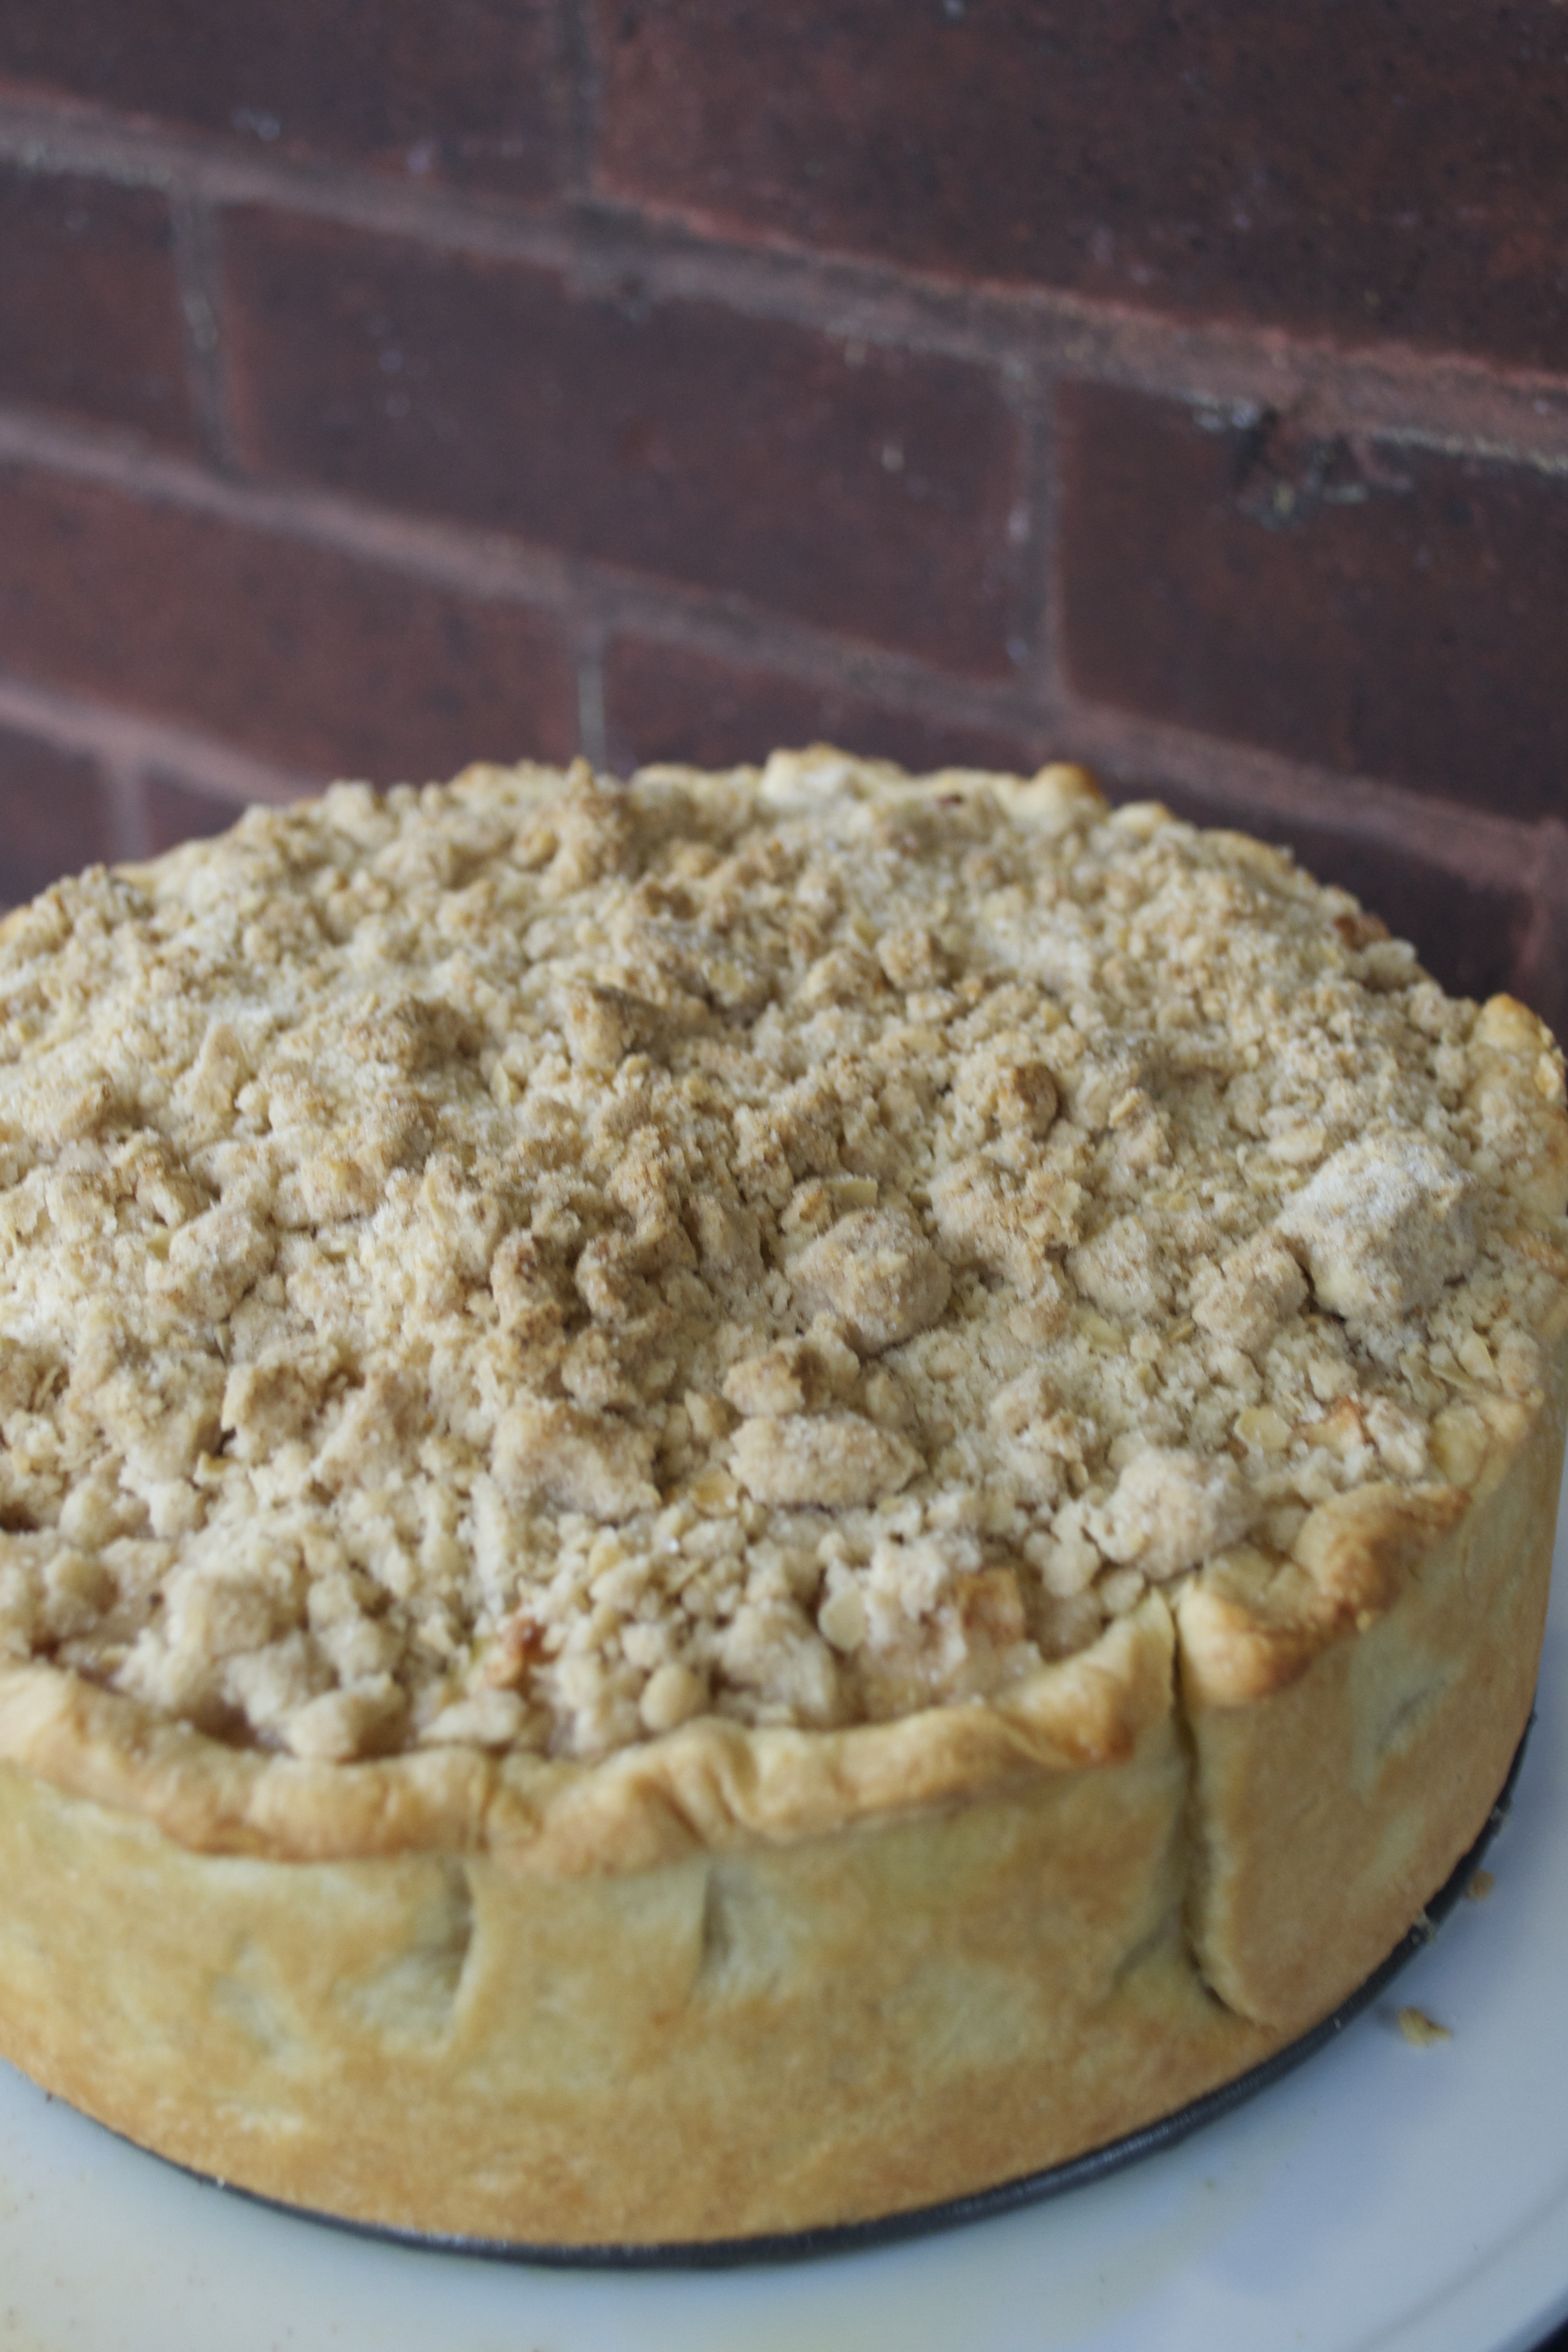
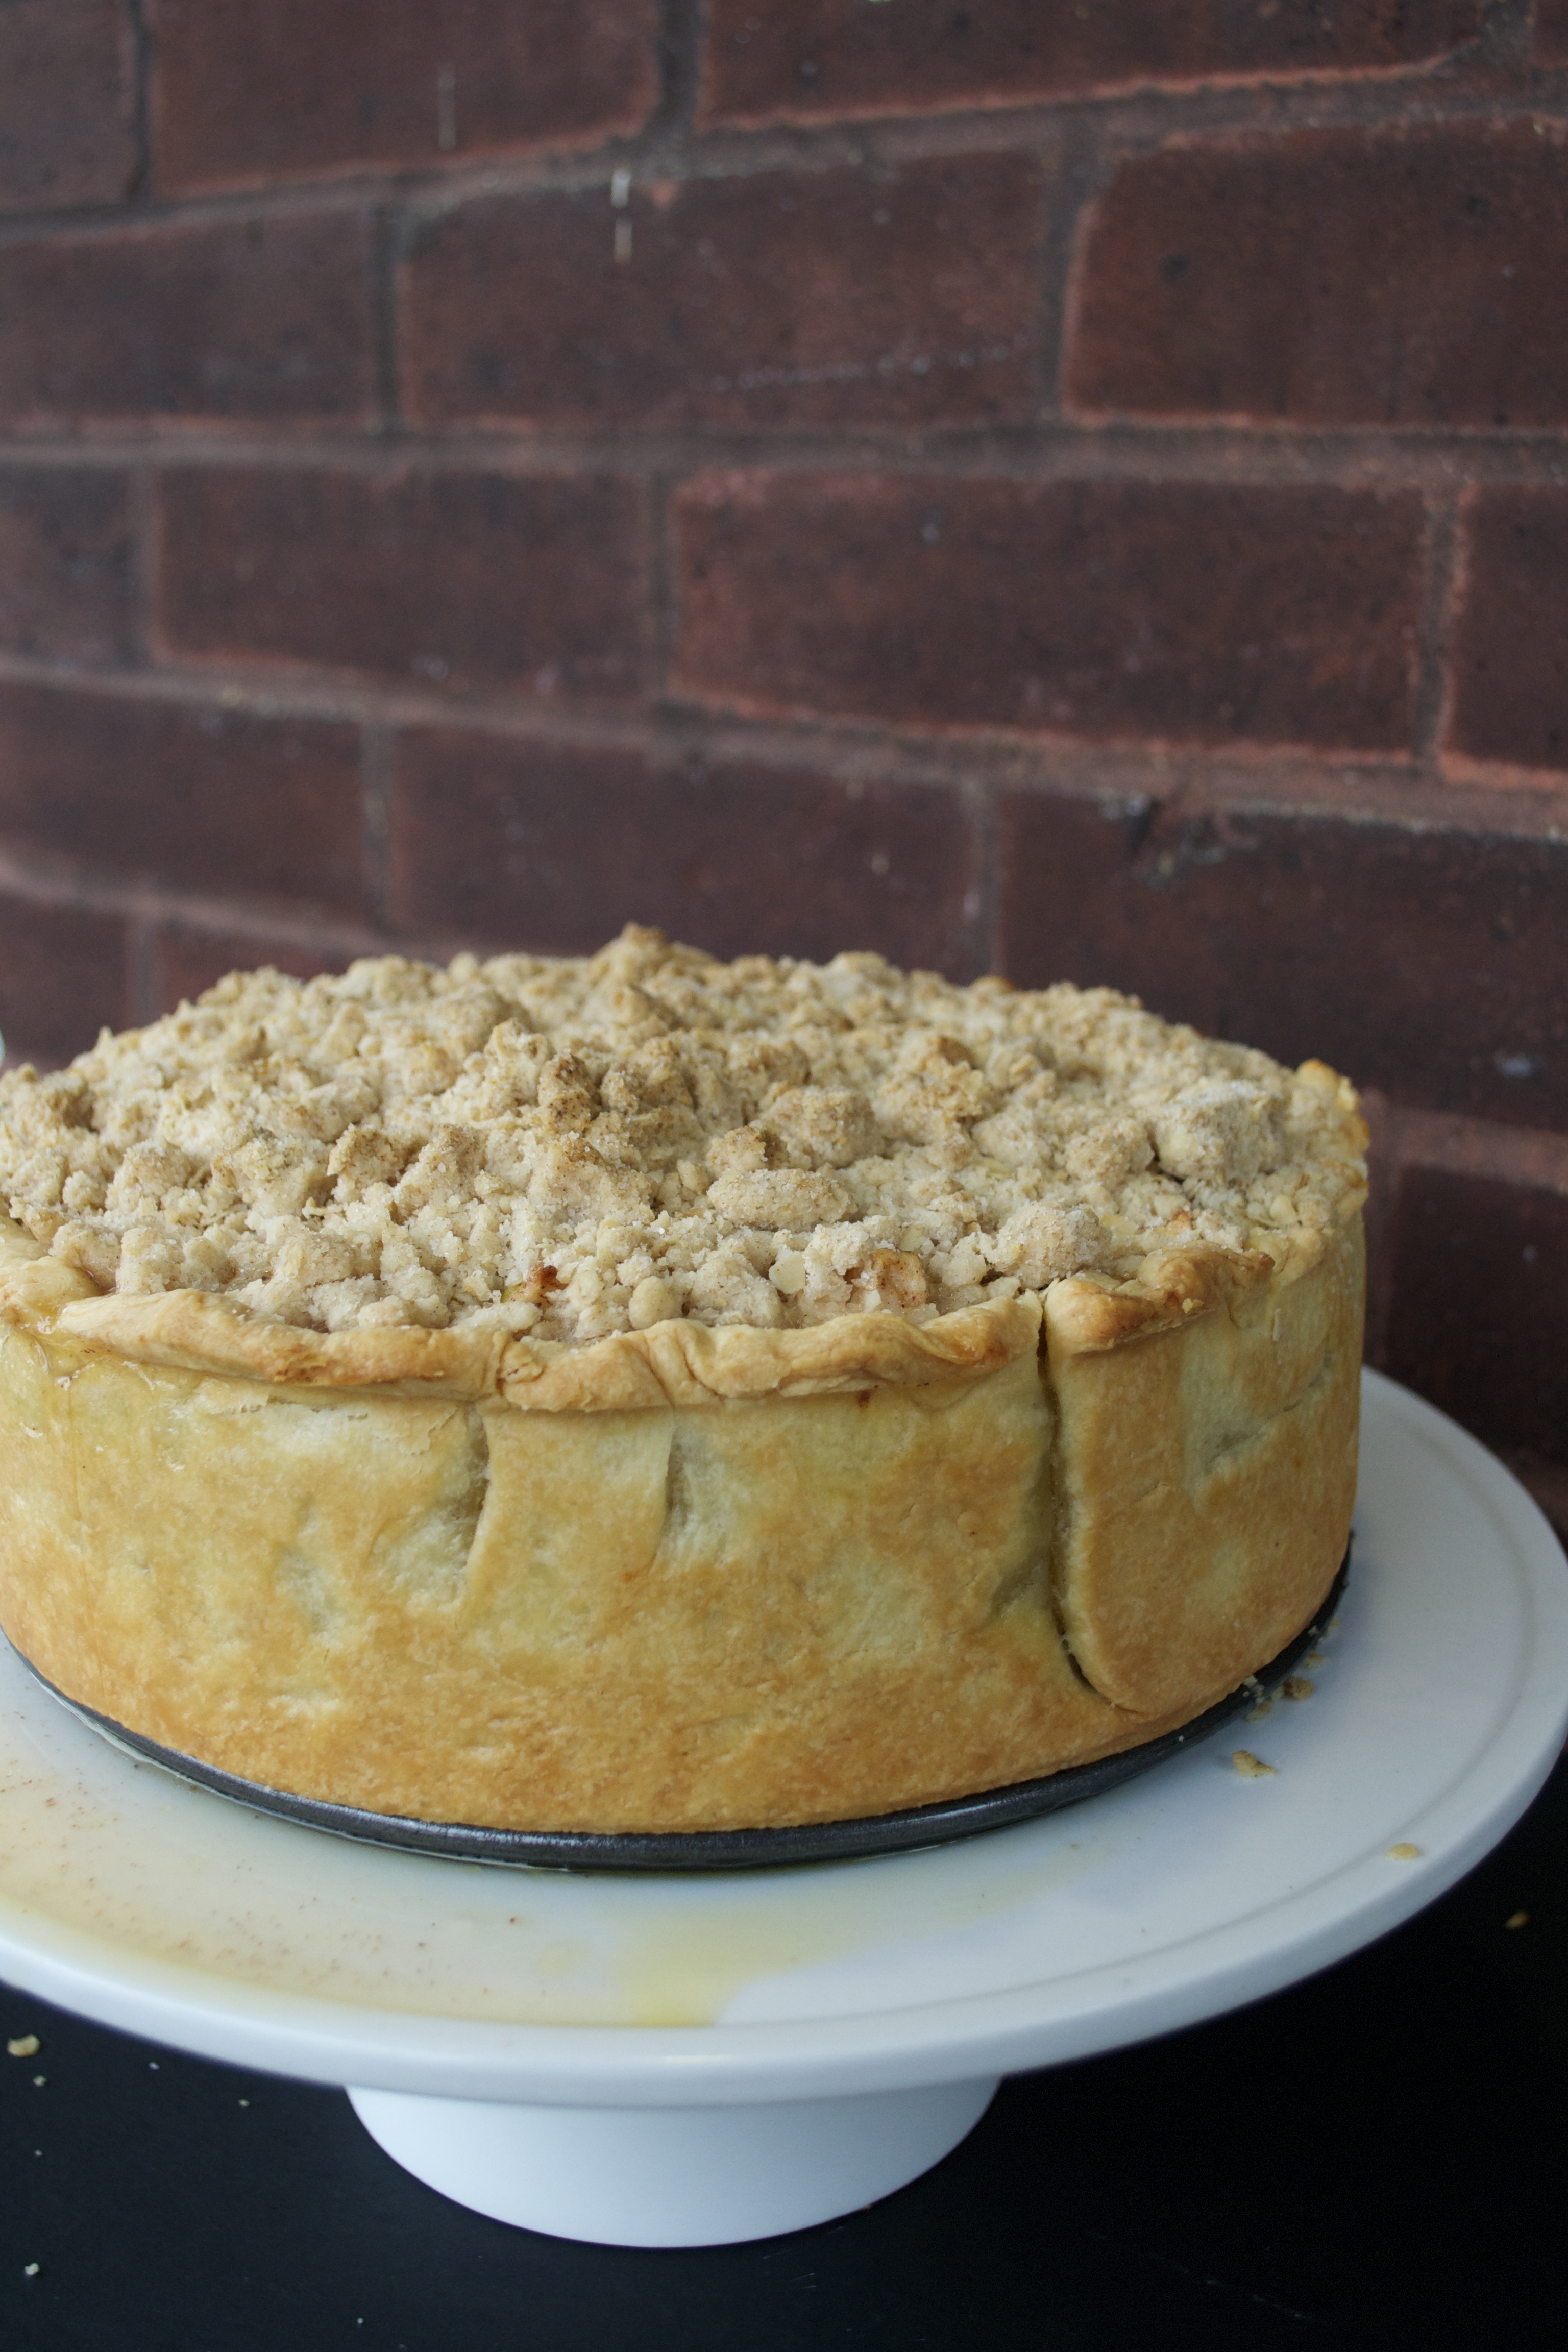
This pie is made in a springform pan instead of a regular pie dish, which allows this pie to be deep and the filling to be almost double a normal-sized pie. Because it is such a large pie, it takes quite a while to bake – about an hour and a half – but the wait is more than worth it!

Although it is quite the pie, it isn’t too heavy since the top is just a streusel crumble rather than a second layer of pie crust. I added rolled oats to the streusel because one, I love oats, and two, it gave it an apple crisp twist – which is another apple dessert that I love.

Deep Dish Apple Pie

Deep Dish Apple Pie
Serves 12-16
Recipe from The Smitten Kitchen Cookbook

Pie dough:

Ingredients:
2 1/2 cups all purpose flour
1 tablespoon sugar
1 teaspoon table salt
16 tablespoons unsalted butter, cold and diced
1/2 cup ice cold water

Directions:

1. In the bowl of a food processor, add the flour, sugar and salt and pulse to combine. Add the diced butter and pulse just until you have pea-sized pieces of dough. Transfer to a large bowl.

2. Drizzle the water over the dry mixture and work it together with your hands. Knead briefly then form into a large disk, wrap in plastic wrap and chill for two hours.

Apple pie:

Ingredients:

1 recipe of above pie crust

Filing:
4 lbs apples, 1/2 green apples and 1/2 Fuji apples
1 tablespoon freshly squeezed lemon juice
1 cup sugar
1/4 cup flour
1/2 teaspoon table salt
1 teaspoon ground cinnamon
1/4 teaspoon nutmeg

Streusel topping:
3/4 cups sugar
1/4 teaspoon cinnamon
1/4 teaspoon table salt
1 cup all purpose flour
3/4 cups rolled oats
1 teaspoon baking powder
6 tablespoon butter, melted

Vanilla ice cream

Directions:

1. Prepare crust: coat a 9-inch springform pan with oil. On a floured surface, roll out chilled pie crust into a 16-inch round – 1/4 inch think. My trick to getting a rolled out pie crust into the pan is to roll it back over the rolling pin and then slide your arm under it and then you should be able to lift the whole thing up and transfer it to the springform pan! Trim the overhang to one inch, crimp edges and then place the dish into the fridge while you prepare the apples.

2. Preheat oven to 375 degrees. Peel, core and chop apples into bite-sized pieces. Place them all into a large bowl and drizzle with the lemon juice. In a separate small bowl, whisk the sugar, flour, salt, cinnamon and nutmeg and then mix into apples.

3. Spoon apples into prepared crust and spread them as flat and evenly as possible. Bake pie for 30 minutes (if the tips of the apples begin to brown and burn, cover the top with foil).

4. While pie is baking, make the streusel topping. In a medium bowl, stir together sugar, cinnamon, salt, flour, oats and baking powder. Pour in the melted butter and mix to combine. Stick in freezer until pie has baked for 30 minutes.

5. After 30 minutes, remove the pie from the oven, decrease the oven temperature to 325 and then spoon the streusel onto the top of the pie – pressing gently into apples. Return to the oven and bake for an additional hour. Cover with foil if the streusel begins to brown too quickly.

6. When the pie has finished baking, remove it from the oven and let cool to lukewarm. Run a knife around the crust to loosen the edges from the pan. Carefully loosen the clamp on the springform and slide it over the top and off the pie. The pie slices best when chilled in the fridge, but warm pie and ice cream just can’t be beat. Take your pick and enjoy this tall and proud creation!

Filed Under: Desserts, Thanksgiving Tagged With: Apples, Desserts, Pie

Roasted Beet and Root Vegetable Salad with Quinoa

May 26, 2013 by Mackenzie

We made this salad to accompany the Gnocchi in Tomato Vegetable Sauce from the other night. This recipe was also from The Smitten Kitchen Cookbook and again, she gave us another great recipe!

IMG_0278

The highlight of this salad are the beets – as you can see, their brilliant color makes this dish both eye-catching and mouth-watering! The one significant change we made was doubling the quinoa so there was a more even ratio of vegetables to quinoa, which made it more of a salad than purely a vegetable side dish. In the end, that was a great choice and we loved every bit of it!

Beet and Root Vegetable Salad with Quinoa
Serves 4-5
Recipe from The Smitten Kitchen Cookbook

Ingredients:

Salad:
1 cup uncooked plain quinoa, rinsed
Coarse salt
3 small shallots
Olive oil
1 1/2 lbs mixed root vegetables (radishes, turnips, parsnips, mixed beets, carrots…), as small as you can find them, scrubbed, trimmed and halved to be one to one and a half-inch cubes or so
Juice of 1/2 lemon
Freshly ground black pepper

Dressing:
2 tablespoons sherry vinegar
1 tablespoon balsamic vinegar
2 big pinches of coarse salt
3 tablespoons olive oil
Freshly ground black pepper

Directions:
1. Preheat oven to 400 degrees.

2. Prepare quinoa: bring the quinoa and 2 cups salted water to a boil. Cook for 10-15 minutes, until quinoa has absorbed water – may be longer with more quinoa. Set aside.

3. Roast vegetables: while quinoa cooks, prepare the vegetables. Peel shallots and separate cloves. Make a small foil packet and place the shallots inside, drizzling them with olive oil. Place on a rack in the oven to begin roasting them.

Meanwhile, coat a baking sheet with olive oil and place the root vegetables in a single layer on the sheet. Drizzle with olive oil, squeeze the lemon juice all over and sprinkle generously with salt and black pepper. Roast for 20 minutes in oven, then flip the vegetables and roast for an additionally 10 minutes.

4. Prepare vinaigrette: when vegetables are done, remove them from the oven and set aside. Remove the shallots from the foil packet and place in a blender with the sherry and balsamic vinegars and two pinches of salt and some pepper. Drizzle in some olive oil and blend.

5. To assemble: spoon the quinoa onto a platter and arrange the beets on top. Drizzle entire dish with vinaigrette and serve immediately.

P1000498

Filed Under: Salads, Sides Tagged With: Beets, quinoa, Salads

Gnocchi in Tomato Vegetable Sauce

May 26, 2013 by Mackenzie


Well, here I am in Indonesia! I’m spending six weeks living with my aunt and uncle, doing an internship with Standard Chartered Bank and experiencing the rich culture of this country! I’ve been here just over a week and have had a phenomenal time thus far – but that explains my absence from posting recipes: I’ve been too busy trying indonesian food, working long days and playing golf in some pretty intense heat and humidity.

But, tonight – Uncle Tom and I made quite a feast and I’ll have plenty to post over the next couple of days. First, the main dish – gnocchi in tomato vegetable sauce.

IMG_0279

I’ve never made gnocchi before but have enjoyed it when I have ordered it at restaurants. We found the recipe in the Smitten Kitchen cookbook, which I brought with me to give to my aunt and uncle because I enjoy the book so much! The recipe was is bit time consuming but not too difficult, didn’t require any special tools and turned out FANTASTIC!

We made a couple changes to the original recipe, the most significant being that we did not strain out the vegetables from the tomato broth but rather, left them in to make the broth more of a pasta sauce. That was definitely a key decision and took this dish to the next level.

It was fantastic and will definitely be made again soon!

Gnocchi in Tomato Vegetable Broth
Serves 4-5
Recipe adapted from The Smitten Kitchen Cookbook

Ingredients:

Tomato sauce:
2 tablespoons olive oil
4 medium carrots, halved and diced
1 small yellow onion, diced
2 garlic cloves, minced
1/2 cup white wine
One 28oz can of stewed tomatoes
1/2 cup fresh basil, chopped plus more for garnish
2 cups vegetable stock
Salt and freshly ground black pepper, to taste
Parmesan, shredded for garnish

Gnocchi:
2 lbs russet potatoes, about three
1 large egg, lightly beaten
1 teaspoon table salt
1 1/4 to 2 cups all-purpose flour

Directions:
1. Bake potatoes: preheat oven to 400 degrees. Wash, scrub, and pierce each potato several times. Bake for about one hour – until a thin knife can slide through potato easily. Meanwhile, prepare tomato sauce.

2. Tomato sauce: heat oil in a large pot over medium heat. Add carrots and onions and cook for five minutes, reducing heat if they begin to brown. Add the garlic and cook for another minute. Next, add the wine and cook until it has reduced by half – about 5-7 minutes. Stir in the tomatoes, basil and stock and let simmer for about 45 minutes, to reduce and thicken. Season with salt and pepper. Set aside.

3. Gnocchi: let potatoes cool for 30 minutes or so, after baking. Then, peel and grate them over the large holes of a grater. Let cool to lukewarm then add the egg and salt, mixing to combine. Next, add the flour, a half cup at a time, until the dough comes together and does not stick easily to your hands. (We had to add quite a bit of flour, but we also had used four potatoes – which could have made the difference) Knead the dough briefly for about a minute then divide into quarters.

4. On a floured surface, take one quarter of the dough and begin to roll it into a long rope. The rope got quite long, so it was easier for us to use two sets of hands to roll it out – see if someone can help you here! Roll it to about 3/4 inches thick and then cut into 3/4 inch pieces, little pillows šŸ™‚ Place the pillows onto a cookie sheet and repeat the rolling and cutting until all the dough is prepared. If you have time, place the cookie sheet with the pillows in the refrigerator for about an hour to firm up. You can also freeze them at this point.

5. To cook: bring a large pot of salted water to a boil. Meanwhile, begin reheating the tomato sauce at a low temperature on the stove. Place about 20 gnocchi into the boiling water and cook for 2-4 minutes, supposedly until they float but ours never did (and turned out fine – I don’t think you can over cook them so letting them cook an extra minute is fine). Drain the gnocchi in a strainer.

6. Assemble: using a ladle, pour one to one and a half cups of tomato sauce into a wide, individual bowls. Place 10-15 gnocchi on top and garnish with basil and shredded parmesan. Serve immediately.

P1000521

Filed Under: Dinner Tagged With: broth, Gnocchi, tomato sauce, vegetables

Lemon Couscous Salad with Asparagus and Tomatoes

May 15, 2013 by Mackenzie

I made this salad to go along with the caprese grilled chicken on Saturday night from my last post. My family and I love asparagus so this was a fun, new way to serve it. The lemon juice made it light and summery and the fresh asparagus and tomatoes helped cap off this healthy side dish.

IMG_0294

Ingredients:
6 oz whole wheat pearl couscous
3/4 lb thin asparagus spears, tough ends snapped off
1 tomato, diced
1/4 cup red onion, minced
1 large lemon, juiced
1 tablespoon extra virgin olive oil
2 tablespoons fresh parsley, minced
Salt and Pepper to taste

Directions:
1. Boil a large pot of salted water. Add asparagus and cook until tender, 3-4 minutes. Using tongs, remove the asparagus from the water and in a strainer, run cold water over them to stop them from cooking.

2. Cook couscous according to package directions. Drain and rinse under cold water when finished cooking.

3. While couscous is cooking, chop the asparagus into 1/2 inch pieces. Add the tomatoes. Add the cooked couscous, red onion, lemon juice, olive oil, parsley and salt and pepper. Mix it up and then refrigerate for 15 minutes or until chilled. You can serve it room temperature, but I liked it best chilled.

Filed Under: Healthy, Salads, Sides, Summer Tagged With: asparagus, couscous, lemon, Salads, side dish, tomatoes

Caprese Grilled Chicken

May 14, 2013 by Mackenzie

One of the things I look forward to most in the summer is having family and friends over and grilling on the back deck. The weather is warm, there is lots of good conversation and of course, lots of good food! This past weekend Suzy and Steve came over and we made a delicious dinner – this Caprese Grilled Chicken and a Lemon Couscous Salad with Asparagus and Tomatoes (it’ll be my next post!). It was a perfect Saturday evening in my mind!

20130514-081432.jpg

This chicken was light, fresh and full of summer flavors! Once the chicken was grilled, I spread a homemade pesto on it, layered some tomatoes and topped it all with mozzarella cheese. We closed the lid of the BBQ to let the cheese melt and voila! A healthy, delicious dish!

Caprese Grilled Chicken
Recipe adapted from Skinnytaste
Makes 8 chicken cutlets (serves 6-8)

Ingredients:
Pesto:
1 cup basil
1 large clove of garlic
1/4 cup grated parmesan cheese
salt and pepper to taste
2 1/2 tablespoons olive oil
1/4 cup pine nuts (optional)

Chicken:
4 boneless, skinless chicken breasts, sliced in half horizontally (or 8 chicken breast cutlets)
salt and pepper to taste
1 medium tomato, sliced thin
1 1/2 cups shredded mozzarella cheese
Grated parmesan cheese

Directions:
1. Pesto: In a food processor, pulse the basil, garlic, parmesan, salt and pepper until smooth. Add the olive oil in a slow drizzle while pulsing, then add the pine nuts and pulse to desired consistency. Transfer to a small bowl and refrigerate until ready to put on the chicken. You can store the extra in a sealed container in the refrigerator or freeze for later use (although we didn’t have much left)

2. Chicken: Wash and pat dry the chicken with a paper towel. Slice breasts in half horizontally and season with salt and pepper. Grill chicken over medium heat on both sides until just cooked through. Lower heat and then spread 1-2 teaspoons of pesto on one side of the chicken, top with 1-2 tomato slices and mozzarella cheese and then close the lid of the grill to let the cheese melt. Enjoy!

IMG_0295

Filed Under: Dinner Tagged With: chicken, grilled, healthy

Strawberry Rhubarb Pie

May 2, 2013 by Mackenzie

My college church group had a pie bake-off last week at our end-of-semester party. I made this strawberry rhubarb pie and took 2nd place (to a delicious blackberry pie!)!

IMG_0337

There were two strawberry rhubarb pies at our party, mine more on the sweet side and the other on the tart side. The other recipe was from Smitten Kitchen if you’re looking for a tart pie but I loved the sweet taste of this one! It still had a tart flavor from the rhubarb but was less significant – it was a perfect combination!

I also got a lot of compliments on the crust! I used a recipe from a New York Times bake-off and adapted it slightly. It was perfectly flakey and buttery and delicious!

Strawberry Rhubarb Pie
Makes one pie
Crust adapted from The New York Times and pie recipe from Food Network

Ingredients:
Crust:
1 3/4 cups plus 2 tablespoons all-purpose flour
3/8 teaspoon table salt
15 tablespoons unsalted butter, chilled and cut into pieces

Pie:
2 1/2 cups chopped fresh red rhubarb
2 1/2 cups washed, de-stemmed and halved strawberries (big strawberries can be in thirds)
1 1/2 cups sugar
2 tablespoons minute tapioca
1 tablespoon all-purpose flour
1/2 teaspoon lemon zest
1/2 teaspoon lemon juice
1/2 teaspoon ground cinnamon
1 teaspoon vanilla extract
3 tablespoons butter, cubed small
1 egg white, beaten with 1 teaspoon water
Turbinado sugar

Directions:
1. Prepare crust: In a food processor, pulse together the flour and salt. Add butter and pulse until pea-sized bits form. Add 3-6 tablespoons ice water, 1 tablespoon at a time and pulse until dough begins to come together in a ball. Separate the dough into two balls, one with 2/3 of the dough and the other with 1/3 of the dough. Wrap disks in plastic wrap and chill for at least one hour or up to three days.

2. Roll out large disk for the bottom crust. Transfer to pie plate. Chill in refrigerator while you prepare the filling.

3. Filling: In a large bowl, mix the rhubarb, strawberries, sugar, tapioca (dry), flour, zest, juice, cinnamon and vanilla. Pour into chilled crust. Dot the cubes of butter on top of the filling. Roll out top layer and place over filling. Crimp to seal edges. (Or make a lattice or use biscuit cutters to make a circle design). Brush with egg wash and sprinkle with turbinado sugar. Make a foil collar so prevent the edges from burning. Bake at 425 degrees for 15 minutes then decrease temperature to 375 degrees and bake for an additional 45-50 minutes. Let cool before serving.

Filed Under: Desserts Tagged With: Desserts, Pie, rhubarb, strawberry

Meet Mackenzie

Hi! I'm Mackenzie! I'm currently a Fulbright English Teaching Assistant in Indonesia! I'm writing all about my year on this blog and hope you'll follow along on this journey! Read More…

Disclaimer:

Students and Indonesian Friends: Please don't take anything I say here as critical of my experience or you and your culture. Rather, through this blog I want to share my experience in your country with my friends and family in America! I may write and laugh about a lot of things that are different but none of it is bad, it's just different!

This blog is not an official Department of State website, and the views and information presented here are my own and do not represent the Fulbright Program or the Department of State.

My Latest Posts on Instagram

[instagram-feed]

My Latest Reads

My Latest Reads

Between the World and Me
5 of 5 stars
Between the World and Me
by Ta-Nehisi Coates
If You Follow Me: A Novel
3 of 5 stars
If You Follow Me: A Novel
by Malena Watrous
The Goldfinch
4 of 5 stars
The Goldfinch
by Donna Tartt
Missoula: Rape and the Justice System in a College Town
4 of 5 stars
Missoula: Rape and the Justice System in a College Town
by Jon Krakauer
Station Eleven
4 of 5 stars
Station Eleven
by Emily St. John Mandel
Fight Back and Win
2 of 5 stars
Fight Back and Win
by Gloria Allred

goodreads.com

Archives

  • August 2017 (1)
  • June 2017 (2)
  • March 2017 (1)
  • February 2017 (1)
  • January 2017 (1)
  • December 2016 (1)
  • November 2016 (3)
  • October 2016 (3)
  • September 2016 (2)
  • August 2016 (2)
  • June 2016 (1)
  • May 2016 (3)
  • April 2016 (1)
  • March 2016 (4)
  • February 2016 (2)
  • January 2016 (1)
  • December 2015 (3)
  • November 2015 (2)
  • October 2015 (4)
  • September 2015 (5)
  • August 2015 (6)
  • June 2015 (2)
  • March 2015 (1)
  • December 2014 (4)
  • November 2014 (3)
  • October 2014 (3)
  • September 2014 (4)
  • August 2014 (5)
  • July 2014 (4)
  • June 2014 (2)
  • April 2014 (1)
  • March 2014 (4)
  • February 2014 (1)
  • January 2014 (3)
  • December 2013 (5)
  • November 2013 (3)
  • October 2013 (1)
  • September 2013 (4)
  • August 2013 (3)
  • July 2013 (2)
  • June 2013 (6)
  • May 2013 (6)
  • April 2013 (6)
  • March 2013 (3)
  • February 2013 (7)
  • December 2012 (10)
  • November 2012 (4)
  • October 2012 (1)
  • September 2012 (3)
  • July 2012 (3)
  • June 2012 (5)
  • May 2012 (18)

Mackenzie

Hi! I'm Mackenzie! I'm currently a Fulbright English Teaching Assistant in Indonesia! I'm writing all about my year on this blog and hope you'll follow along on this journey! Read More…

A Look Back

This blog is not an official U.S. Department of State website and the views and opinions expressed here are entirely my own, and do not represent the U.S. Department of State or the Fulbright Program.

Copyright © 2025 · Foodie Child Theme by Shay Bocks · Built on the Genesis Framework · Powered by WordPress